
I was brainstorming Father’s Day gift ideas that I could create using my Cricut, and as many men in Australia have a “man cave” or a “men’s shed,” I thought a personalised man cave sign with some quirky “rules” would be a perfect gift. After browsing online for inspiration, I noticed that most of the man cave signs were designed to be politically correct or not offend anyone.
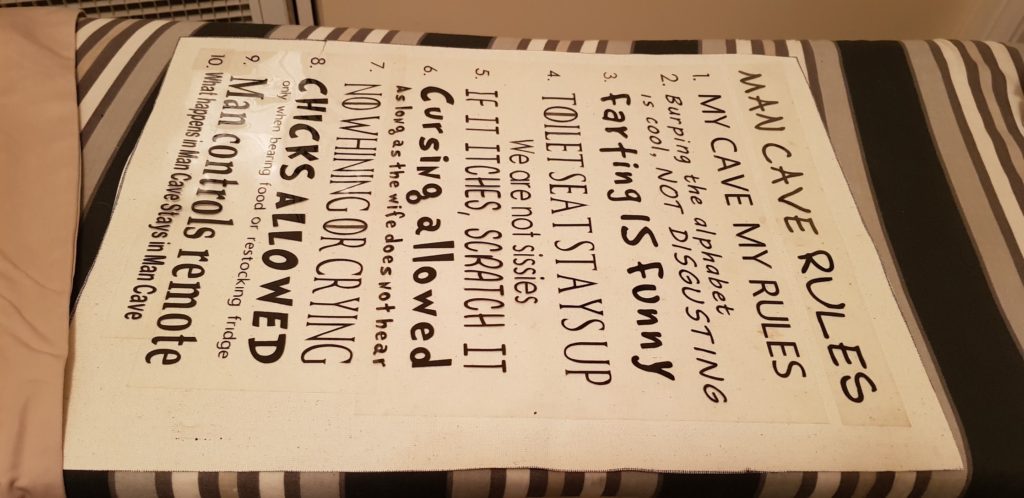
But let’s be real, man caves aren’t about being politically correct. Imagine this: five guys sitting around a bar, enjoying a drink and chatting, when one says, “Oops, sorry, I have flatulence and belching issues today.” That’s just not how men behave in the real world! So, I decided to create a set of funny rules that would truly resonate with guys in their man caves.

While searching Pinterest for ideas, I came across a technique called “reverse canvas.” This method involves removing the canvas from the frame, flipping it around, and using the back to create a unique sign or add iron-on vinyl. I decided to try this method because I have access to a lot of used canvases. I work in aged care, and whenever our residents do art therapy, the canvases are often discarded if the resident doesn’t want to keep them. This gave me a large supply of canvases, so the reverse canvas technique was the perfect solution for this project.
Before we dive into this tutorial, be sure to subscribe to my bimonthly newsletter to be the first to see my latest projects. You can also follow me on Pinterest and Facebook, where I also include my unique mixed-media art projects.
DIY Man Cave Rules Sign: A Fun and Unique Father’s Day Gift
**This post may contain affiliate links. This means I earn a small commission on links used at no extra cost to you. Please see my disclosure policy for more information.**
Materials Needed:
- Used canvas (or a new one)
- Staple remover
- Pliers (for stubborn staples)
- Black Gesso (or acrylic paint)
- Elmer’s glue
- Decorative serviettes (napkins)
- Hot glue gun & E6000 glue
- Steampunk elements (nuts, bolts, hinges, thumbtacks)
- Cricut Explore Air 2 with iron-on vinyl
- Iron (with no steam) Or heat press
- Craft paper to cover the back
- Bronze wax paste
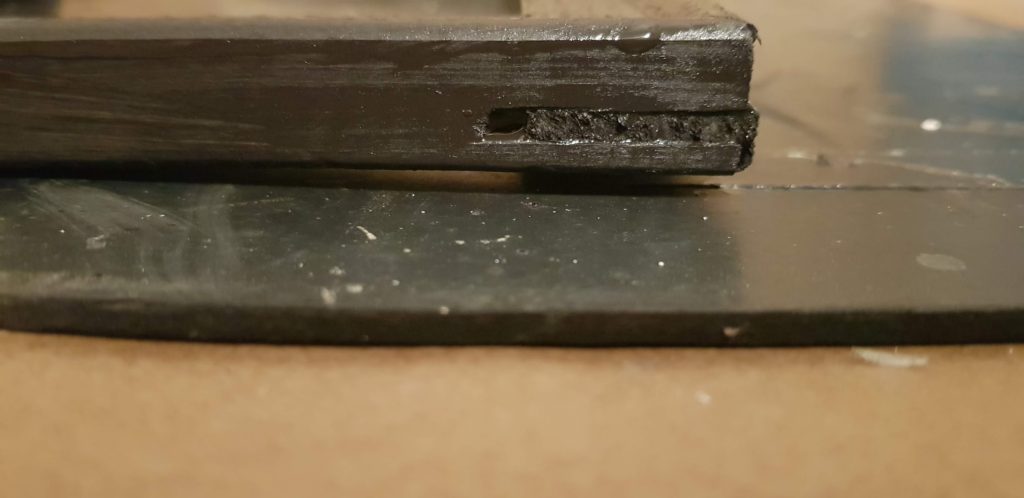
Step 1: Remove the Canvas from the Frame
Begin by carefully removing the canvas from the frame. Use a staple remover to pull out all the staples, and if any staples are left behind, use pliers to remove them completely.

Step 2: Paint the Frame
After removing the canvas, paint the wooden frame with black gesso (or acrylic paint if preferred). Gesso is great for covering the surface and providing a smooth base, but any black paint will work as well.

While painting the wood, I noticed the corners had a messy finish that I wasn’t happy with. So, I decided to change my approach and give the frame a mixed-media makeover instead. You can skip this step if your frame is good.
Step 3: Create a Mixed Media Assemblage Frame
To add character to the frame, apply Elmer’s glue to the surface and cover it with decorative serviettes (napkins). You can use your fingers to gently press the serviettes into the glue, creating a textured effect. Once dry, sand off any excess paper for a smooth finish. This post will show you 15 ways to add texture to assemblage mixed media.

Step 4: Add Steampunk Elements
Now, it’s time to get creative. Gather steampunk elements like nuts, bolts, hinges, thumbtacks, and even leftover resin pieces. These items will give the frame a rugged, industrial look. Secure them in place with a hot glue gun and E6000 glue for extra durability. It is always hard to look past the mess, but most textures look great once painted.

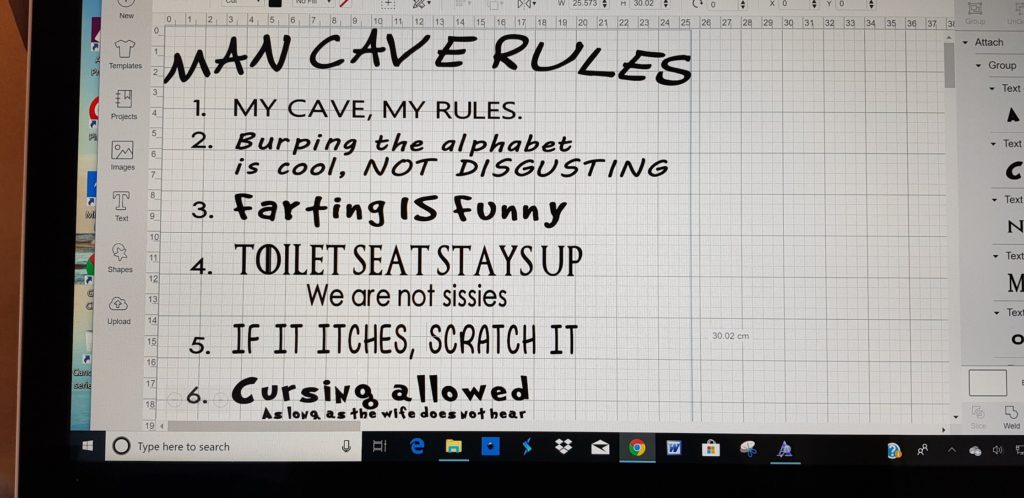
Step 5: Design and Cut the Vinyl
Place the frame over the canvas and measure the available space for your text. To ensure proper alignment, draw a pencil line around the outside of the frame, as you’ll need this guide later.

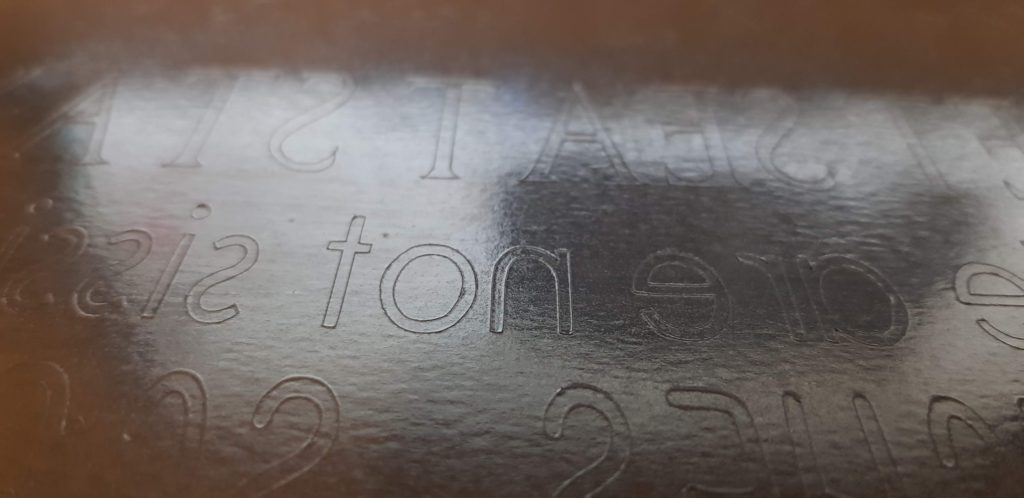
Using Cricut Design Space, create your “Man Cave Rules” text. Once you’re happy with the design and fonts, load the iron-on vinyl into the Cricut Explore Air 2. Remember to mirror the design before cutting, as you’ll be using iron-on vinyl.
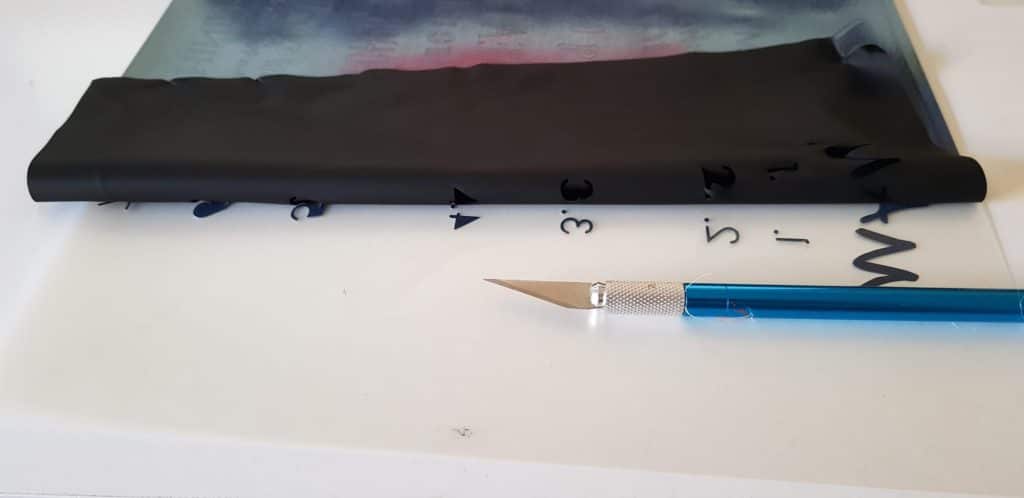
Step 6: Weed the Vinyl
After the Cricut has cut out the design, carefully remove the excess vinyl (a process known as weeding). Use an X-Acto knife or a specialised weeding tool to remove the parts you don’t need, leaving only the text.
Step 7: Apply the Vinyl to the Canvas
Position the vinyl onto the canvas and cover it with a cloth. Using a hot iron (without steam), press down on the design for 30 seconds. If the vinyl hasn’t fully adhered, continue pressing in 8-second intervals until it does. Check that the vinyl has adhered properly before moving on to the next section. Be careful not to move the iron around, as this can cause smudging. For an easier and more efficient transfer, a heat press is the ideal tool for the job.
Step 8: Trim the Canvas
Using a pencil, draw a 1cm border around the inside of the frame and carefully cut along this line. This will leave a slight overlap of canvas that will fit neatly into the frame.

Step 9: Apply the Bronze Wax Paste
Paint all the embellishments with gesso or acrylic paint. For a vintage look, apply bronze wax paste to the frame’s surface.

Use your finger to rub the paste into the raised areas, creating a distressed effect. Repeat this process until you’re happy with the look.

Step 10: Staple the Canvas to the Frame
Once the canvas is cut to size, staple it back onto the frame. For a neat finish, cut a piece of craft paper to fit the back of the frame and attach it with masking tape to cover the staples.

And TA-DA that is the man cave sign done. Here are some close-ups so you can see the detail.


More man cave projects
I created this wine barrel table with a built-in wine bucket, perfect for storing ice and drinks.

This wall-mounted drop-down pallet bar is great for outdoor parties and family gatherings.


If you’d like to find any of the items used in this project, we’d greatly appreciate it if you used our affiliate links. These links provide us with a small commission at no extra cost to you, allowing us to continue creating and sharing more inspiring projects. We’d also love to hear your thoughts—feel free to leave a comment or share this post!


16 Comments
Michelle Leslie
July 27, 2019 at 4:04 pmLOL, my hubby would love a sign like this in his pub. The words are perfect
Anita Holland
July 28, 2019 at 12:21 amThank you, I think any man would. We just have to be politically correct all the time so as not to offend. We all had a good giggle over it.
Michele Michael
October 24, 2019 at 2:09 pmSaved to my Father’s Day board. Totally in sync with your artsy vibe!!! Please psot again at Funtastic Friday , Thursday Night at 9pm est
Robin
October 26, 2019 at 2:22 amWhen you have all boys, your whole house becomes a man cave! Thanks so much for sharing your talent with us at the Creative Muster. Looking forward to seeing what you’ll be sharing next week. Pinning!
Robin 😊
Anita Holland
October 26, 2019 at 8:27 pmMy workshop used to be his man cave until I took over. lol
Cecilia
October 28, 2019 at 2:44 amThanks for sharing at Vintage Charm!
Dee | Grammy's Grid
November 1, 2019 at 10:58 amPerfect for a man cave!! Thanks so much for linking up at the #UnlimitedMonthlyLinkParty 6. Shared.
Anita Holland
November 1, 2019 at 7:59 pmThank you so much!
Mother of 3
November 1, 2019 at 2:49 pmI Love it! Those rules are hilarious.
Anita Holland
November 1, 2019 at 7:59 pmThank you, they were my Husbands contribution. 🙂
Julie
November 6, 2019 at 12:02 amHa ha! Very funny!!!
Anita Holland
November 6, 2019 at 12:19 amThank you Julie, we thought they were funny. It is what men really want in their shed.:)
Kristie Cook
November 7, 2019 at 3:01 pmGreat mixed media frame & sign! No doubt that’s what real men do in their man caves, ha ha!
Anita Holland
November 7, 2019 at 8:30 pmThank you Kristie, It turned out pretty cute.
Michelle
November 9, 2019 at 7:07 amThat is awesome and so funny!
DIY Man Cave Sign – Home and Garden
April 26, 2022 at 4:10 pm[…] This sign was made as a fathers day gift to go into a man cave /man shed. These rules were made up by men (this is what they want). The frame was a reverse canvas which was decorated with items found around a work shed and glued in place. The text was added using iron-on vinyl cut with a Cricut. You can see the full cricut tutorial here. […]