
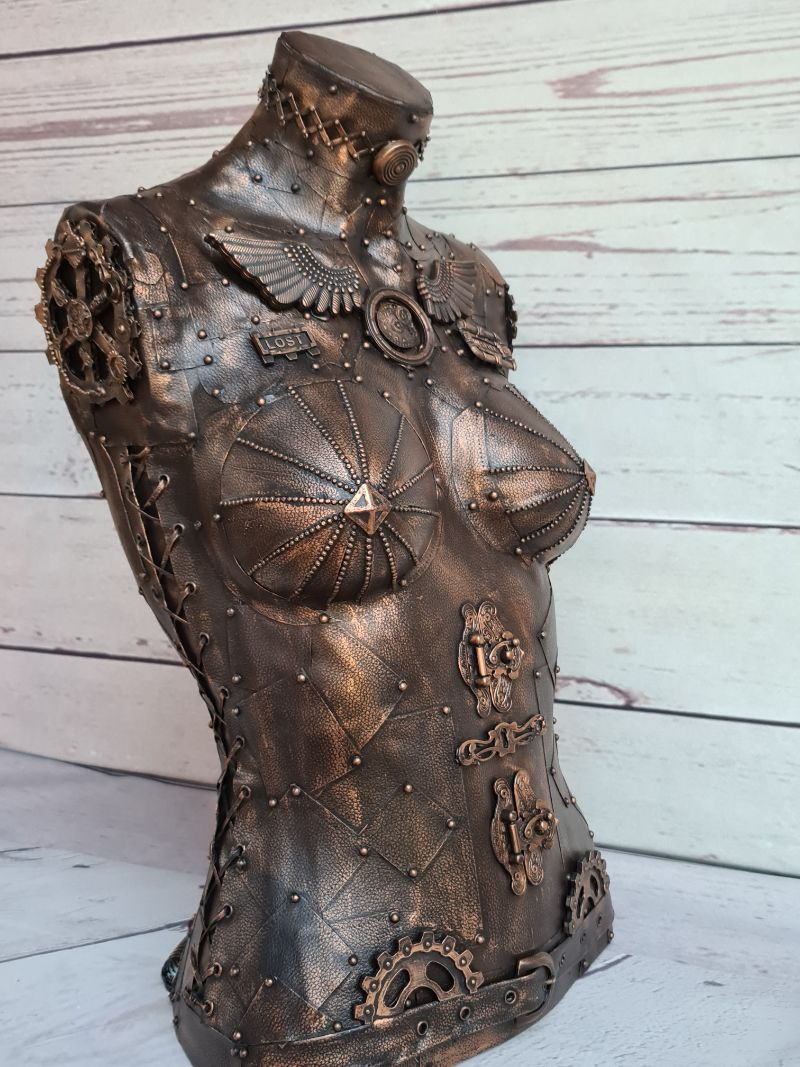
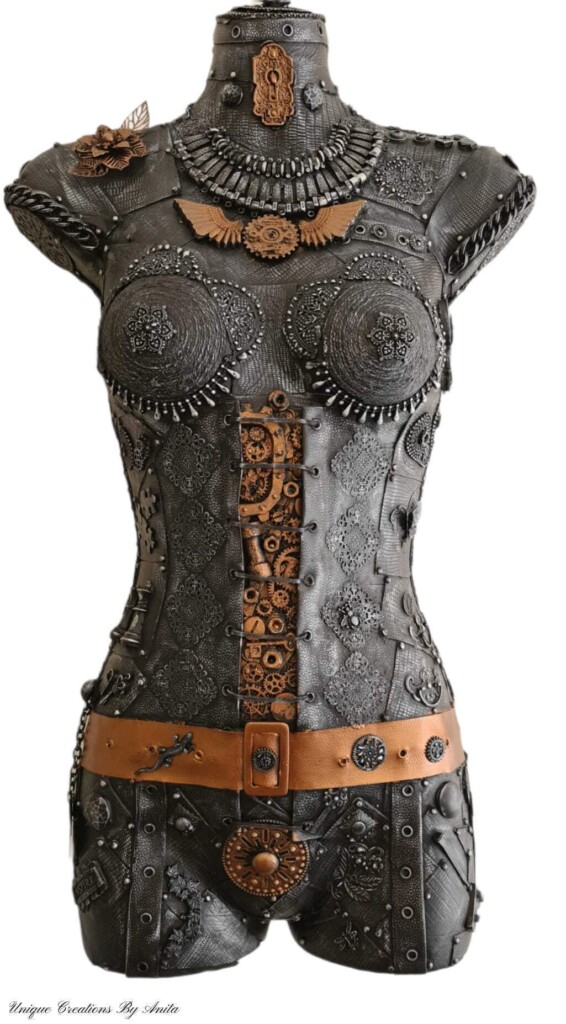
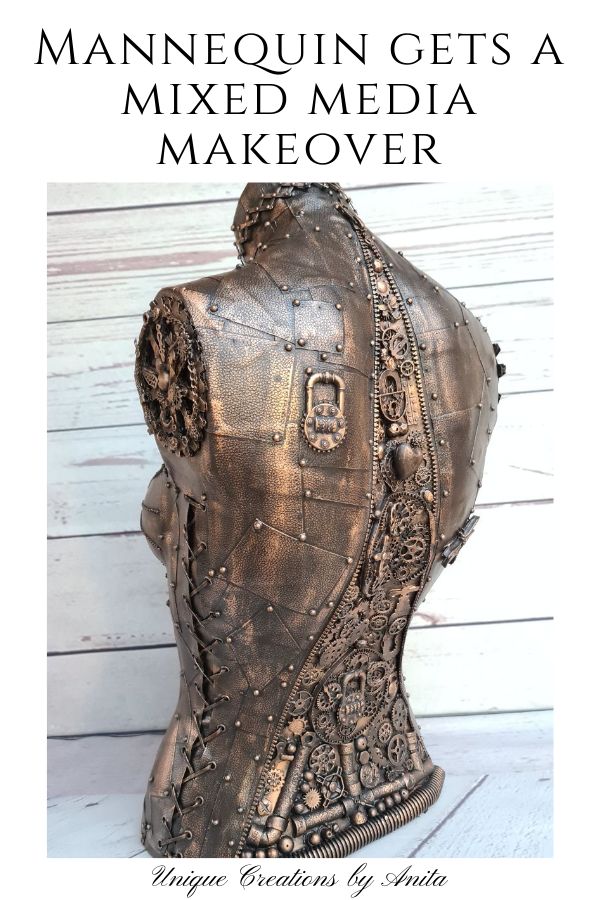
Are you a fan of the intricate and imaginative world of Steampunk? If so, decorating a mannequin in this unique style might just be the creative challenge you’re looking for. In this blog post, I’ll show you how I transformed a thrifted half mannequin into a stunning Steampunk masterpiece.
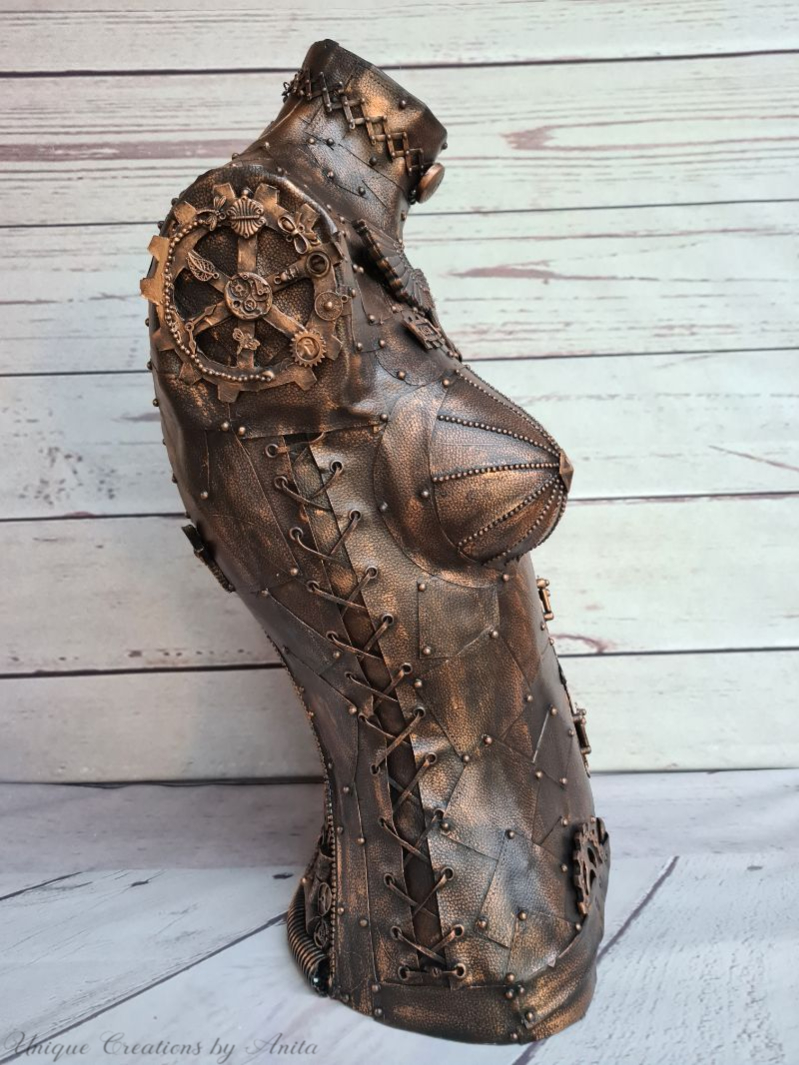
With the perfect mix of patchwork leather, gears, and rivets, this mannequin brings a fusion of Victorian and industrial aesthetics into one amazing creation. This project isn’t just about upcycling; it’s about giving new life to an old piece while embracing the Steampunk spirit.
Before we dive into this tutorial, be sure to subscribe to my bimonthly newsletter to be the first to see my latest projects. You can also follow me on Pinterest and Facebook, where I also include my unique mixed-media art projects

How to decorate a Mannequin Steampunk Assemblage style
**This post may contain affiliate links. This means I earn a small commission on links used at no extra cost to you. Please see my disclosure policy for more information.**
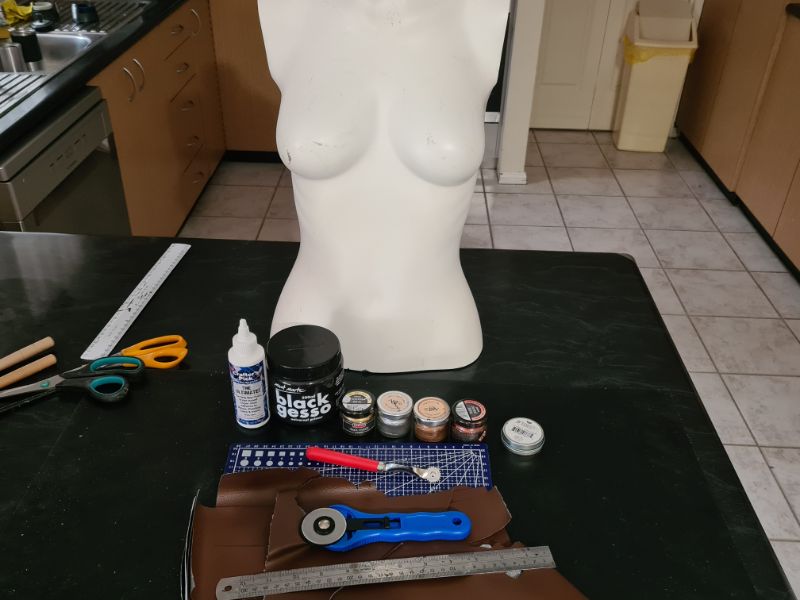
Materials Needed
- Half mannequin (plastic or hollow inside)
- Faux leather scraps
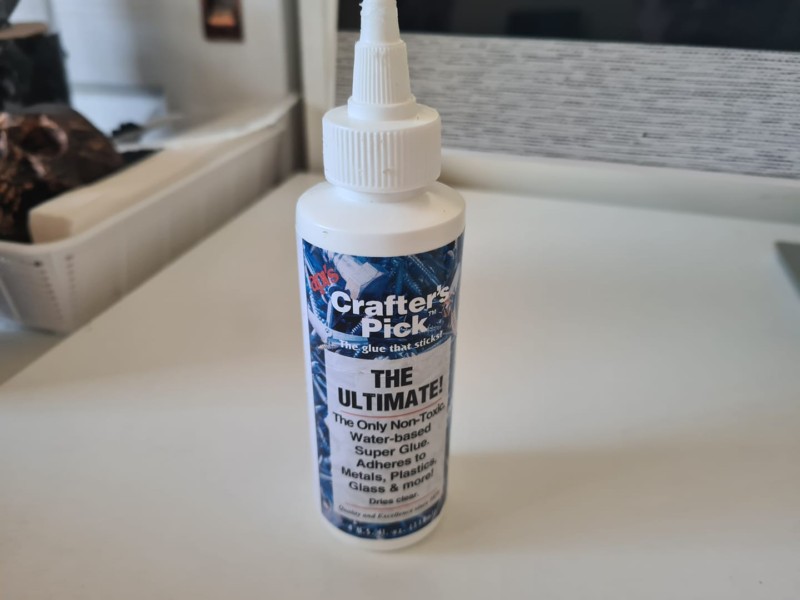
- Glue (Crafter’s Pick “The Ultimate” or tacky preferred)
- Leather cord
- Grommet punch & leather eyelets
- Upholstery studs
- Beads, crystals, and decorative charms (Steampunk or industrial)
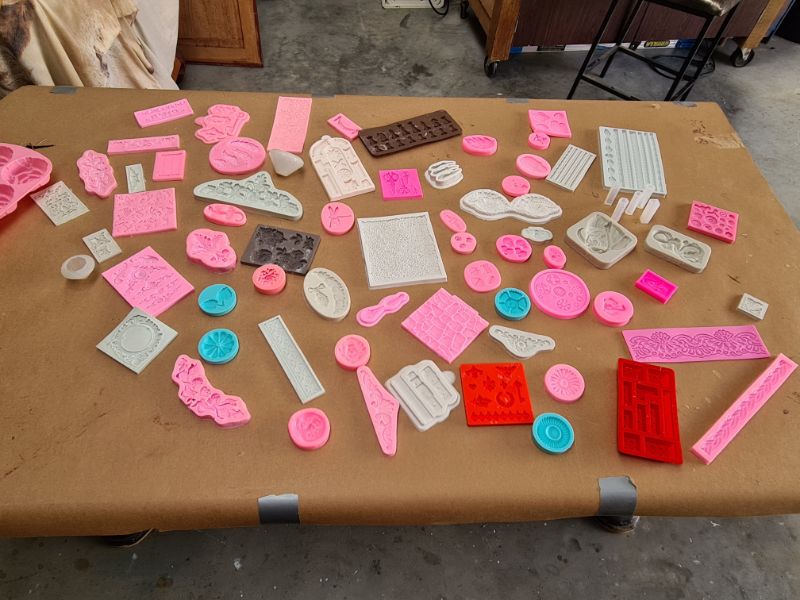
- Epoxy resin for custom charms
- Silicone moulds, gears, pipes, wings, industrial, watches, steampunk.
- Hot glue gun and glue sticks
- Black gesso (for priming)
- Bronze metallic wax paste, art alchemy bronze (for highlights)
- Corrugated cardboard (for gears)
- Clear acrylic spray (for sealing)
Find Your Mannequin
The journey for this project started when I found the perfect mannequin at a thrift shop for just $30. This lightweight, hollow mannequin was ideal for the task ahead. If you’re working with a mannequin that can open at the bottom, consider adding a bag of sand to the base to stabilise it while you decorate. It helps prevent the mannequin from tipping over during the process.
Preparing the Leather
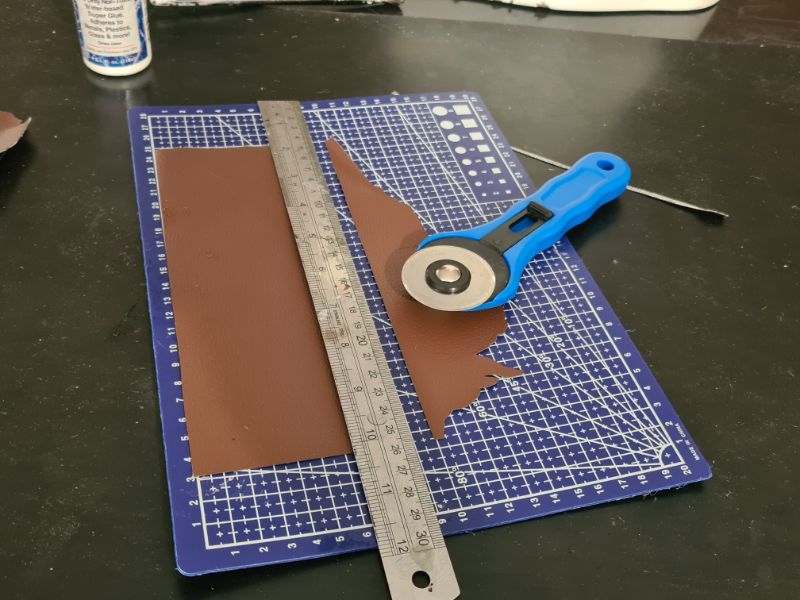
The next step was cutting faux leather into patchwork pieces. I spent hours measuring and cutting each piece to fit the curves of the mannequin. I originally considered making random cuts, but my need for precision led me to create a structured patchwork pattern. This was the most time-consuming part of the project, but it was worth the effort.
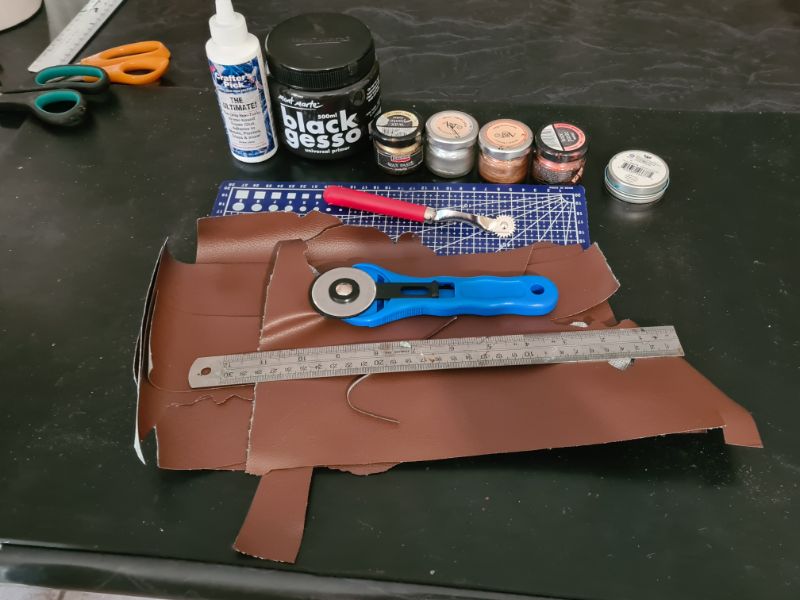
A quick tip: If you have access to a cutting machine like Cricut or Silhouette, you could save yourself hours of work. I used a manual cutting method with a mat and rotary cutter, but I now regret not using a machine, as it would’ve taken a fraction of the time.
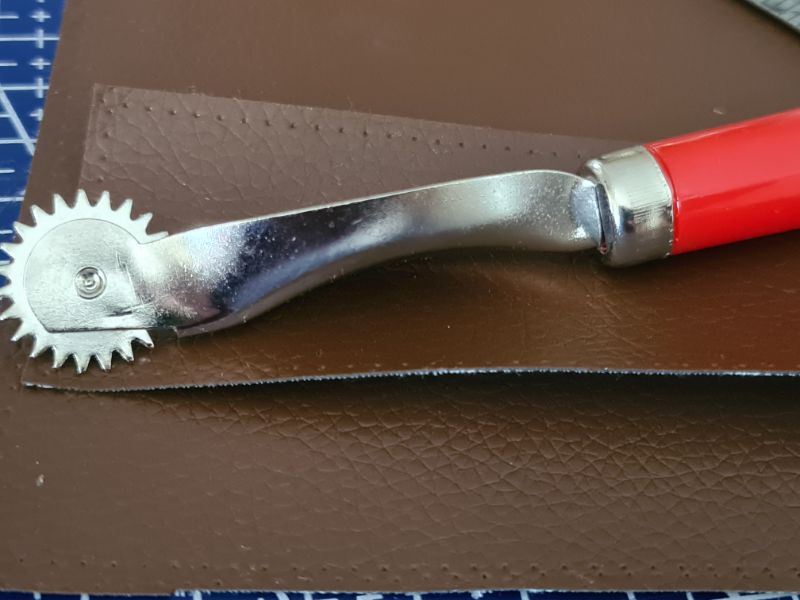
To enhance the patchwork effect, I used a tracing wheel to create stitching marks. This added a lovely detail to the leather pieces, making them appear hand-stitched.
Choosing the Right Glue
Finding the best adhesive was a bit of trial and error. I initially tried hot glue, but it left unsightly lumps that showed through the leather. Mod Podge was too slow to dry, and other glues like E6000 ate into the leather. In the end, I settled on Crafter’s Pick “The Ultimate” for its durability and quick bonding. Tacky glue will also work fine.
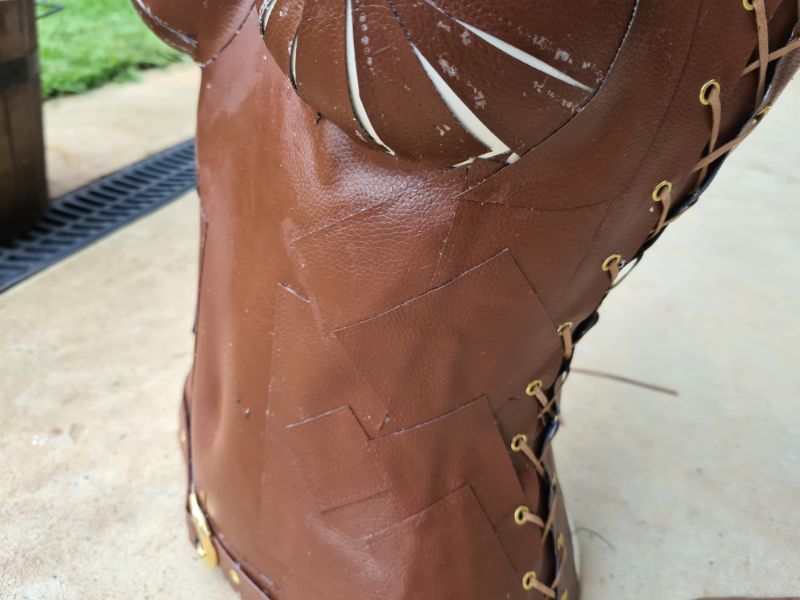
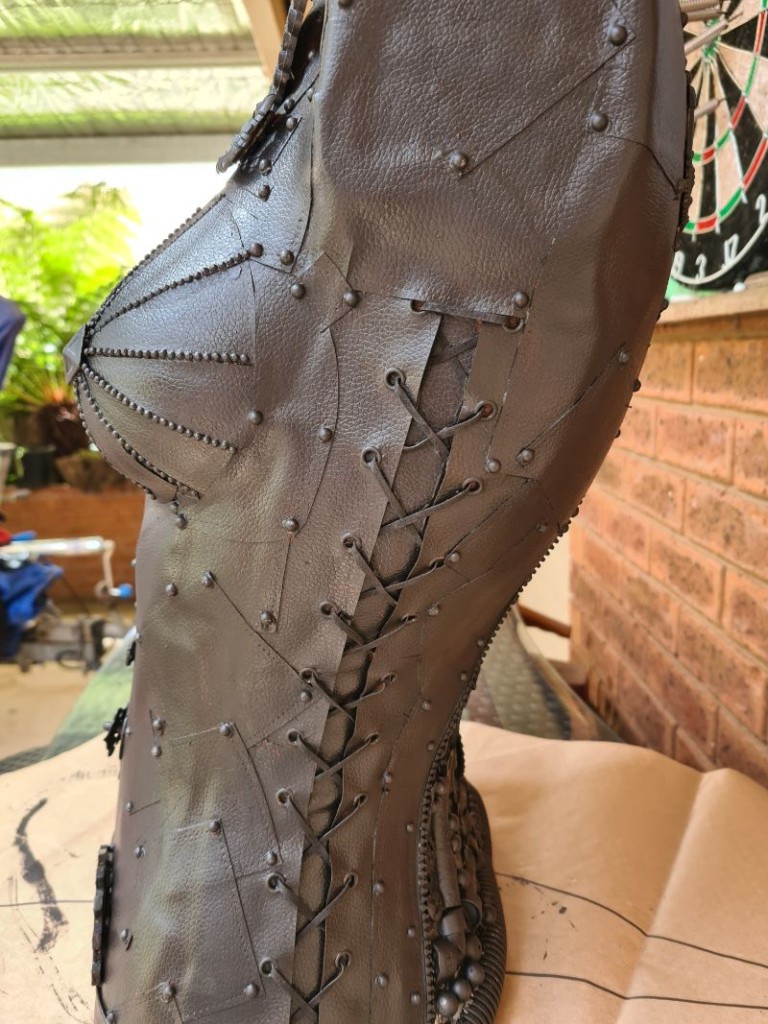
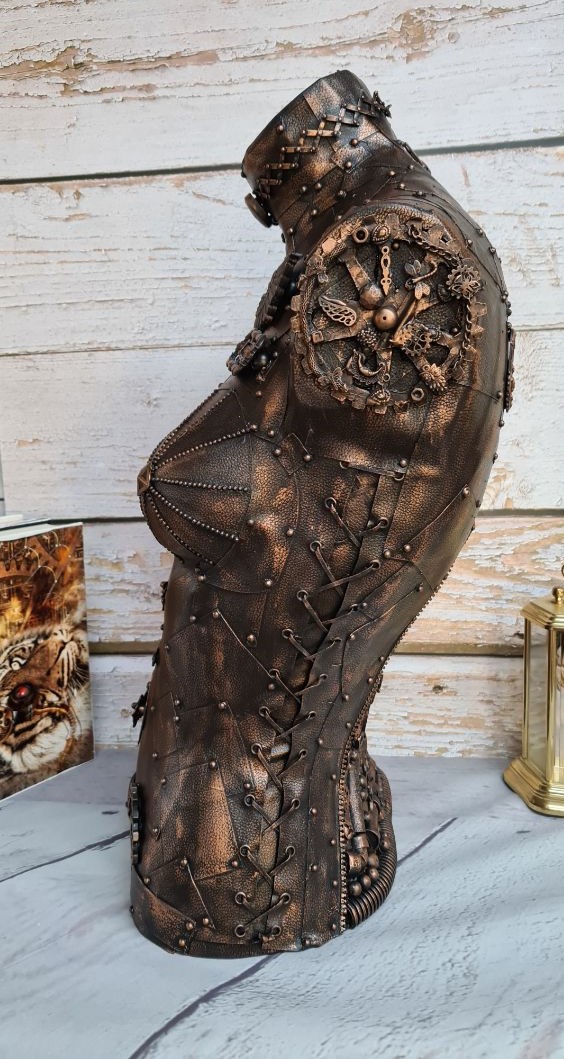
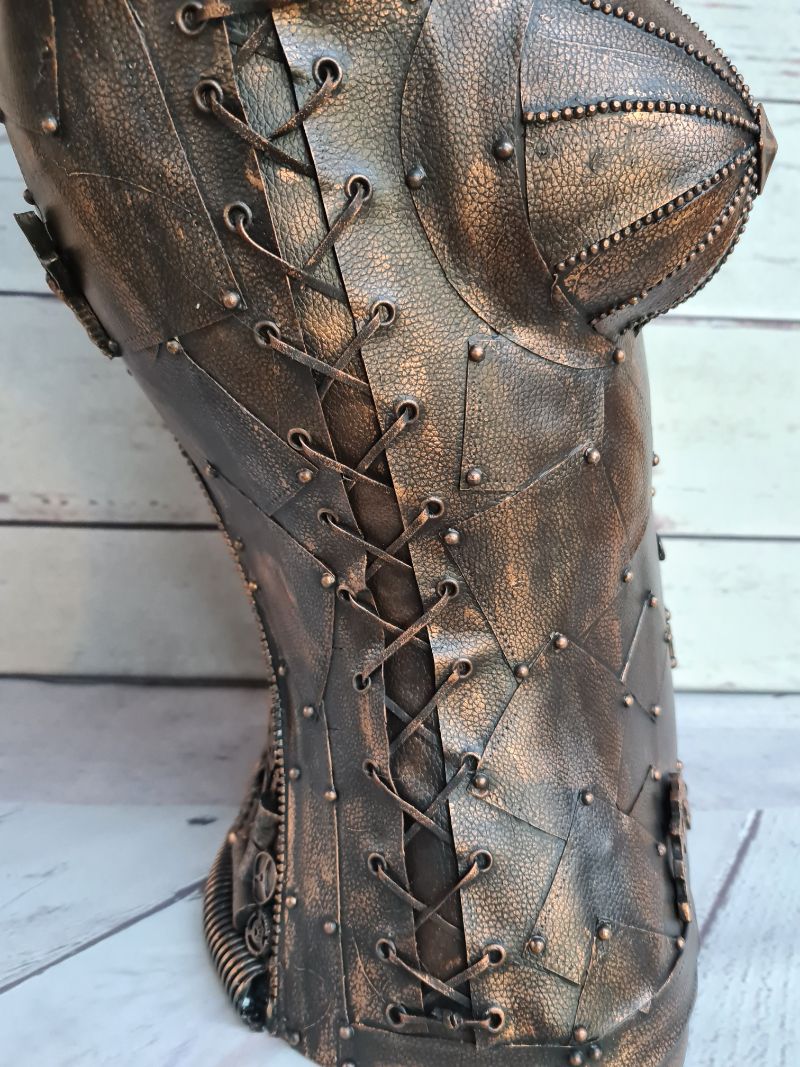
Creating the Tie-Up Sides
For the sides, I used two long strips of leather and added grommets with a punch.
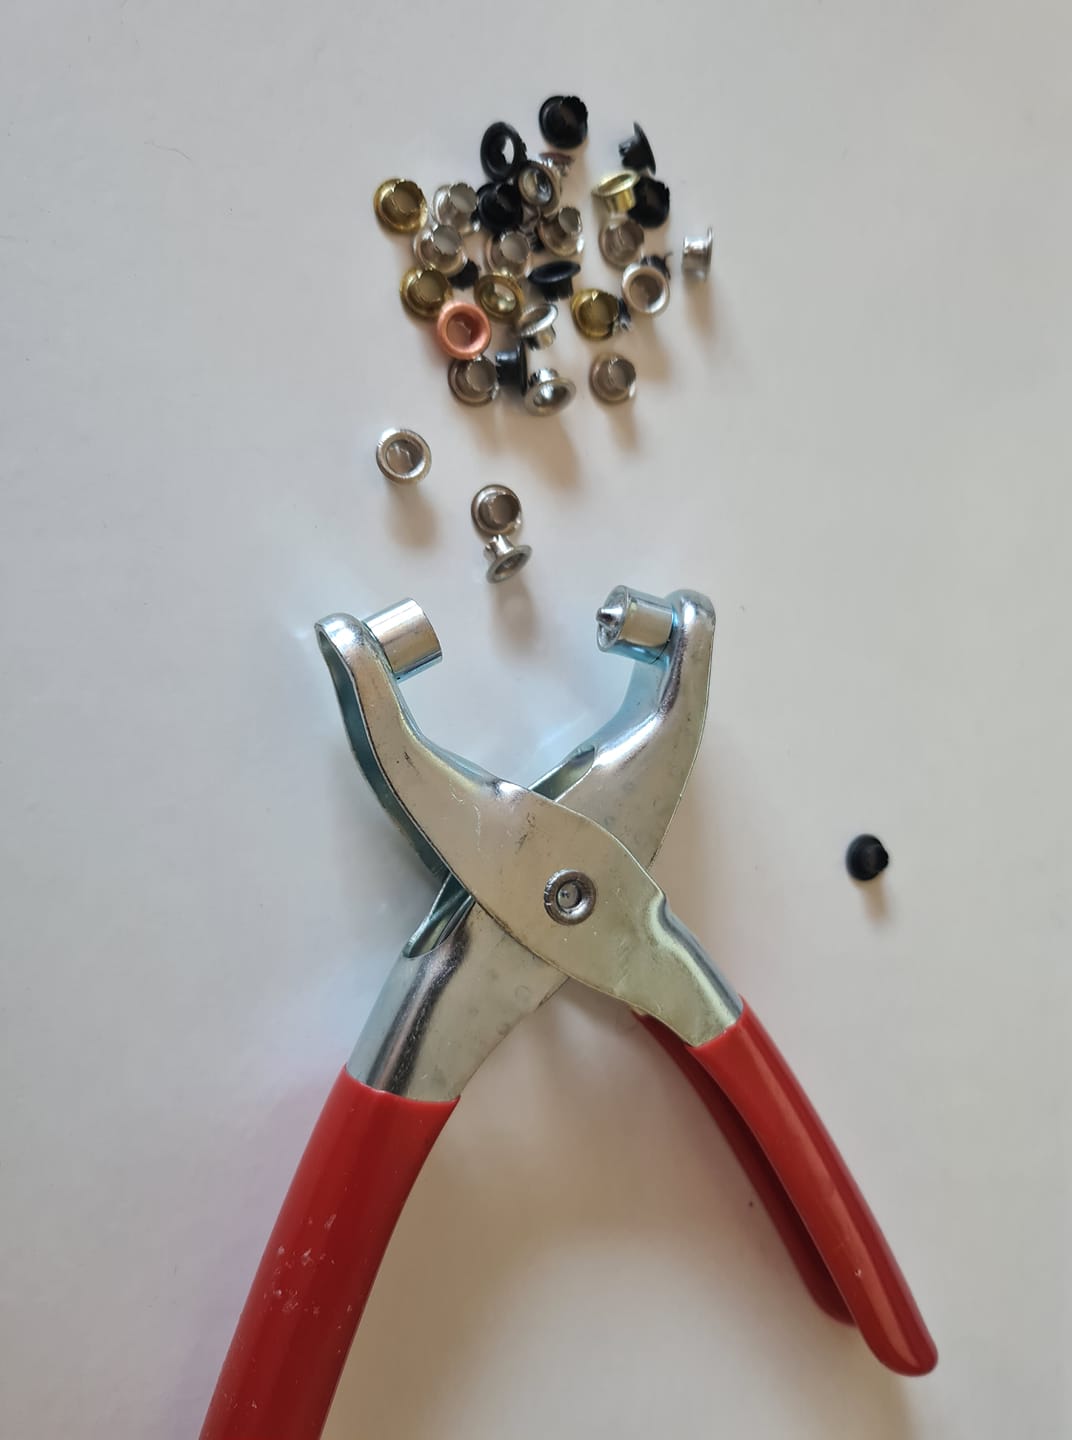
You can now glue the two smaller pieces to the bigger one and thread the leather cord through the holes to create a corset-like effect.

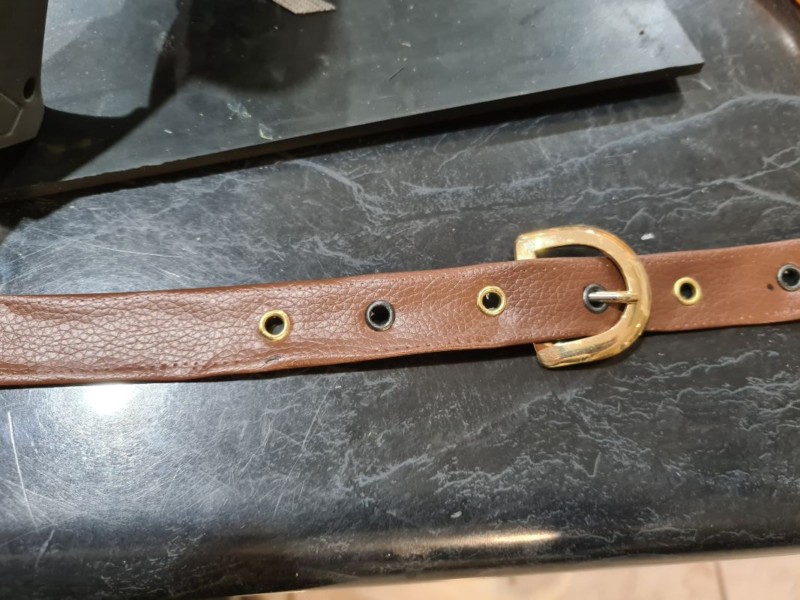
The belt was made in the same way, using a recycled belt buckle. This was a simple but essential detail to enhance the Steampunk look.
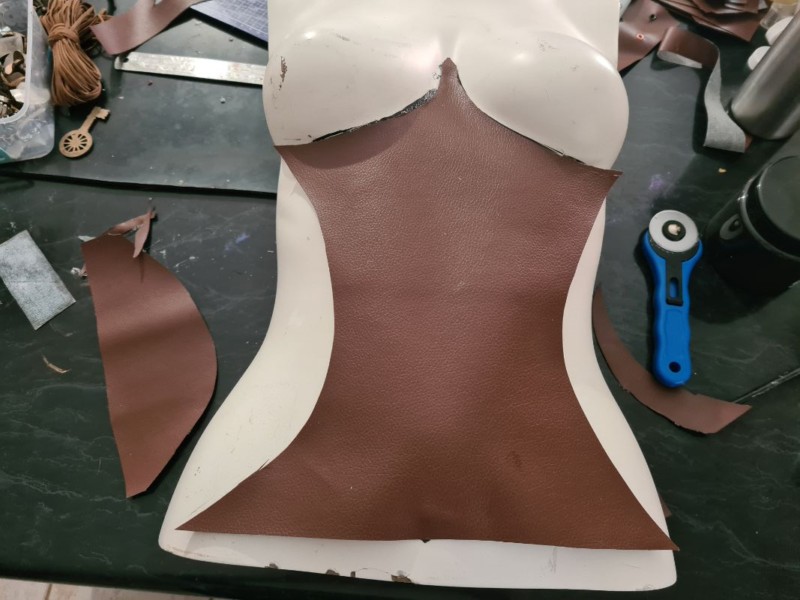
Attaching the Leather to the Mannequin
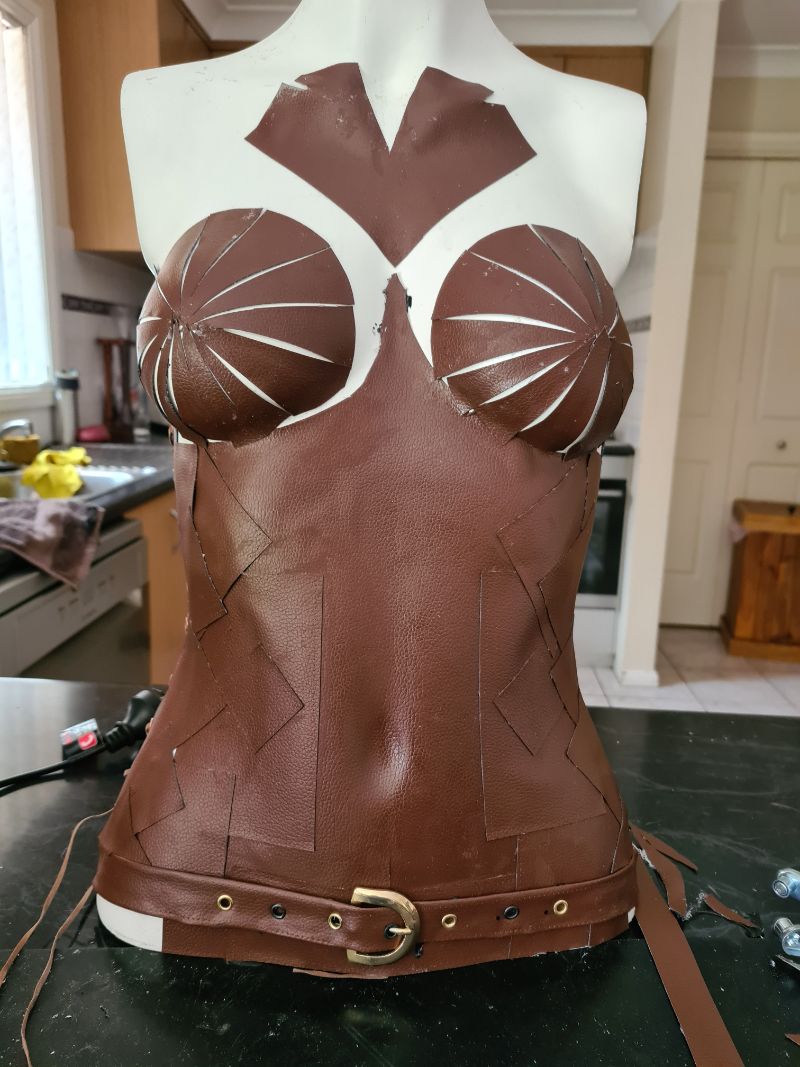
I started by glueing the leather to the mannequin’s middle section. Because the mannequin had curves, I had to cut the leather to shape to avoid bulging. It’s important to cover the whole surface with glue to ensure the leather sticks flat.
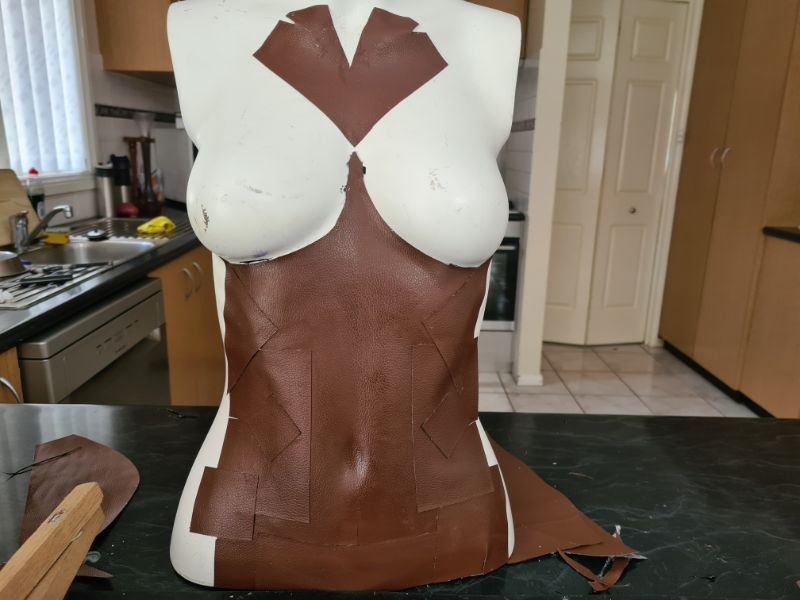
I then began layering and overlapping patches.
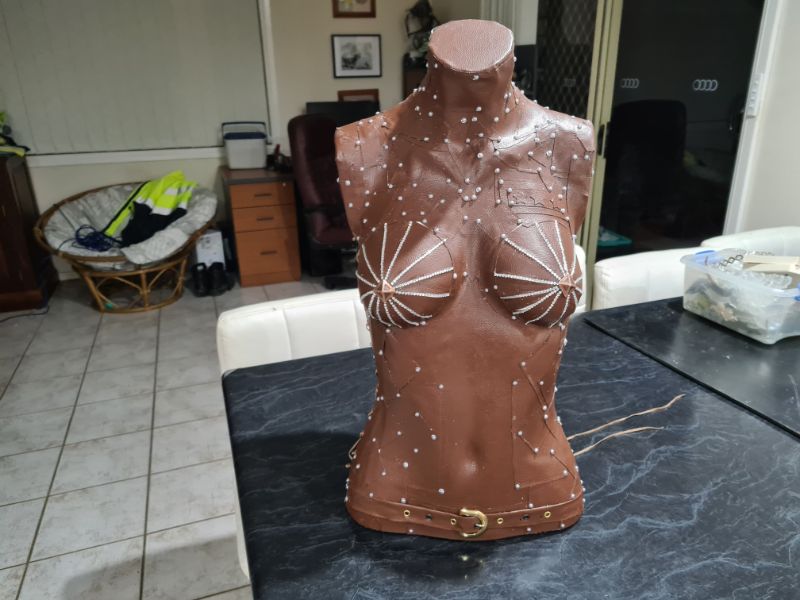
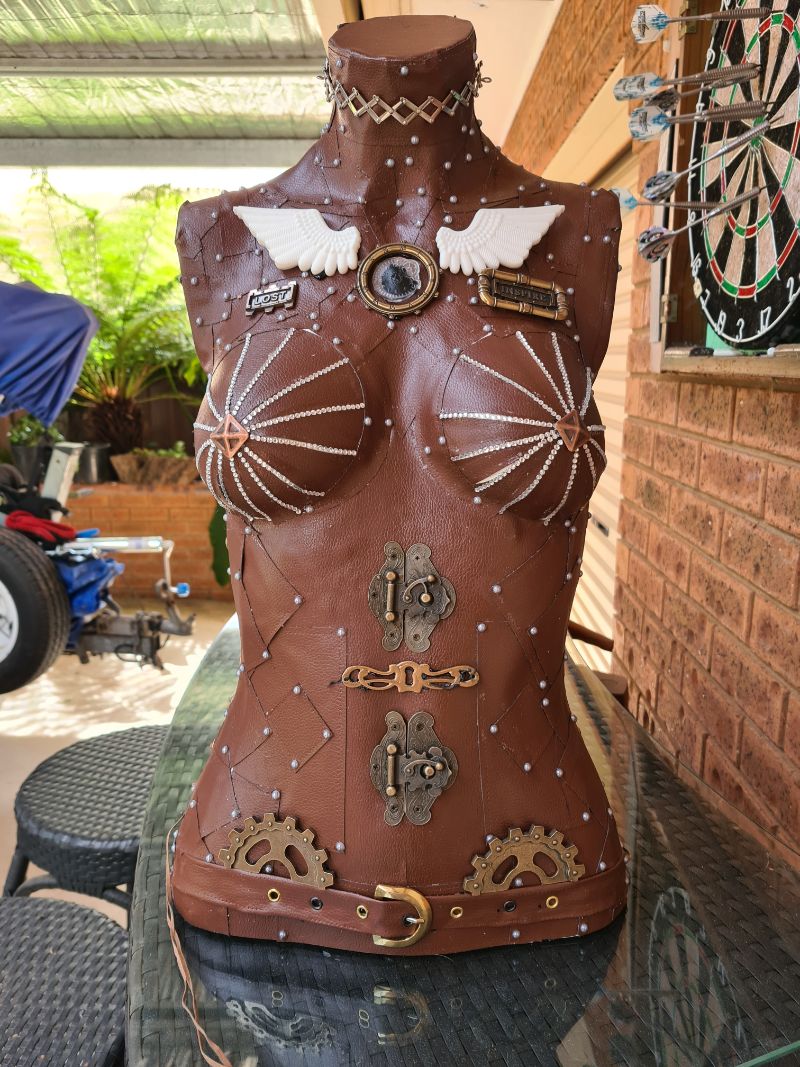
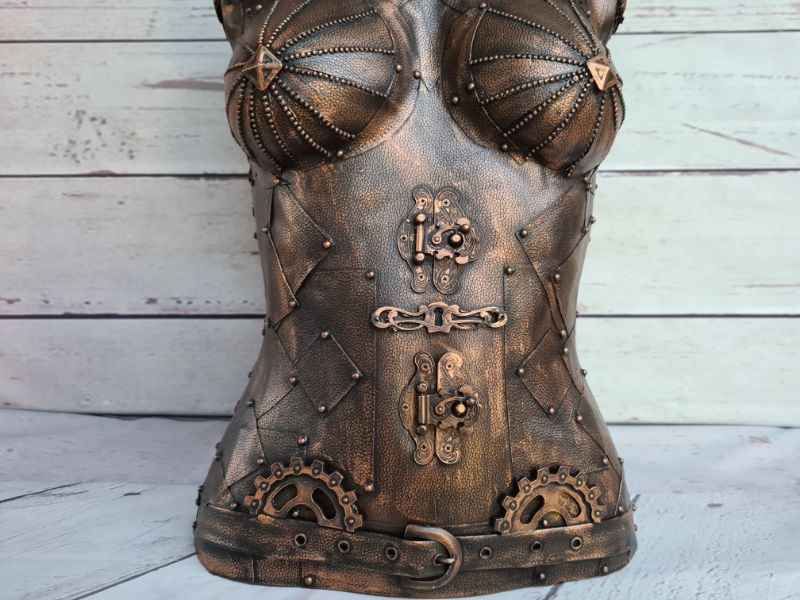
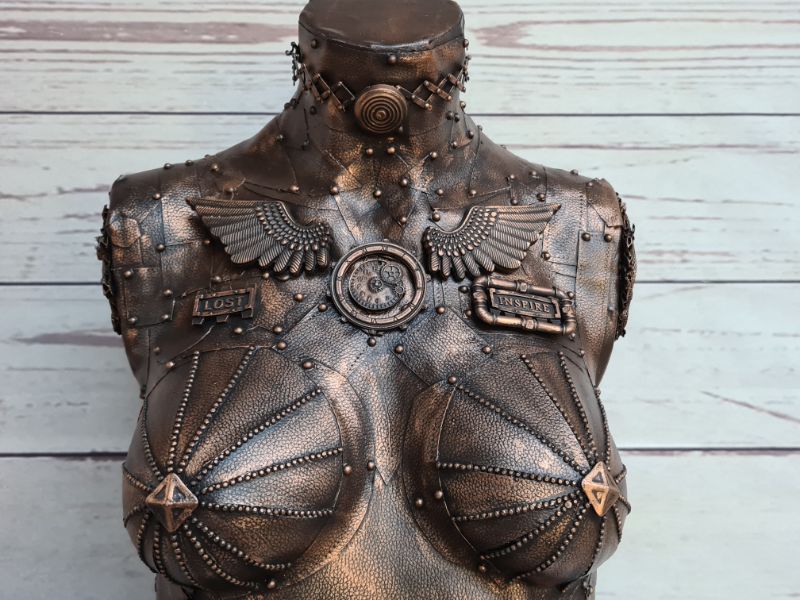
For the chest area, I cut leather circles and shaped them into a pizza slice shape. It was tricky, but I eventually found a method that worked.
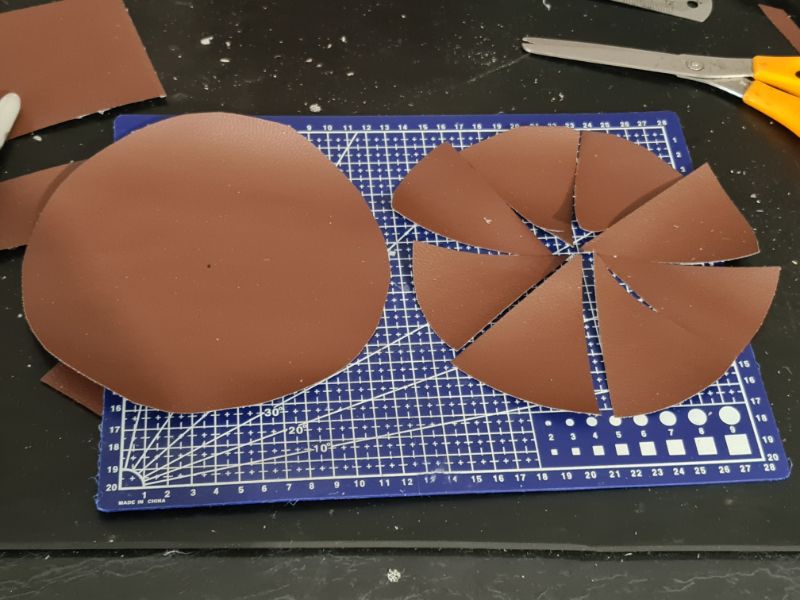
I was left with a gap, but I knew I could cover it up later with some beads.
Next, glue the lace-ups to the mannequin and add more patches to cover the seams. If your mannequin is curvy like mine, you’ll need to make slits in the leather so it can lie flat against the plastic.

Do this to both sides. Don’t worry too much about the glue residue, the gesso will cover that later.
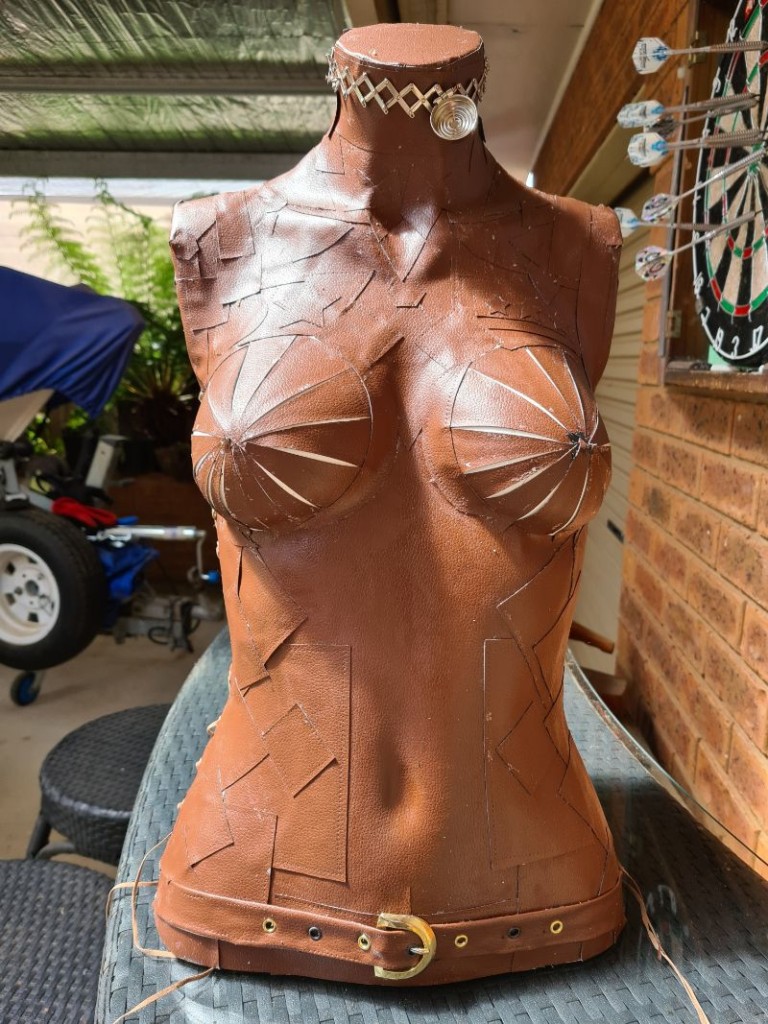
To give the outfit a more uniform look, I added patches to resemble lapels. You can continue adding overlapping patches until the entire surface is covered.

This is how mine looked after adding all the patches. Some patches appeared to be lifting, but once the glue became tacky, I was able to press them back down.
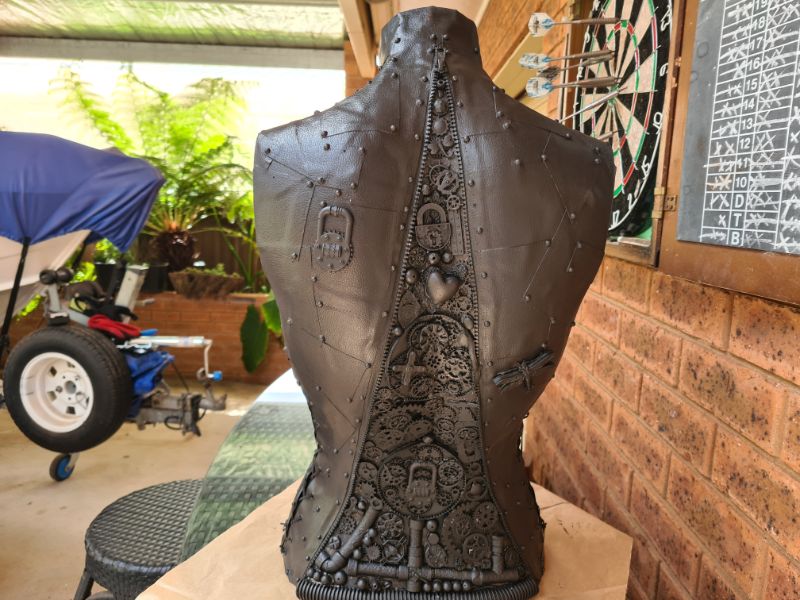
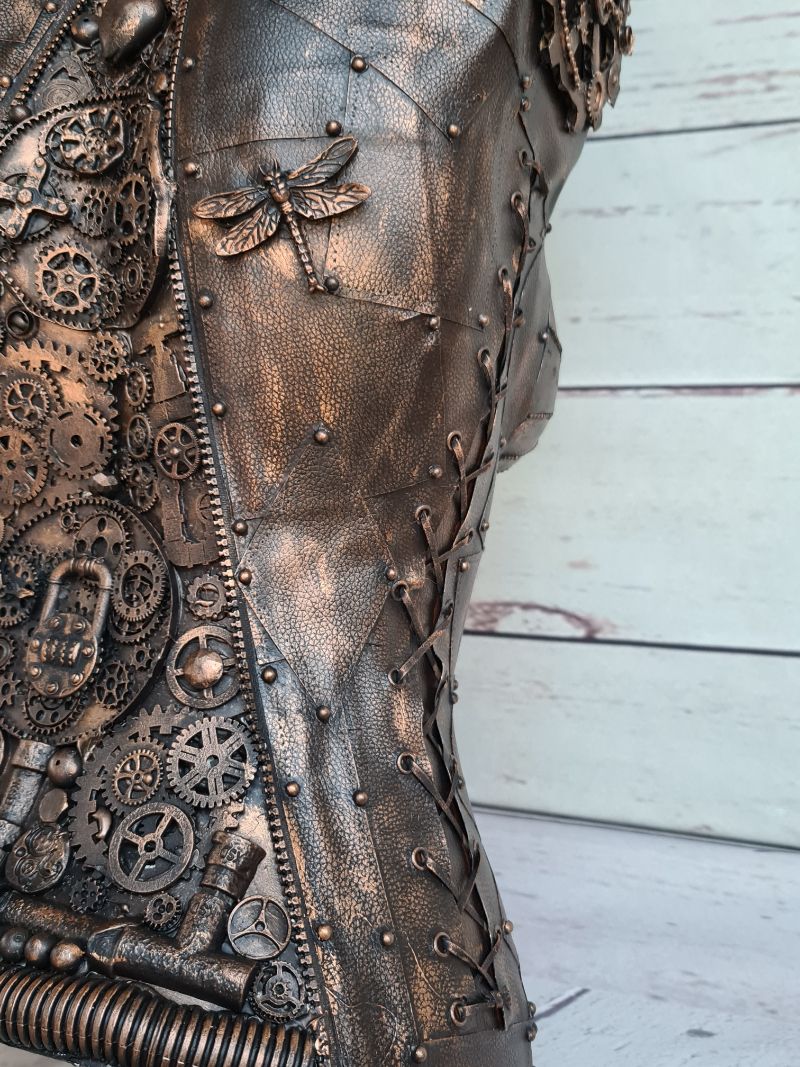
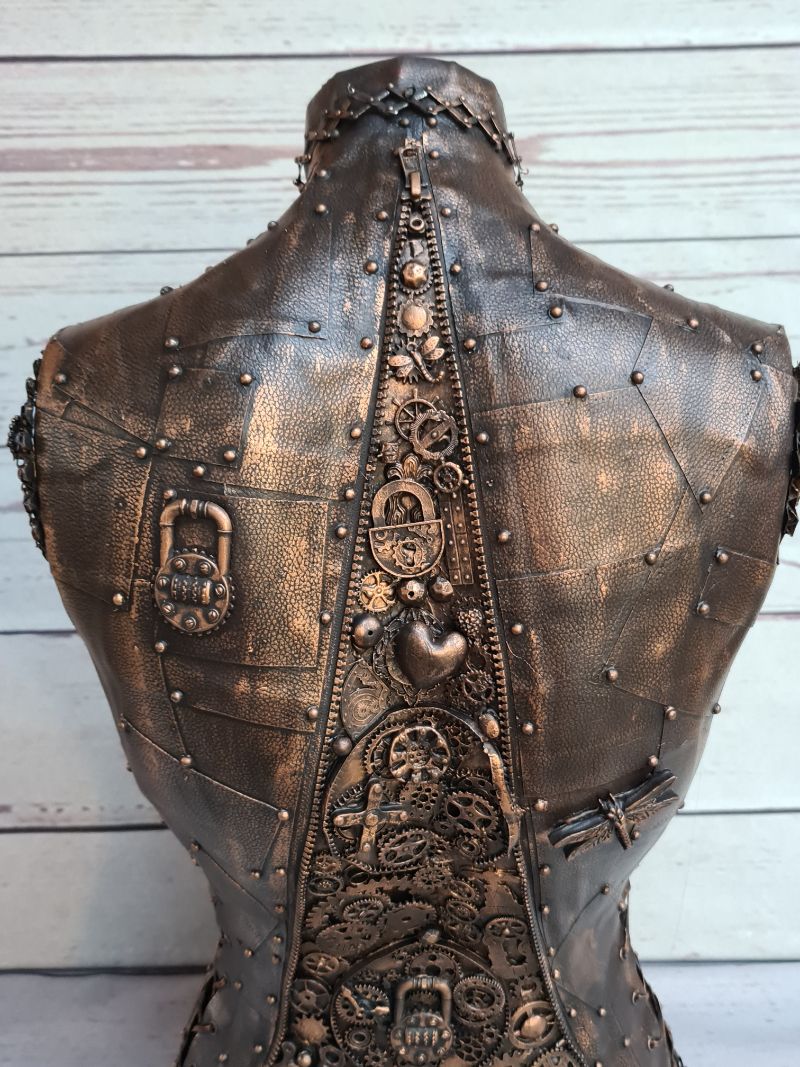
The large zipper down the back was repurposed from an old mattress cover. I used hot glue to attach it, then added more patches to conceal it.

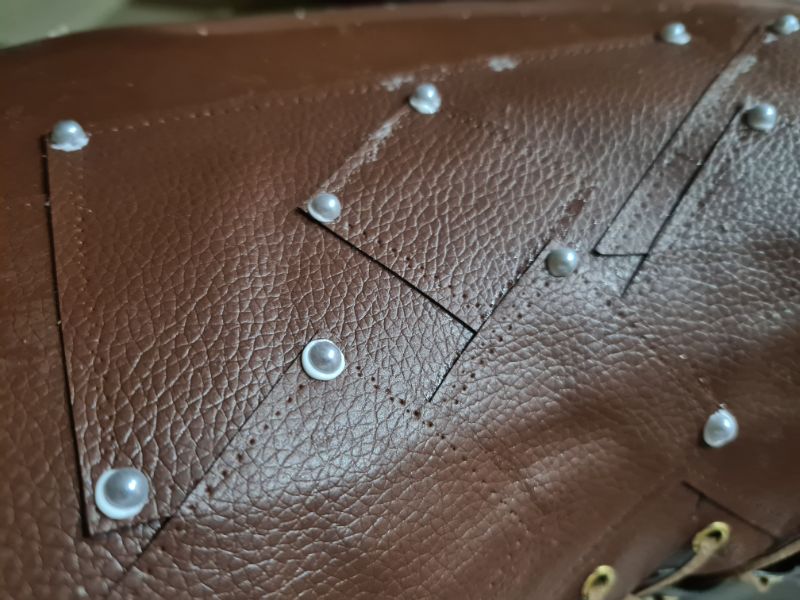
Adding the studs
Steampunk is all about gears, cogs, and rivets, to name a few. To create the look of rivets, I used half beads, adding them one by one. It was a tedious process, but the result was definitely worth it.

You can add the beads to every corner of each patch.
To make the chest area sparkle, I used self-adhesive crystals. However, they didn’t stick as well as I’d hoped, so I ended up glueing them on.

To cover the rough joins of the leather pieces on the chest, I used upholstery studs from my workshop. I had to drill the tips first, then secure them with hot glue.
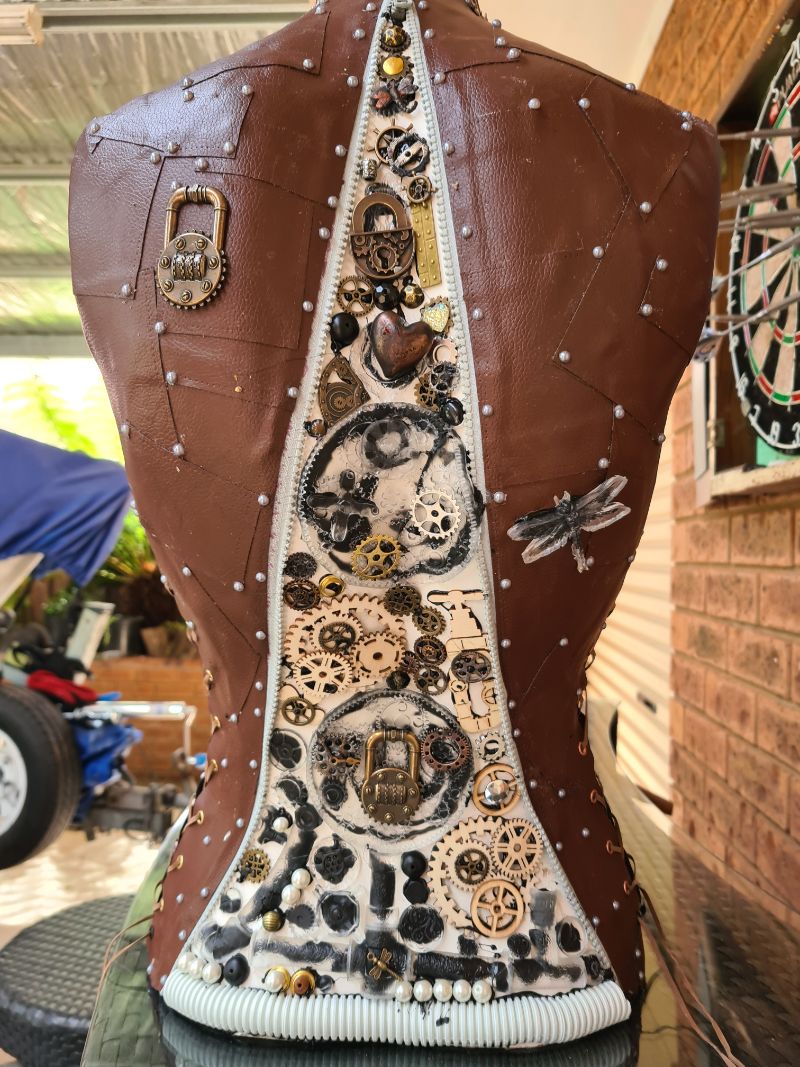
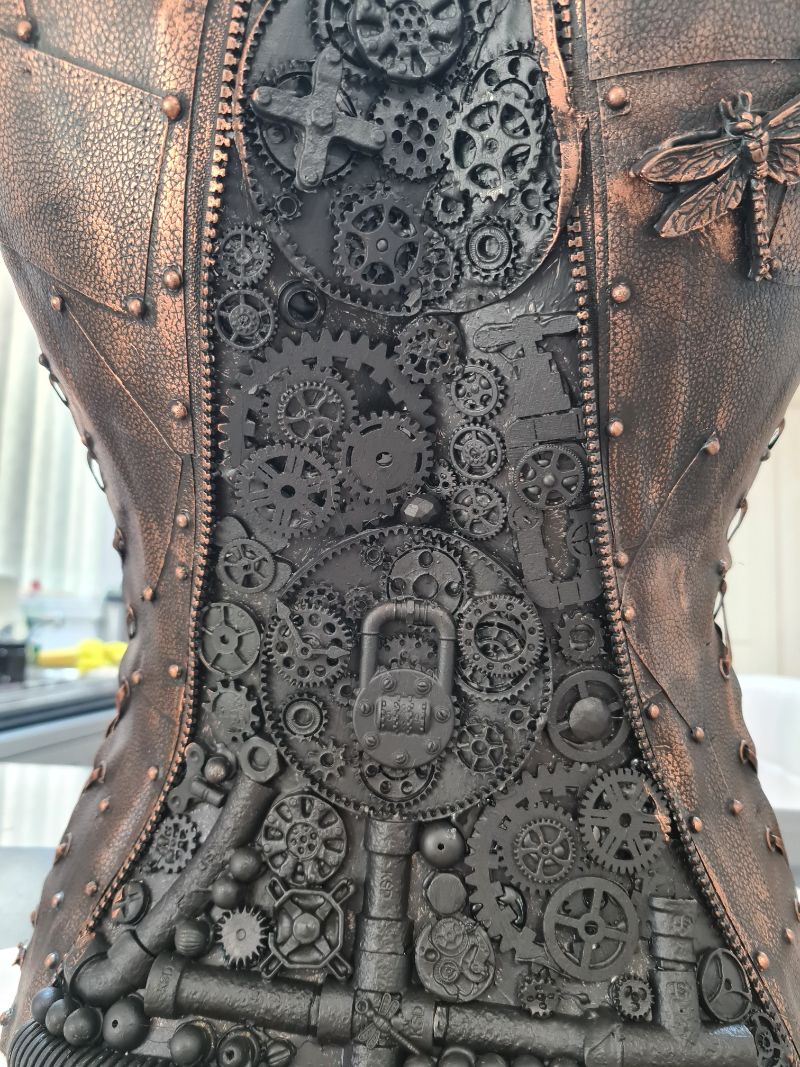
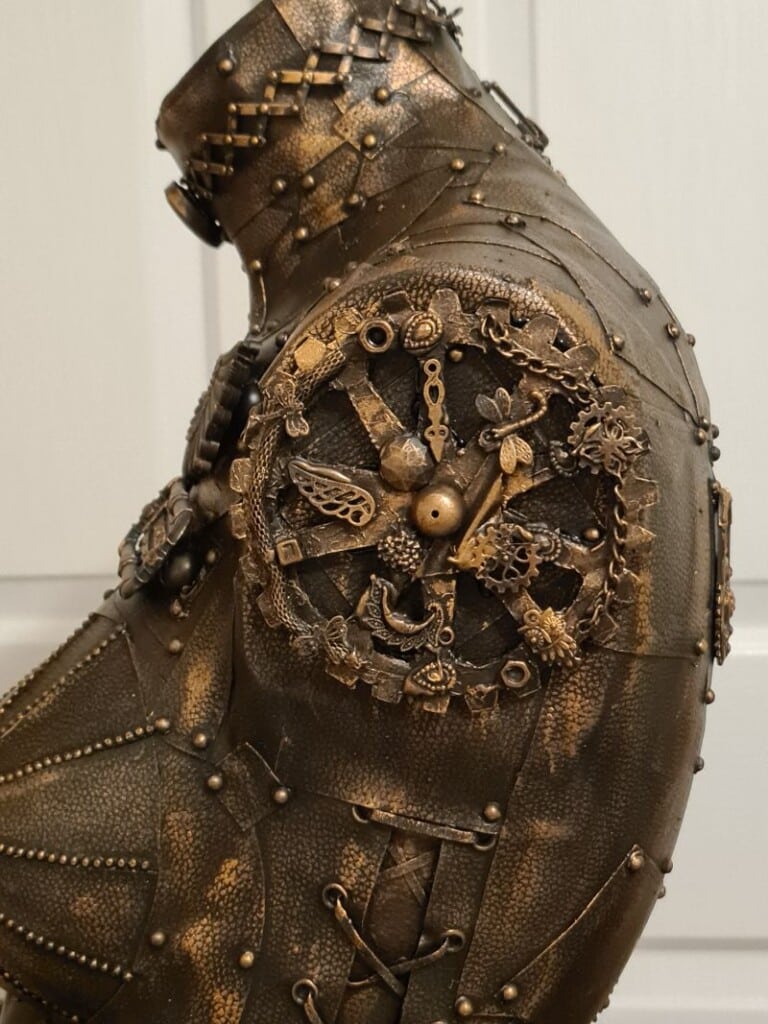
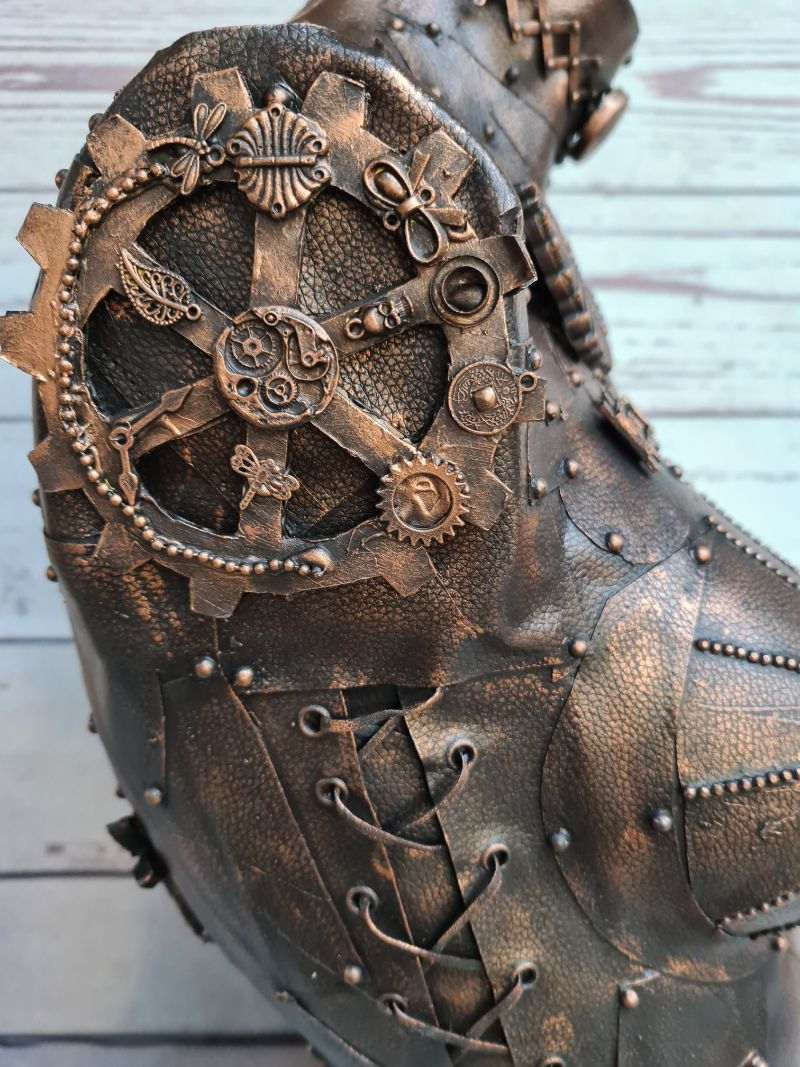
Decorating the Back
My mannequin had a curve in her back, so I knew the charms wouldn’t sit flat. This could cause issues if they were bumped, as they might break or fall off. To avoid this, I made some charms using epoxy resin and moulds. I created all the Steampunk charms in one batch for consistency.
The advantage of using resin charms is that they can be heated and moulded into shape. I used a hairdryer to warm them up, then applied hot glue to attach the resin charms.
There’s no right or wrong way to add your embellishments, as long as you incorporate plenty of interesting textures and layers, the result will be fantastic. For more ideas on how to add texture to your projects, this post offers various methods to help elevate your designs.
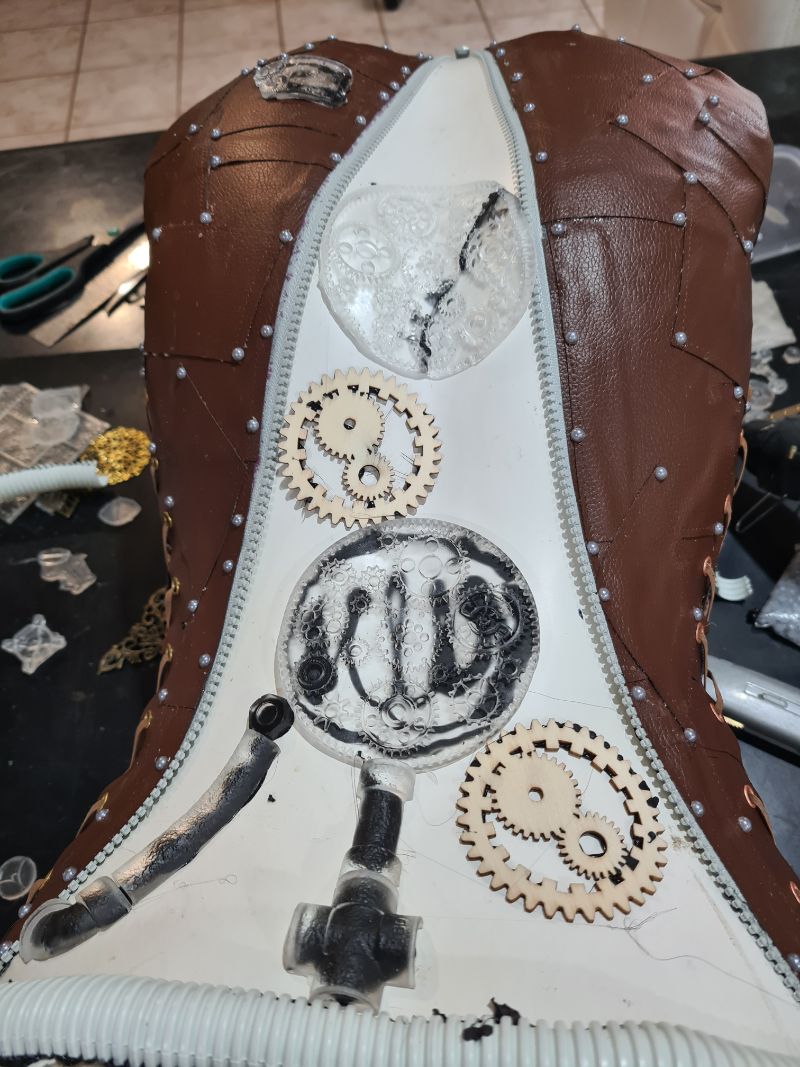
I attached the metal Steampunk charms (Mitform Casting) and various bits and bobs using hot glue. Once the base was covered, I began layering the charms. To fill any gaps, I used beads from recycled jewellery. The wooden gears were all from Poppy Craft products, and the plastic pipe at the bottom was a section I cut off my greywater hosepipe.
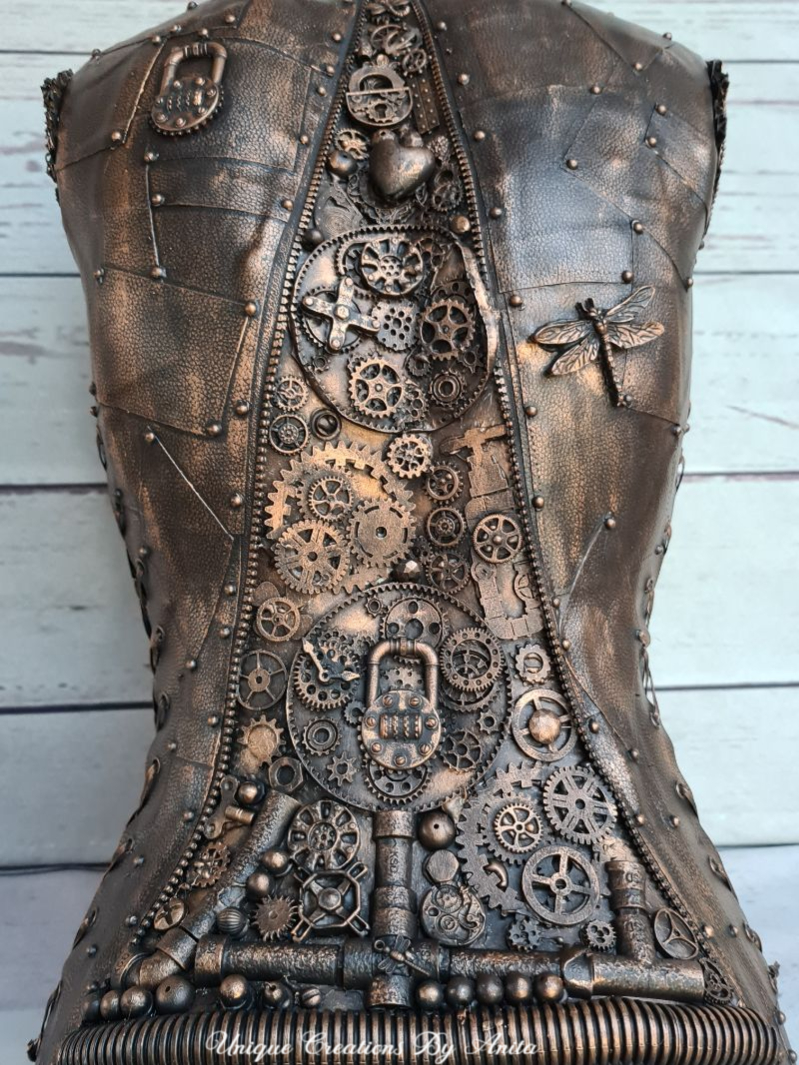
Adding the charms to the front
I treated myself to some high-quality Steampunk charms for the front. These are mitFORM charms, which I purchased from a company in Australia called Random Arts. The latches were ordered from Amazon.
Paint the mannequin
I used black gesso to paint the mannequin. Since it also acts as a primer, it provides a better finish than acrylic paint. I started by painting everything black, making sure to get into all the nooks and crannies to prevent any other colours from showing through.
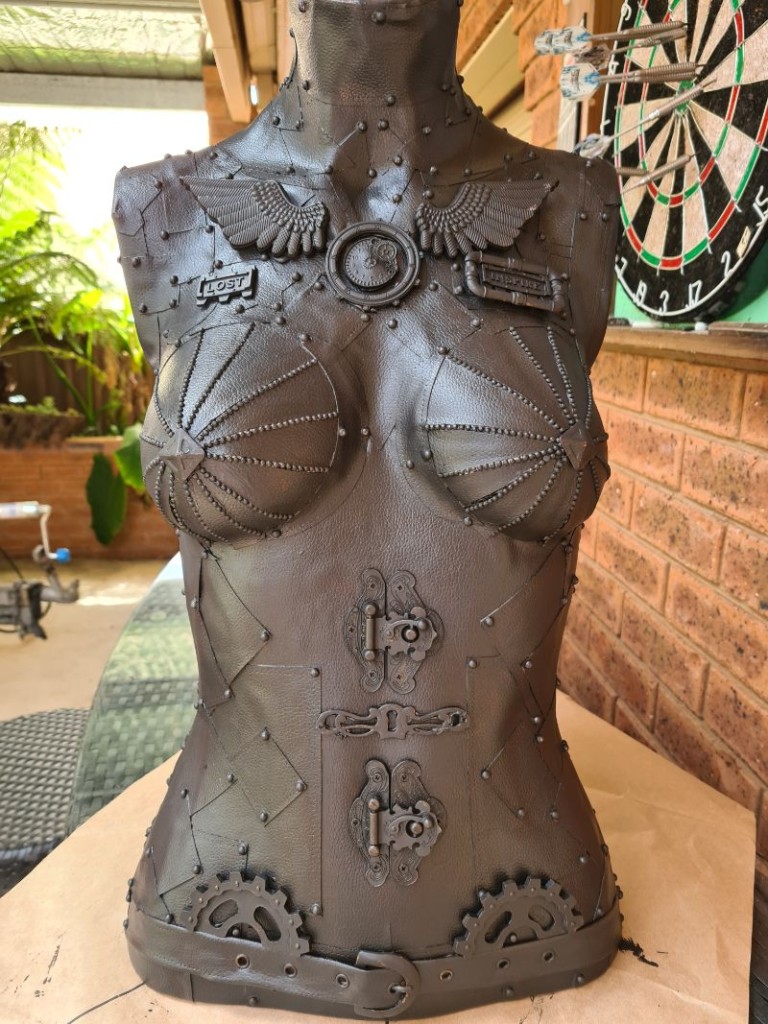
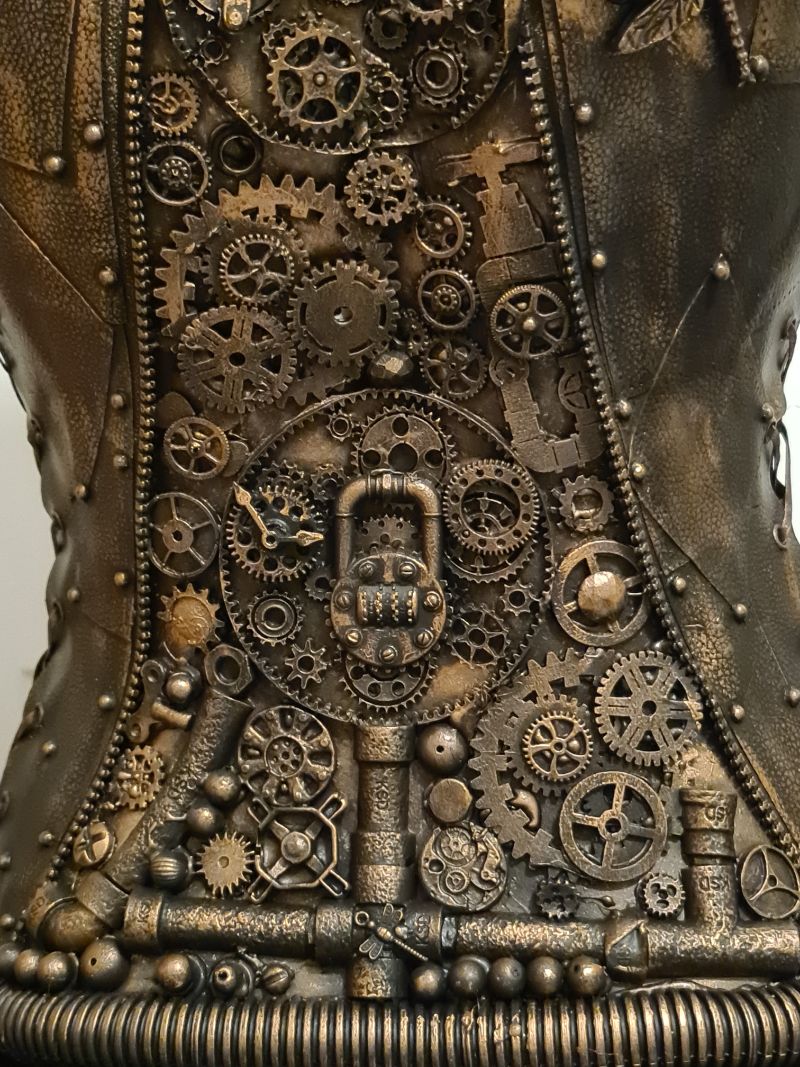
Add the bronze metallic wax paste
This bronze metallic wax paste is what truly brings the magic to life. If you don’t have any at home, check out the recipe in this post—you might already have the ingredients to make your own.
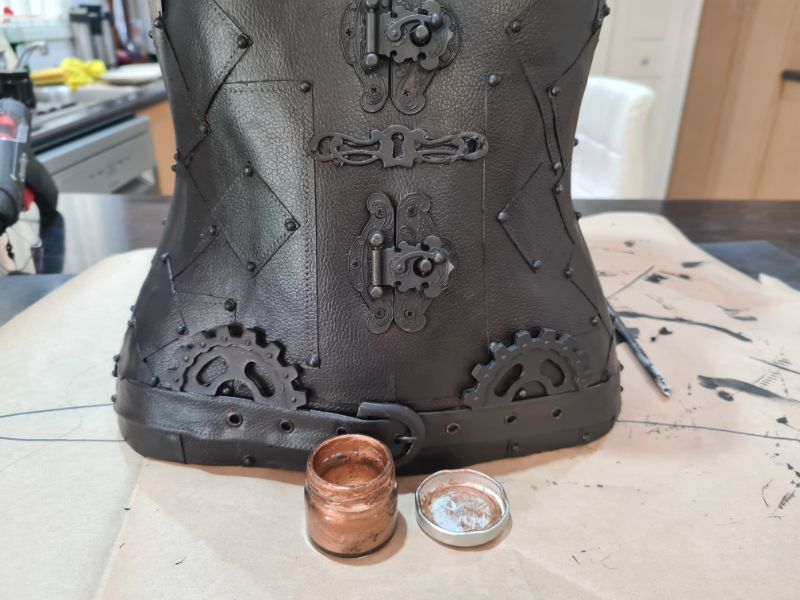
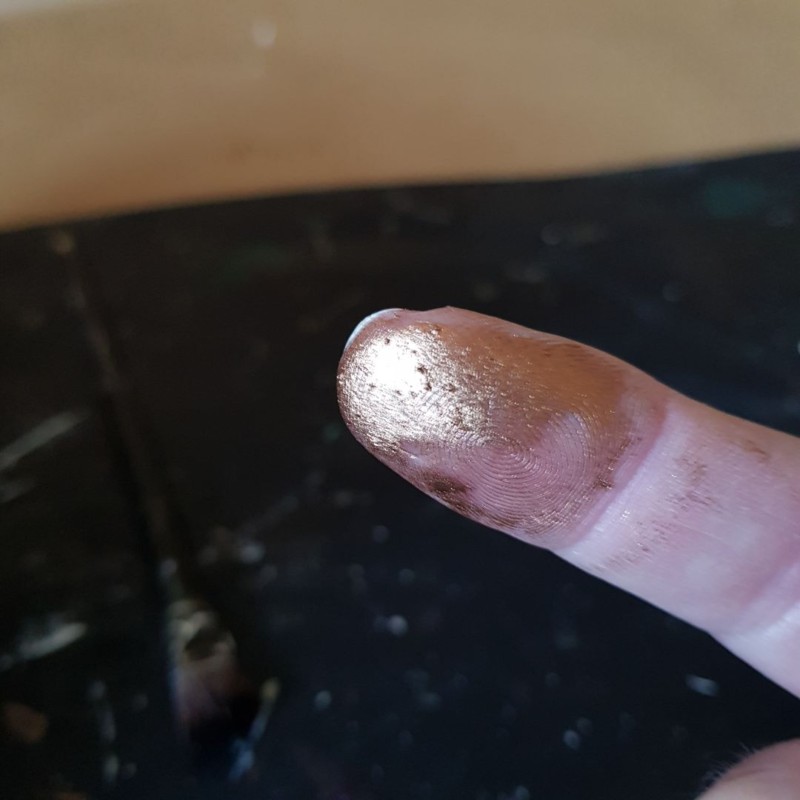
The best way to apply the wax is with the tip of your finger. Simply touch the wax with your finger, avoiding scooping it.
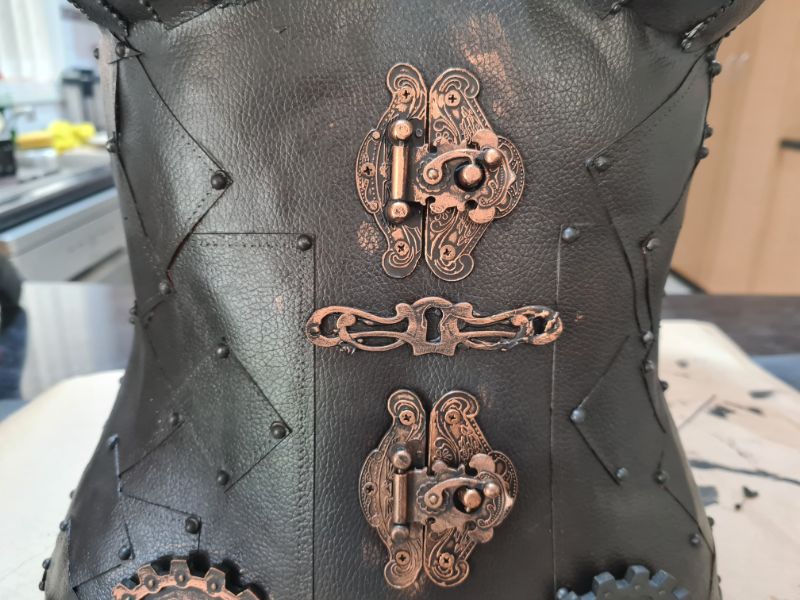
Start by lightly rubbing your finger over all the raised edges. The goal is not to cover the entire black surface, but to make the raised edges darker than the rest. It might feel awkward at first, but once you get the hang of it, you’ll be able to do it in no time. I completed this in less than 10 minutes.
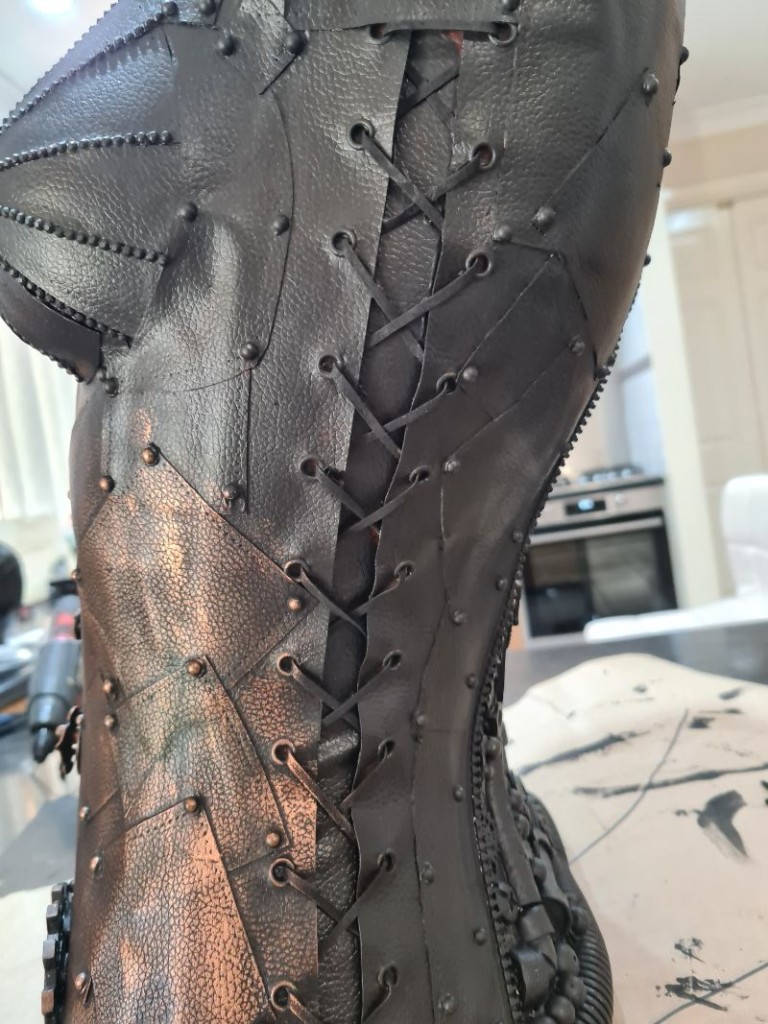
Apply the same process to the leather, but press even lighter. The best way I can describe it is like tickling someone – just a gentle touch.
If you apply too much wax and aren’t happy with the result, don’t stress. Simply wait for the wax to dry, paint it black again, and start over with the wax.
Do the same with the back, but in the smaller gaps, you can use a small paintbrush to add some wax.
Making the arm gears
I made these from a corrugated cardboard box. I printed the image onto paper, glued it to the cardboard, and then used a craft knife to carefully cut around the image.
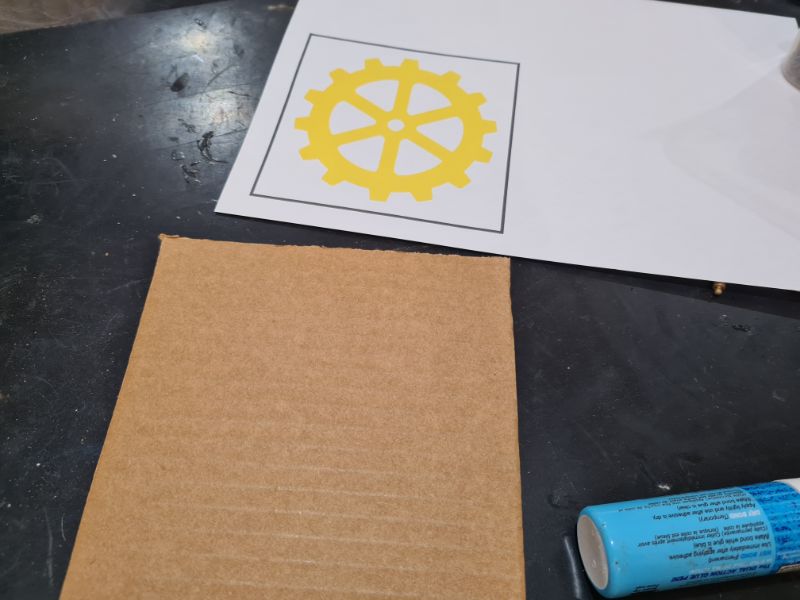
I glued all sorts of random bits and pieces onto them, as you can see in the image below. To give the gears a more rustic look, I added some texture paste. Then, I painted them with gesso and highlighted them with the bronze wax paste. The beauty of this technique is that you can be messy, and it still looks great once painted.

Seal the finish
The gold wax paste needs to dry for 12 hours before you can seal it. This will help the colours pop even more. If you don’t seal the wax, it may become slightly dull over time. I applied two thin coats of clear acrylic spray to seal it.
Close-up photos of the finished Steampunk Mannequin

More mannequin inspiration projects
This mannequin is decorated using embossed soda cans.


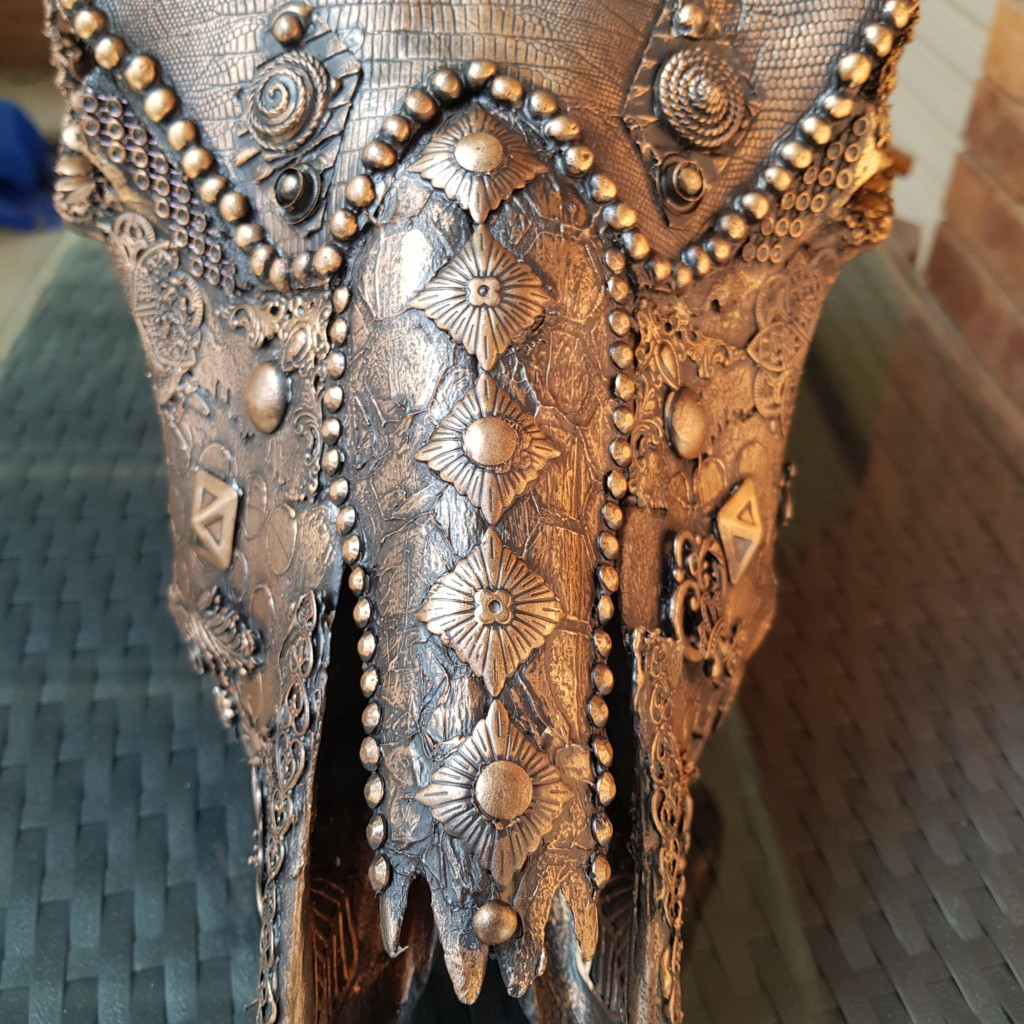
This cow skull was decorated in a similar technique; I just added lots more detail.

If you’re interested in any of the items used in this project, we’d appreciate it if you used our affiliate links. Clicking these links earns us a small commission at no extra cost to you, helping us create more inspiring and exciting projects to share. We’d also love to hear your thoughts—feel free to leave a comment or share this post!

85 Comments
Marie-Interior Frugalista
October 14, 2020 at 1:58 amGood answer! I laughed out loud at your response to the guy at the thrift store. I would’ve had a sassy response too. Oh my word, Anita, what you did with the mannequin is absolutely amazing! Girl, you are the Queen of Steampunk! I could sit and stare at this for hours looking at all the bits and bobs. The opened zipper on the back – the lace up sides – the gear armholes – so creatively brilliant. I think Miss Mannequin is looking sexy and a little badass!
Anita Holland
October 14, 2020 at 1:50 pmThank you so much Marie, she is by far my favourite steampunk creation I don’t think I will top her very easy.
Rebecca Payne
October 14, 2020 at 5:12 amOMG! what a great and very creative idea and job.
Anita Holland
October 14, 2020 at 1:51 pmThank you so much Rebecca, she was a long time in the making and turned out better than I had hoped.
Cheryl r Atkinson
October 18, 2020 at 11:04 pmI saw this on Facebook and I must say I was in awe. What a magnificent creation. You have a great imagination. Great job!!!
Anita Holland
October 20, 2020 at 11:13 pmThank you so much Cheryl, I do seem to have a taste to the different, but that is what every project so much fun.
Lydia C. Lee
October 14, 2020 at 6:46 amYou really are clever. That’s quite amazing!
Anita Holland
October 14, 2020 at 1:54 pmThank you Lydia, she is pretty badass as Marie said.
Lucrecia
October 15, 2022 at 6:17 pmMis más sinceras felicitaciones, desde Buenos Aires, Argentina, magnífica obra. Este año comencé con el stempunk, me fascina!!!!!
Anita Holland
October 16, 2022 at 7:07 pmThank you so much. I have lots of steampunk projects on my Facebook page that I don’t post on my website if you want more inspiration. You can find the link on the social media tabs on my website.
Sara
October 14, 2020 at 9:04 amHubs is pulling apart sewing machines right now and saving me all the bits and bobs so i can try steampunk too one day! Can’t wait to find the perfect victim to try it on!
Anita Holland
October 14, 2020 at 1:56 pmThank you Sara. I just discovered we have a salvage yard down the road with junk galore. I want to learn to weld so I can try more steampunk ideas.
Sara
October 26, 2020 at 9:49 pmI’ve always wanted to learn how to weld too!
Anita Holland
October 27, 2020 at 2:32 pmI just missed the welding coarse at college so I have to wait until next year. I have always taught myself using youtube, but people have said welding is not that easy. I love the idea of trying to create garden decor using junk.
Karen Oliver
October 14, 2020 at 12:23 pmABSOLUTELY FANTASTIC !!!
Anita Holland
October 14, 2020 at 1:56 pmThank you Karen that is very kind of you to say.
Michelle Leslie
October 14, 2020 at 7:33 pmNo flippin ways Anita. She is gorgeous!!!! Every single detail is just so well thought out and WOW. I’m kinda at a loss for words right now. I love Steampunk stuff and this mannequin must be one of the most beautiful examples I’ve seen. She can come live in my house anytime
Anita Holland
October 20, 2020 at 11:02 pmThank you so much, Michelle, I am so addicted to steampunk I just can’t stop. She was so popular and got snapped up straight away.
Ida P. Krause
October 15, 2020 at 6:28 amOh my gosh this is totally amazing! You did a fantastic job with this mannequin. You are certainly a very talented person.
Anita Holland
October 20, 2020 at 11:02 pmThank you so Ida that is very kind of you to say.
Cecilia
October 16, 2020 at 7:29 amAnita, you’ve perfected steampunk to an art–the details are amazing! Thanks for sharing at Vintage Charm. Pinned & tweeted!
Anita Holland
October 20, 2020 at 11:04 pmThank you so much Cecilia, this one been by far my most popular.
Tania
October 16, 2020 at 11:46 pmWow… wow… this is amazing!!
Tania
Anita Holland
October 20, 2020 at 11:04 pmThank you so much
Ann
October 17, 2020 at 6:38 amYou knocked it out of the park with this one, Anita. I sent you a message via your form – hope you got it!
Anita Holland
October 20, 2020 at 11:05 pmThank you so much Ann, this was the only message that I received from you.
Ann
October 22, 2020 at 10:19 amHow strange. I used your contact form. Email me when you get a chance.
Jasmine
October 18, 2020 at 12:25 amHello Anita, you have an amazing talent. This is yet another masterpiece!
Anita Holland
October 20, 2020 at 11:09 pmThank you so much, Jasmine, that is such an amazing comment.
Joyce
October 18, 2020 at 2:05 amAll I can say is “WOW”. You have inspired me to try soemthing new.
Anita Holland
October 20, 2020 at 11:10 pmThank you so much Joyce for the great comment. I am so glad I can inspire you to have a go.
Tamar A Strauss-Benjamin
October 19, 2020 at 8:46 pmSo cool!
Anita Holland
October 20, 2020 at 11:13 pmThank you.
Lisa | Handmade in Israel
October 19, 2020 at 10:31 pmWow, you did a great job! Love seeing the process and love the comment you made to the guy in the shop 🙂 #MMBC
Anita Holland
October 20, 2020 at 11:15 pmThank you so much Lisa. With this technique, I have no idea how it will turn out until the end. One advantage of mixed media is that if you are unhappy with the result you can paint over it and start again.
Anne Sweet
October 19, 2020 at 10:47 pmFantastic result, I loved reading all the little details about how you made it. Totally fascinating and superb work.
Anita Holland
October 20, 2020 at 11:17 pmThanks Anne, I just make it up as I go along. I really enjoy watching it all come together.
Anita Holland
October 20, 2020 at 11:29 pmThank you so much for the feature, it really does mean a lot.
Julie
October 25, 2020 at 11:26 pmBlimey, she’s one super cool sexy lady isn’t she? I have to say, about 1/4 of the way through with just the glued on leather she was looking everso slightly less sexy but as you added all the finishing touches it really came together.
I love your sassy response to the guy in the shop – cheeky!
Anita Holland
October 27, 2020 at 2:30 pmThank you so much Julie, my style of mixed media is always very messy during the process. I think this is the reason other people give up because they cant see past the mess. I was pretty proud of my comment. lol
Kippi Ohern
October 27, 2020 at 12:35 amYou are so talented. I had no idea how much work something like this took.
It turned out perfect!!!
Have a great day,
Kippi
Anita Holland
October 27, 2020 at 2:34 pmThank you so much Kippi. It does take a long time but so much fun to see the progress and the final results.
Kim
October 27, 2020 at 2:44 amYou really do the most amazing work! Absolute gorgeous and better than any mannequin art I’ve ever seen.
Anita Holland
October 27, 2020 at 2:35 pmThank you so much Kim, that is a brilliant complement which has made my day.
Michelle @ The Painted Hinge
October 27, 2020 at 7:03 amThis is gorgeous Anita! I love steampunk style!
Anita Holland
October 27, 2020 at 2:36 pmThank Michelle, It has been a steampunk year for me, totally addicted to the look.
Kim Purvis
October 27, 2020 at 9:57 amThis is a work of art girl! It belongs in an art gallery! You are amazing. You should sell this stuff!
Anita Holland
October 27, 2020 at 2:38 pmThat is so kind od you to say kim. I see myself as a crafter but this piece has been called art a lot, so I am thrilled. I did put her up for sale and she sold in minutes, with others asking for the next one I make.
Naush Samama
October 27, 2020 at 11:19 amAbsolutely AWESOME !!!! I would’nt even know where to start from ?? Where did you buy your resin moulds from ? These are really WICKED !!
Thank you very much for sharing with us at Meraki Link Party.
Naush
Anita Holland
October 27, 2020 at 2:40 pmThank you Naush, when I started I had no idea where I was going with it either. If I did not like something I just covered it up with the next piece. The mould I got some from Amazon and some from China. There are some links on my site to some of them.
Libbie@alifeunfolding.com
October 27, 2020 at 11:56 amThis is so very creative! I hope you have it displayed front and center! Gorgeous work.
Jennifer
October 27, 2020 at 1:04 pmThis is so amazing!!! The whole mannequin is awesome but there are so many interesting things on the back. You are so talented!!!
Meegan
October 27, 2020 at 1:26 pmWow wow and wow! This is absolutely incredible. Not only as an art piece but your creativity just exudes from this mannequin. Just amazing!
Kristi @ Chatfield Court
October 27, 2020 at 6:23 pmTruly creative and a real work of art! Amazing work!
Anita Holland
October 31, 2020 at 12:55 pmThank you so much.
Dee | Grammy's Grid
November 1, 2020 at 8:18 pmWOW, what a mannequin! Very creative. Thanks so much for linking up with me at my #UnlimitedMonthlyLinkParty 18, open until November 26.
Anita Holland
November 2, 2020 at 7:49 pmThank you so much for the shout out.
Carolina Gonzalez
December 22, 2020 at 4:00 amAnita, that mannequin piece is a total work of art. It should be displayed in a Gallery somewhere. Wow. I absolutely love it.
Anita Holland
December 25, 2020 at 12:12 pmThank you so much for the awesome compliment. I have always seen it as crafting but from the comments, other people think otherwise.
Rachelle
February 27, 2021 at 11:32 amAnita, you have the most unique creations. Truly amazing. I incorporated the steampunk into scrapbooking for years, so it’s a favorite of mine.
Would love it if you came over and added one of your creations to my Friday with Friends link party.
Happy crafting to you!
Rachelle
March 5, 2021 at 6:54 amAnita, I so in awe of your talent, and am happy to feature you and you steampunk mannequin at the Friday with Friends link party!
Anita Holland
March 7, 2021 at 12:14 pmThank you so much, That is so kind of you to say.
Valetta R Mody
May 28, 2021 at 9:28 amI absolutely adore the Steampunk Mannequin. Thank you so much for sharing.
Anita Holland
June 1, 2021 at 1:44 pmThank you so much for the lovely comment, she was a labour of love.
Kim J Patterson
November 8, 2021 at 1:06 amJust a query regarding the clear finishing spray. The krylon brand which the link leads to is nearly $100 and others are around $30. Is there a difference between them which affects the finished product?
Anita Holland
November 8, 2021 at 11:32 amHi Kim, You can use any clear polyurethane. The product I used here in America is not available outside the country. I have used the really cheap brand in the past and they worked fine as long as you do light coats and let them dry before you reapply. The biggest issue when you add it to the leather is that it can take up to a week to stop being sticky depending on the weather.
Kaz Musa
April 27, 2022 at 2:24 pmOmg i found u again lol. I lost u there for awhile!
Anita your amazing hon. I saw this along time ago and was really inspired to make one too.
Over the years I’ve made quite a few with paper mache and material.
I’ve then cut it off the mannequin and turned them in to lamps..but not a full on steampunk one.
I’ve made many steampunk hats and wall art but the ol mannequin just evaded me. Your tutorial is so thorough and totally understandable..😃😁 thanku so very much for taking the time and effort to not only do this project but to explain and share it with us.
I’ve got boxes of gears and clock parts..motorcycle parts and bric-a-brac around here so I best dig it all out. Sadly I’m sitting amongst packed boxes waiting for a home to move into and rent but no luck yet..basically everything is packed and I’m going stir crazy lol. Been like this for about 3months but have to be ready to go at a moments notice!
But guess what is sitting on top of all the boxes in my craft room? My mannequins..lol!
We will see! Anyway just wanted to thanku for the inspiration and brilliant tutorial.
Your amazing
Cheers Kaz from Oz xx
Joshua Farr
July 28, 2022 at 10:46 amOne of these just sold at a store in Indiana for $100.. I couldn’t get them to ship it to me and am so disappointed. These are amazing!
Anita Holland
July 29, 2022 at 2:49 pmWow, that was a bargain, pity you lost out. I sell mine for $600 without postage. They take an average of about 50 to 72 hours to make.
Kathi
August 19, 2022 at 9:01 amWow! That’s amazing! Thank you so much for the detailed instructions, notes, and step-out photos. I pinned it!
Anita Holland
August 23, 2022 at 8:11 amThank you so much Kathi, I really appreciate it.
Krys
August 21, 2022 at 6:30 pmOmg…..u have more amazing mannequin’s. ALL of ur work is extremely AMAZING!! I could just sit & look at ur pieces for hours. I can’t even imagine all the creativity that goes on in ur mind. Oh, to see a glimpse! I have a paper mâché mannequin about 10” tall that I may try my hand at. I recently bought Anna‘s new molds. I’ve been making a lot of gears w/air dry clay. My pieces will be flexible to bend around the body. Ur work is definitely an inspiration!! Thank u SO MUCH for sharing ur tutorial!! I can’t wait to see more of ur work. Ur a brilliant artist!!🥰🥰
Anita Holland
August 23, 2022 at 8:15 amThank you for the wonderful compliment, I look forward to seeing your finished mannequin.
Cheryl B Acampora
May 24, 2023 at 11:31 pmWOW! I just found this post. YOU ARE AMAZING!!! That is the coolest thing I have ever seen. Your work is SPECTACULAR!!
Anita Holland
May 26, 2023 at 12:06 amThank you so much, your comment has made my day. 🥰
Rachel Bias
October 2, 2023 at 1:54 amYou are amazing!!! Thank you for sharing in detail!! Not a lot of people will do that!. I’m about to start on mine now!
Anita Holland
October 11, 2023 at 6:45 amThank you so much. I love sharing my ideas, I can always tell when someone has used my tutorial and feel great it has inspired others.
Carley Sassmann
December 11, 2023 at 12:36 amI’m so in love! 😍 does anything change in the process if you use real leather? I have a number of leather upholstery samples and I’ve been waiting for a brilliant way to use them. Also, any leads on items to dismantle to get a volume of gears etc. ??? Have you done any male forms? Thanks so much for sharing your creative process and your stunning finished product with the world. What a gift. Cheers ✨
Donna
December 12, 2023 at 8:35 amCould you tell me what sizes you cut out the patchwork pieces?
Anita Holland
December 13, 2023 at 4:06 pmHi Donna, I cut them to random sizes, this will give you a better look. I just tended to try and keep them squarish.
Anne Humphries
December 30, 2023 at 4:11 amHi Anita absolutely beautiful, so have inspired me to do one myself, I have done a picture bottles etc but this is a project. Managed to pick up a cloth Mannequin on a stand the body is cloth, can you recommend glue for this please, I think maybe will be easier to stick the leather to many thanks love your work Anne
Anita Holland
January 16, 2024 at 9:35 amSorry for the delay, I would recommend the crafters pick ultimate glue. It works on everything.
Lenita
June 28, 2024 at 10:32 amJust discovered you today. I know I’m late, but this mannequin is absolutely gorgeous! I’ve been drooling at it for the last half hour. I too love steampunk, but this is on a whole other level! Amazing to look at and inspiring. Makes me want to make a corset!
Anita Holland
July 9, 2024 at 4:54 pmThanks so much for the lovely compliment.
Aluminium Can covered Steampunk Mannequin -
March 30, 2025 at 8:45 pm[…] you missed my first steampunk mannequin here is the […]