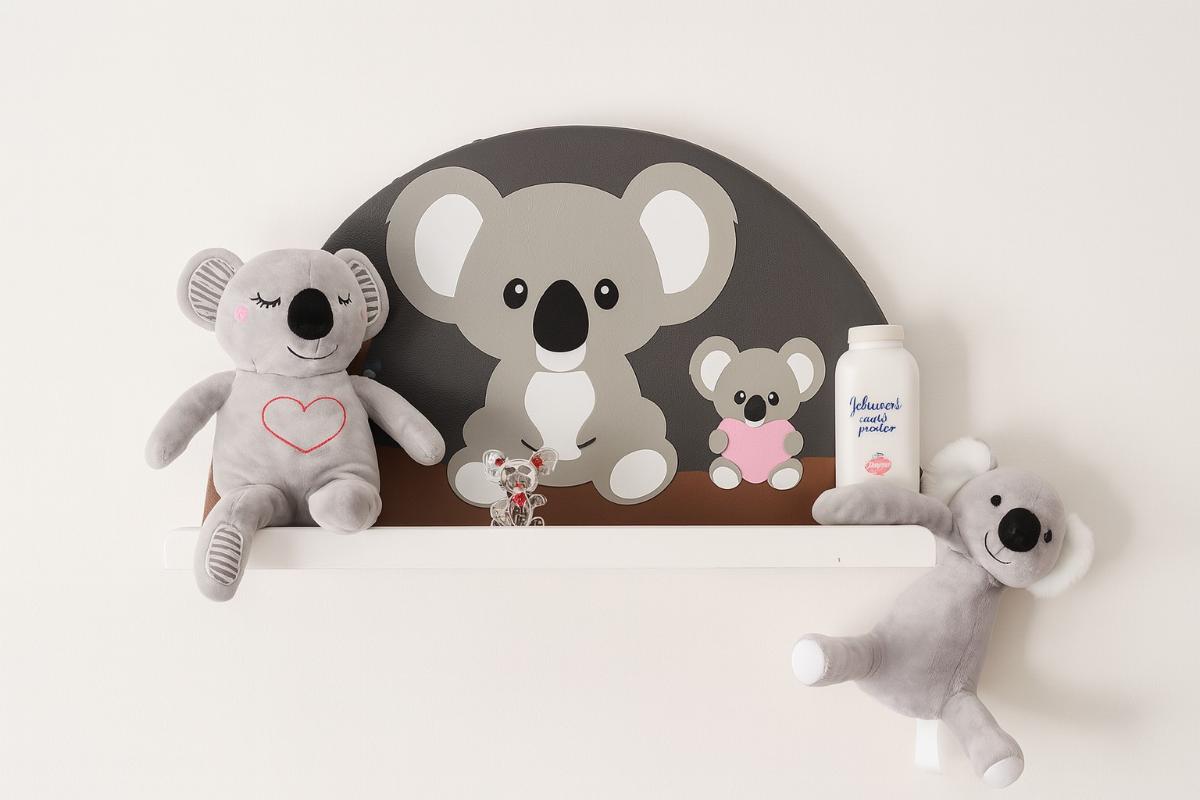
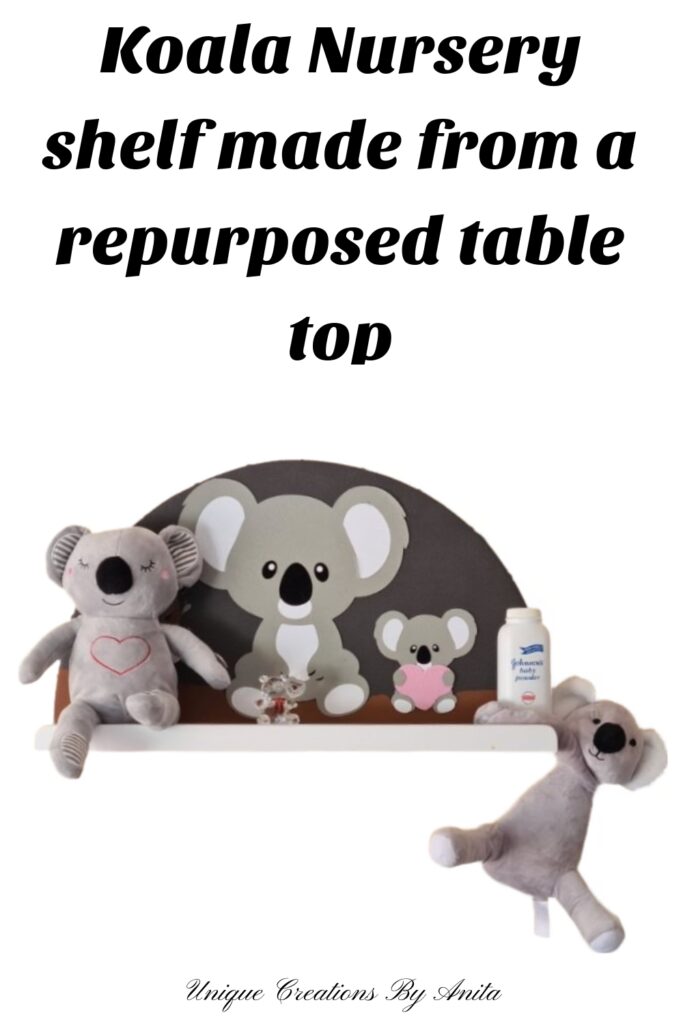
Becoming a Nana inspired this DIY Koala Nursery Shelf—a sweet, space-saving feature that fits my grandson’s Australian native animal theme. I couldn’t find a shelf that matched the look we wanted, so I repurposed a toddler play table and used my Cricut to add layered koala details. It’s budget-friendly, sturdy enough for books and décor, and the faux-leather backing adds cosy texture you’ll love.
I’m thrilled to be joining the Do It Over Designers Blog Hop, hosted by Ann from The Apple Street Cottage. Each month, we upcycle or transform something old into something fresh. You’ll find the other makers’ projects at the end—go have a stickybeak for more clever ideas.
Before we dive into this tutorial, be sure to subscribe to my bimonthly newsletter to be the first to see my latest projects. You can also follow me on Pinterest and Facebook, where I also include my unique mixed-media art projects
How to make a Koala nursery shelf (Cricut Project)
**This post may contain affiliate links. This means I earn a small commission on links used at no extra cost to you. Please see my disclosure policy for more information.**
Materials & Tools
- Repurposed toddler table (or 18–19 mm plywood offcut)
- Cricut cutting machine + Cricut Design Space
- Koala SVG or layered design (purchased from Etsy)
- Grey faux leather (for koala pieces)
- Optional: flocked HTV
- Faux leather or vinyl sheet (for the arched backing)
- Crafter’s Pick The Ultimate Glue or Tacky glue
- Jigsaw
- Wood clamps
- Wood glue, staple gun + 6–8 mm staples
- Upholstery tacks (decorative)
- Drill/driver, countersink bit, small wood screws
- Keyhole hanger/bracket, self-adhesive Velcro
- Orbital sander and Sanding disc (120–180 grit),
Cutting the shelf
Plan the Design and Prep the Tabletop
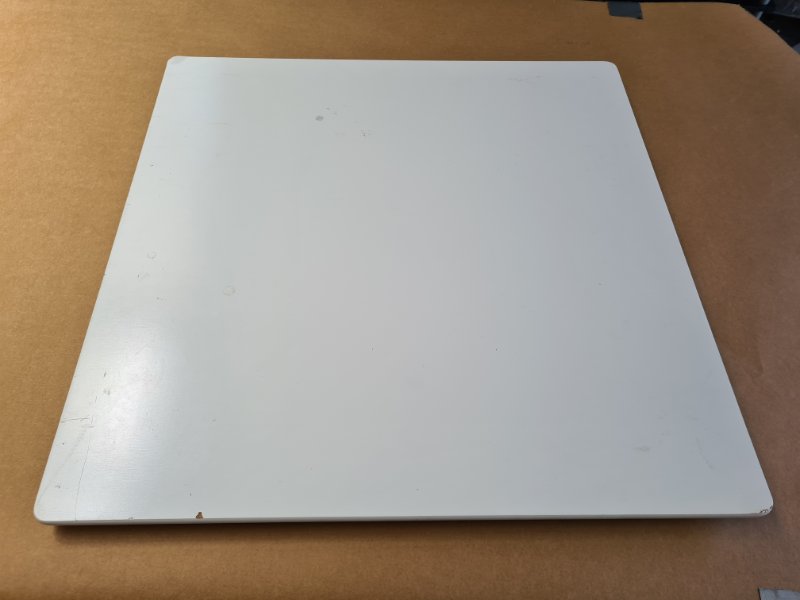
I began with a white-painted toddler table top, which saved time on prep. The tabletop had a few surface marks, but I planned my cuts to avoid those areas.
Before I got started, I chose a design from Etsy and sized it in Cricut Design Space, cutting the decal to use as my cutting template. With the vinyl positioned on the board, I measured carefully and divided the remaining wood into two pieces: a larger section for the shelf base and a slimmer strip for the front lip to keep books and décor from sliding off.
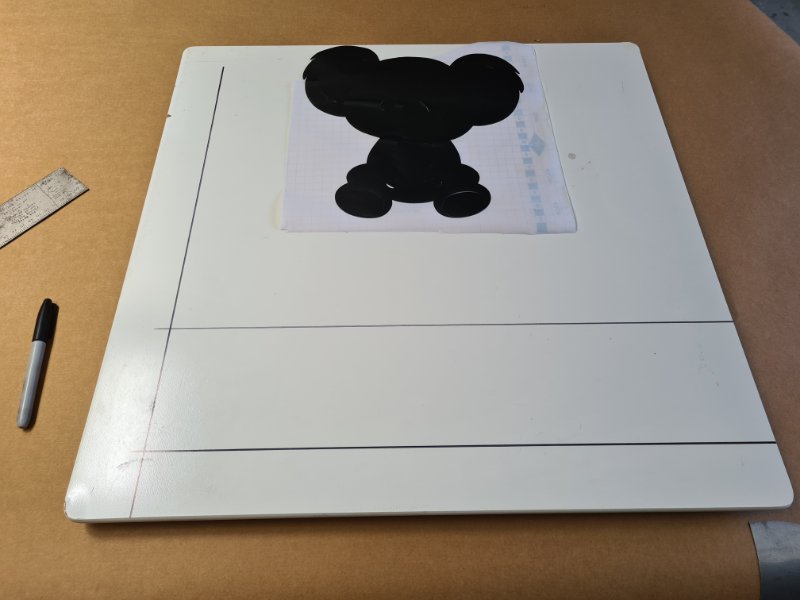
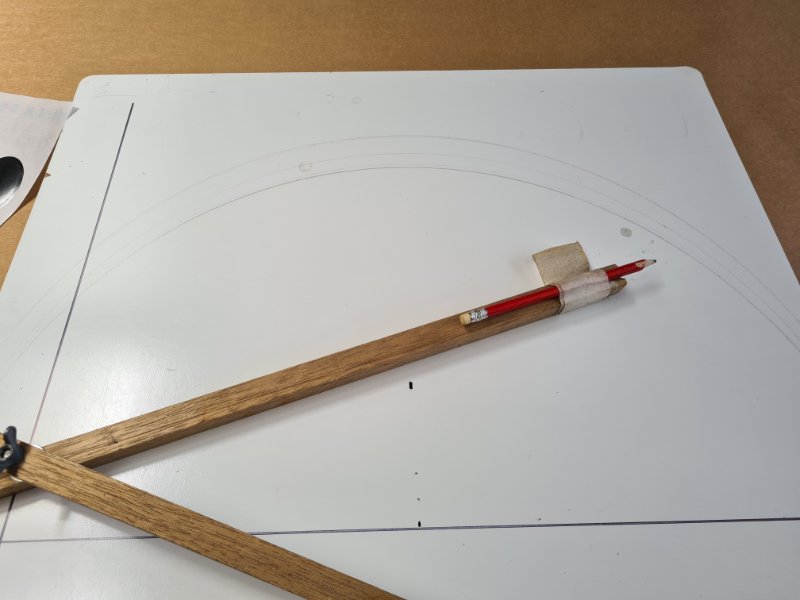
To create the arch, I used a homemade compass suited to larger projects. I found the centre of the board, drew a guideline, and followed it to make a precise, symmetrical cut.
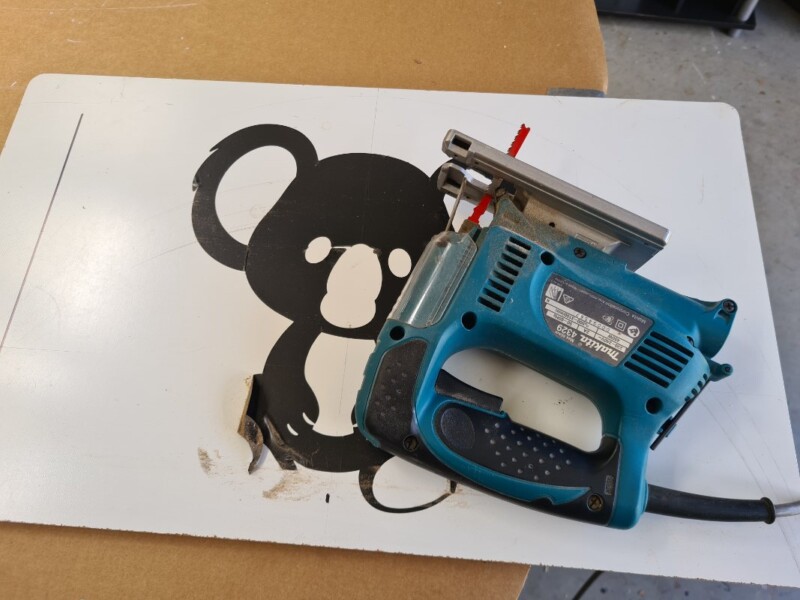
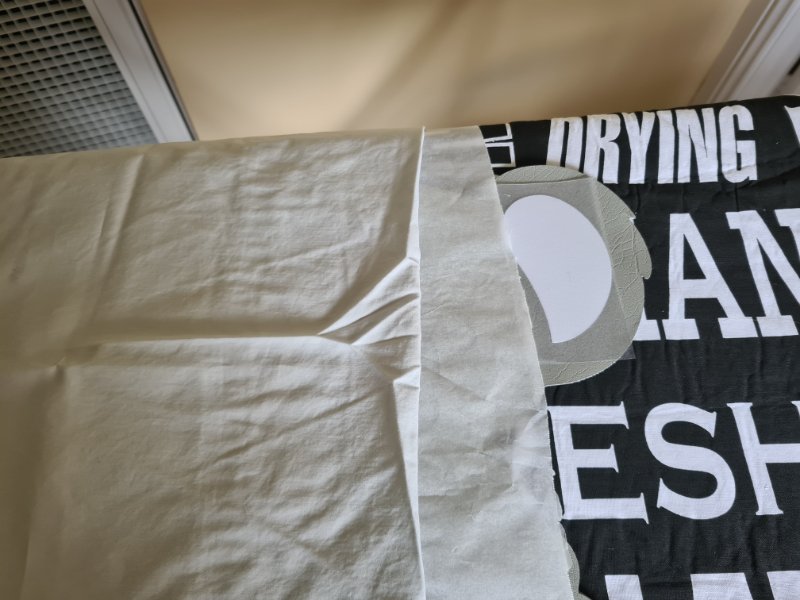
Here’s where I made a rookie mistake—I skipped masking tape along the cut line, and the plywood splintered. If you’re cutting plywood, run masking tape on both sides of the line for a cleaner edge. I cut the arch with a jigsaw; with the tape in place, the finish would have been much smoother.
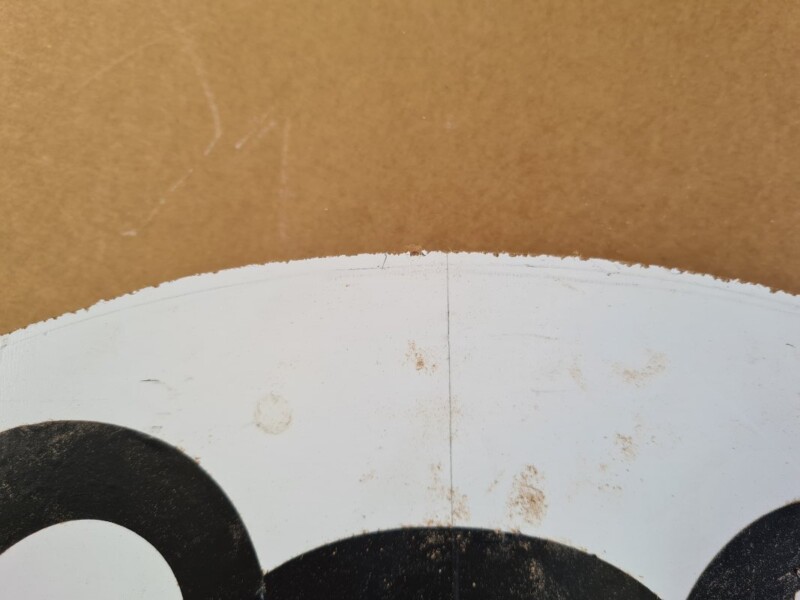
In the image below, you can see the effects of not applying masking tape before cutting.
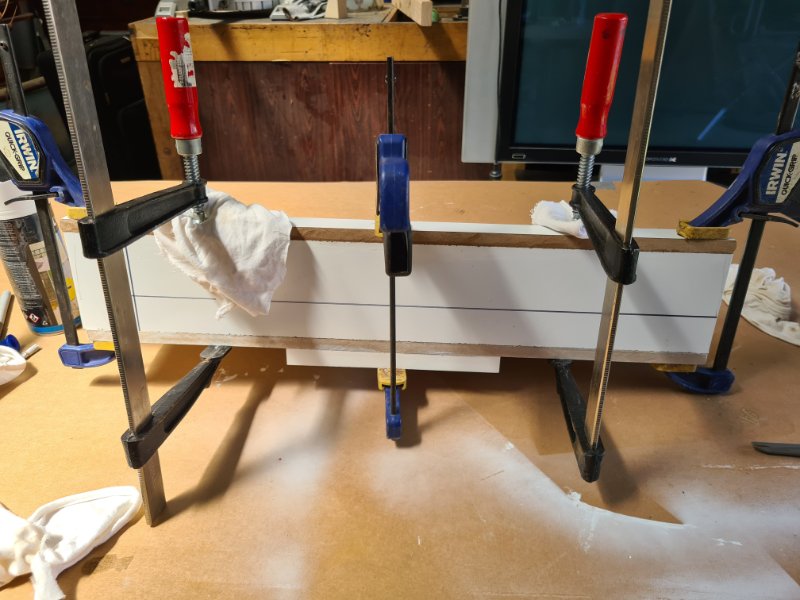
Assembling the shelf
I applied wood glue along the front edge of the shelf, positioned the lip, and clamped it tightly until the glue dried for a strong, secure bond.
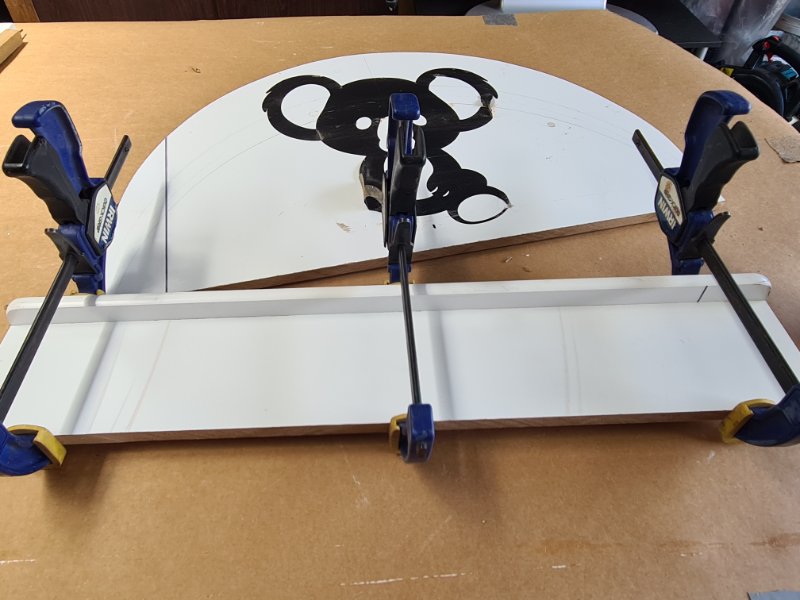
Once the glue had cured, I attached the back to the shelf base. I pre-drilled pilot holes and secured the joint with wood screws. I always recommend drilling pilot holes first—it prevents splitting and gives a clean, professional finish.
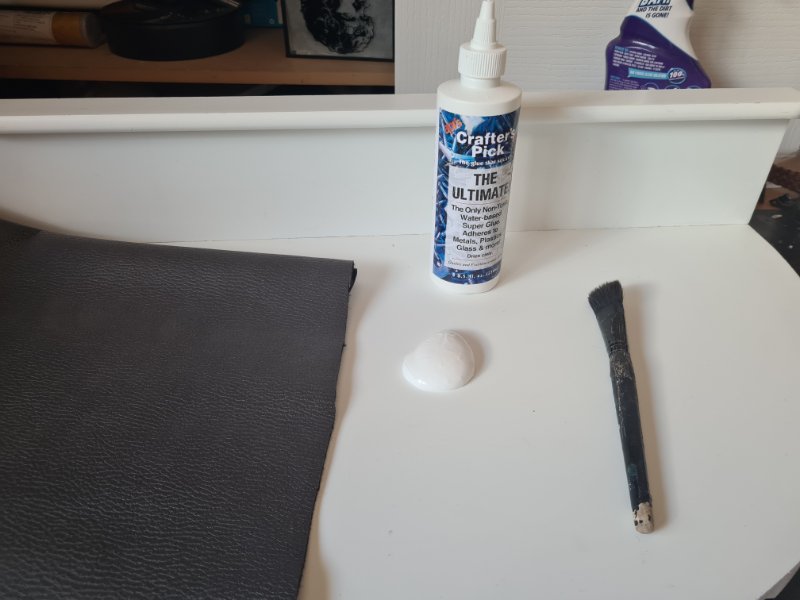
Adding the fabric
To give the shelf a unique, textured finish, the back is lined with faux leather before the koala details go on. For adhesive, I used Crafter’s Pick The Ultimate Glue—reliable across multiple surfaces, and it dries clear for a clean result.
The faux leather was cut to match the arch, leaving a 3 cm allowance to wrap and staple on the back. After brushing on a thin, even coat of glue, the piece was laid in place, bubbles smoothed out, and left to dry completely before the next step.
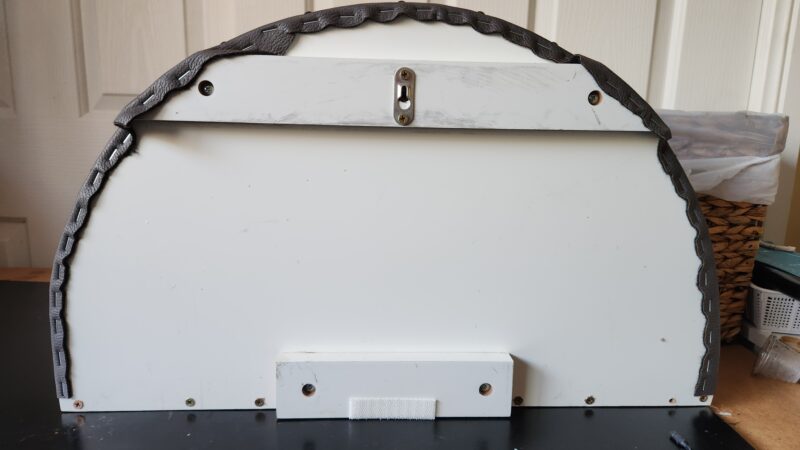
Once the glue had dried, I stretched the faux leather tightly over the arch and secured it by stapling it to the back. To add a decorative touch, I finished the look with upholstery tacks around the arch, giving the shelf a stylish appearance.
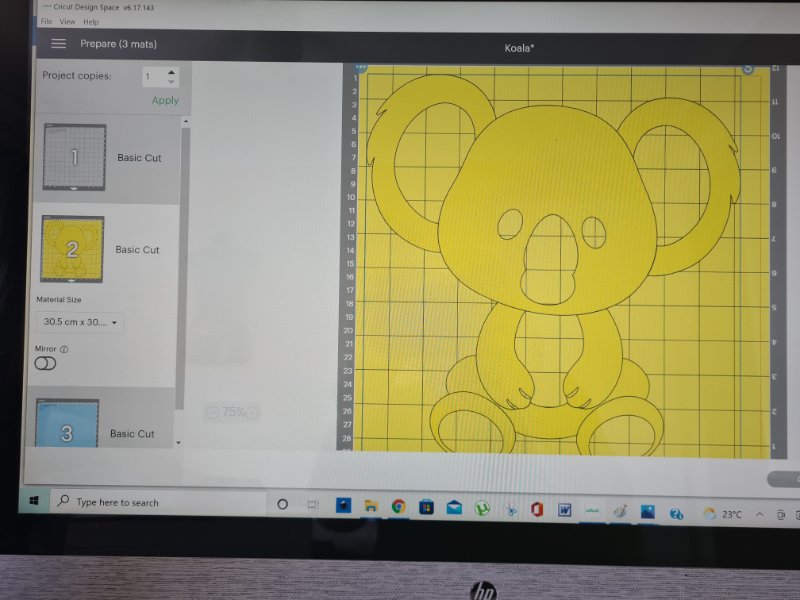
Adding the design
I used my Cricut machine to cut out my designs, first uploading them into Cricut Design Space and resizing them to fit perfectly. The software breaks down the design into different layers for easy cutting.
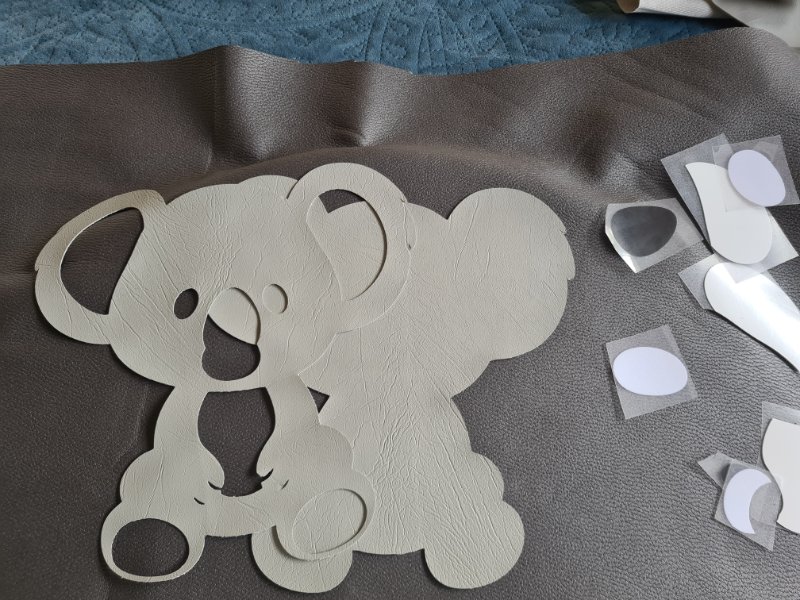
Assembling the design
I initially cut the design from flocked HTV vinyl, but I worried that ironing it onto the textured faux leather might distort the design due to the fabric’s ripples. I was also concerned about scorching the faux leather or the heat affecting the glue underneath. In the end, I decided to cut the shapes from grey faux leather, which I knew would adhere securely with Crafter’s Pick The Ultimate Glue.
To fuse the layers, either a heat press or a regular household iron can be used. In this project, an iron was chosen, working one layer at a time. Parchment paper and a cotton pillowcase were placed between the iron and the vinyl for protection. The iron was pressed down for 30 seconds, with 10-second checks to ensure proper bonding. This process was repeated for each layer.
Follow the same process for all the images. I used a scrap of faux leather for the brown strip at the bottom and secured each image with fabric glue. To hang the shelf, I attached a keyhole bracket to the back and added self-adhesive Velcro to keep it firmly in place, preventing any sway when items are added.
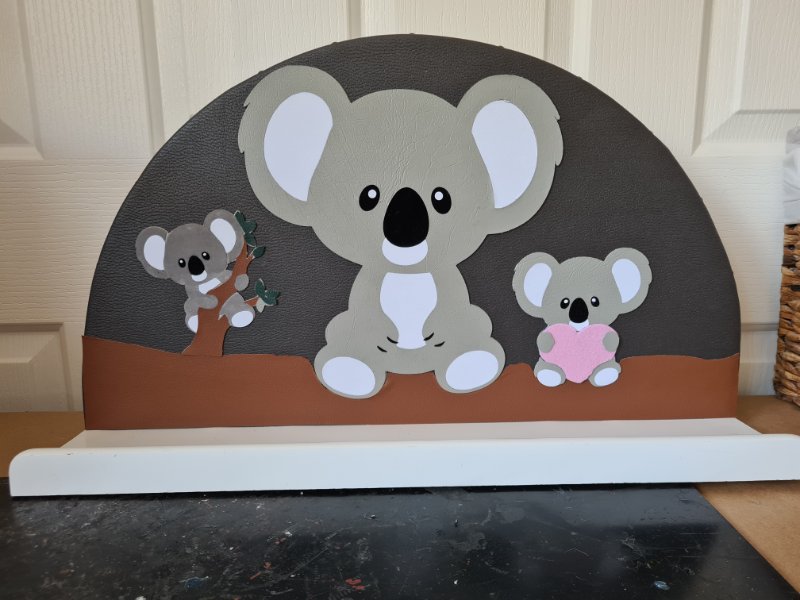
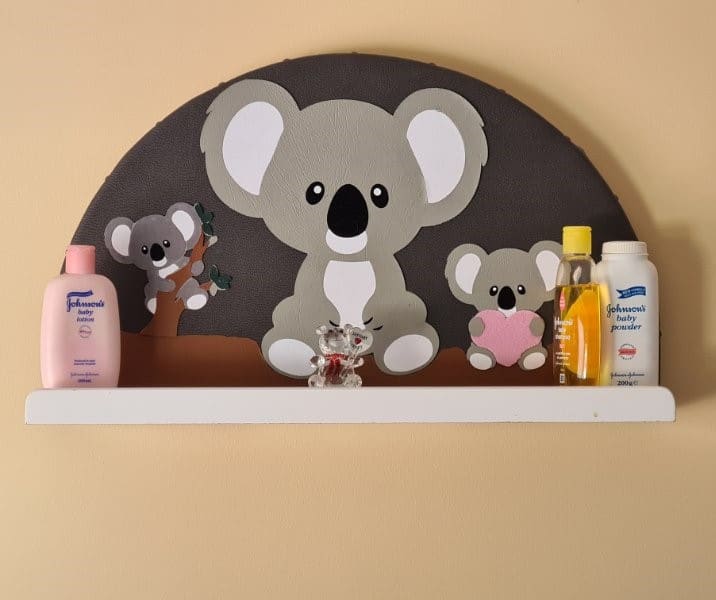
The finished Koala nursery shelf adds a charming touch to his room.

More Diy shelf ideas
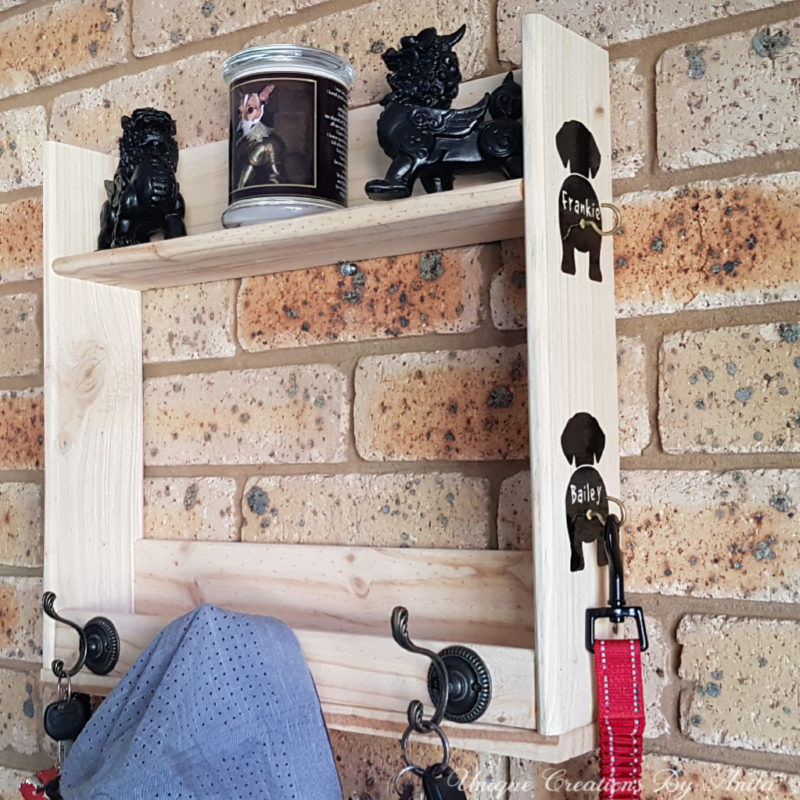
I created a pallet wood display shelf that also functions as both a hat rack and a key holder. You can find more Cricut project ideas for inspiration here.
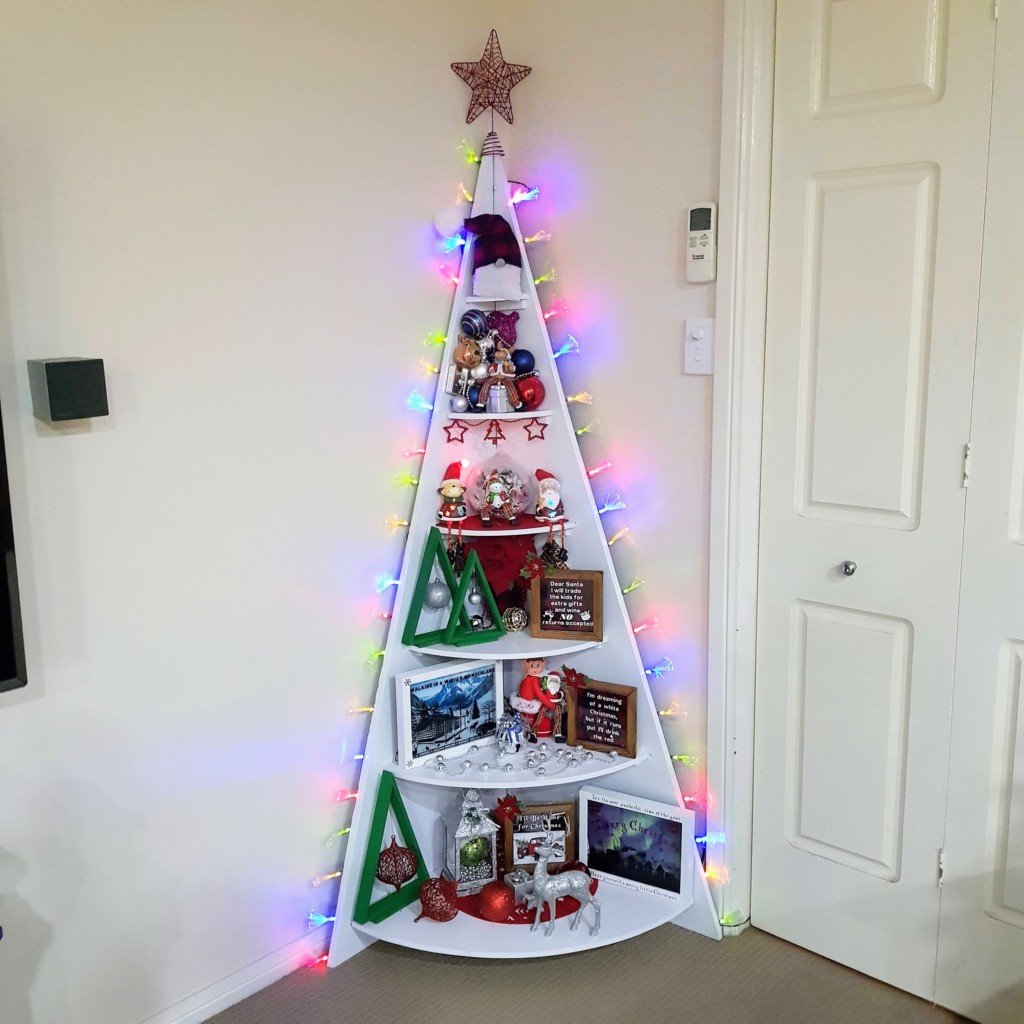
This wooden Christmas tree shelf fits neatly in a corner and serves as a year-round shelf, so you won’t need to store it after the holidays.
Do over designers’ blog hop
As I mentioned, this is the ‘Do It Over’ Designers Blog Hop, and there are some incredible projects to explore! Be sure to check out the links below for some inspiring ideas.

Southern Sunflowers

If you’re interested in any of the items used in this project, we’d appreciate it if you used our affiliate links. Clicking these links earns us a small commission at no extra cost to you, helping us create more inspiring and exciting projects to share. We’d also love to hear your thoughts—feel free to leave a comment or share this post!


21 Comments
Repurposed Thrift Store Art To Creative DIY Fall Wall Decor - Modern on Monticello
September 28, 2024 at 9:00 pm[…] Unique Creations by Anita […]
Kim
September 28, 2024 at 9:26 pmHow cute is that?! Oh my goodness, so adorable. I love that it was mom to the rescue, too! Now your daughter has a personalized piece of decor and a keepsake for her son. Win, win!
Anita Holland
September 29, 2024 at 11:03 amThanks Kim, I have been busy making him so many toys too.
Ann
September 28, 2024 at 10:16 pmAbsolutely adorable and I’m sure your daughter loves it. I love all that my Cricut Maker can do – thanks for sharing another great idea, Anita!
Anita Holland
September 29, 2024 at 11:04 amThanks Ann, I would be lost without it.
sara allen
September 28, 2024 at 10:31 pmI am so impressed with your shelf on so many levels Anita; it’s so cute and professional! Your grandson is one lucky little boy; I would have loved to have a shelf like this growing up!
Anita Holland
September 29, 2024 at 11:05 amThanks Sara, I had so much fun making it. Imagine what can now be done with the Laser.
Gail @Purple Hues and Me
September 28, 2024 at 11:07 pmOh my, Anita! This is so sweet and cool! What a fabulous ideas to create a shelf that is so unique and perfectly themed for your grandson! I know you will have fun designing more new ideas for your grandbaby! He is so fortunate with all the great memories you’ll give him!
Anita Holland
September 29, 2024 at 11:05 amThank you Gail, it does look good on his wall.
Patti @ Pandora's Box
September 28, 2024 at 11:25 pmWOW! Amazing vision you have! He will adore this!
Anita Holland
September 29, 2024 at 11:06 amThank you Patti, that is an awesome compliment.
Tania
September 29, 2024 at 1:32 amThis is adorable Anita. Your projects are always so professionally done and precise, it’s impressive. I’m over here all eyeballing things, cutting without masking tape, etc.! Haha!!
Anita Holland
September 29, 2024 at 11:07 amThank you Tania, I think my OCD is the cause of that. 😂
Cara
September 29, 2024 at 2:30 amI love that you made this for your daughter when she was unable to find exactly what she was looking for Anita! What a treasure to hang on to. I wish I had the skills you have to work with my Cricut, I usually get frustrated and throw in the towel, lol. You did an amazing job!
Anita Holland
September 29, 2024 at 11:09 amThank you Cara. I think sometimes people overthink the Cricut thinking it is difficult. I learnt by just playing around using cheap Kmart vinyl so no big cost.
Tuula @ Color Me Thrifty
September 29, 2024 at 4:06 amOh my gosh that is totally adorable Anita! What a great repurpose from that table top. Who doesn’t love koalas? Soooo Cute!
Anita Holland
September 29, 2024 at 11:10 amThank you, and I agree koalas are just the cutest.
Julie
September 30, 2024 at 7:10 amWowza! What a beautiful shelf and such a clever upcycle. That koala design is super cute and this looks great in the faux leather.
Allyson @ Southern Sunflowers
October 3, 2024 at 5:17 amYour shelf is an absolutely amazing project in all respects – wow, wow, wow!!
Donna @ Modern on Monticello
October 9, 2024 at 3:16 amI am blown away by this project. It is so very creative and adorable. Kudos to you for picking up the power tools and making it yourself! Impressive and I definitely pinned it.
Anita Holland
October 15, 2024 at 7:59 pmThanks so much, I am more comfortable with power tools than kitchen appliances 🤣🤣