
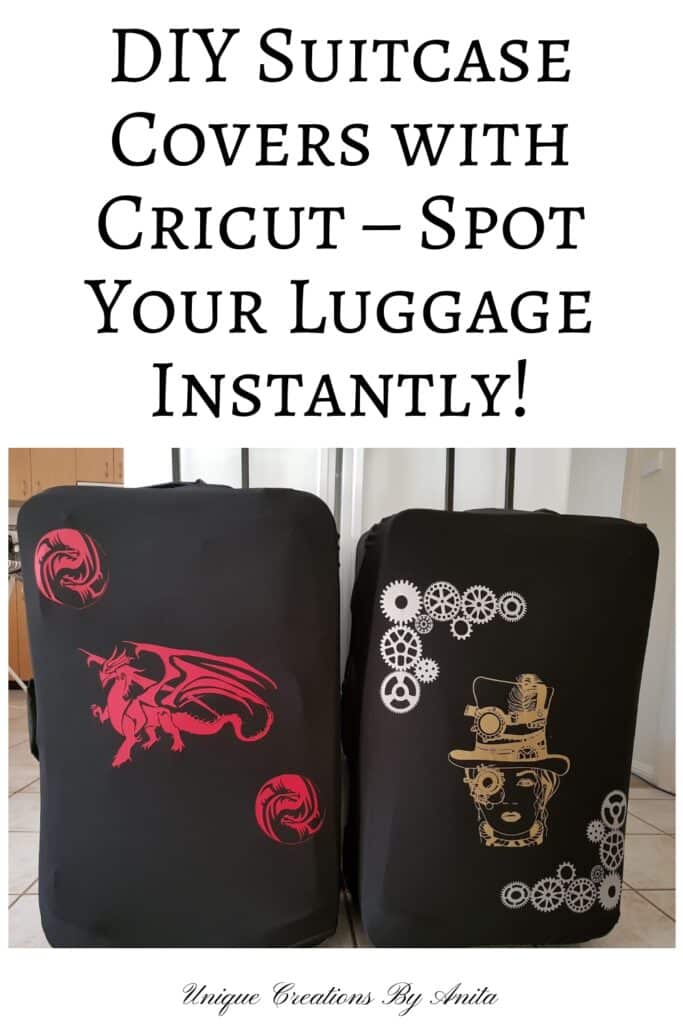
We were heading off on holiday when the idea for this project came to me. Standing at the airport carousel, almost every second suitcase was black — including ours. Everyone was picking up identical bags to check if it was theirs. That was the first reason I wanted custom covers.

The second? Our bags were getting so battered during travel, we had to replace them every couple of years. These custom vinyl suitcase covers solved both problems. They made our luggage easy to spot and protected it from damage.
And let’s be honest — I was looking for another excuse to use my Cricut!
Before we dive into this tutorial, be sure to subscribe to my bimonthly newsletter to be the first to see my latest projects. You can also follow me on Pinterest and Facebook where I also include my unique mixed-media art projects.
DIY Custom Suitcase Covers Using a Cricut and Heat Transfer Vinyl
**This post may contain affiliate links. This means I earn a small commission on links used at no extra cost to you. Please see my disclosure policy for more information.**
Materials Needed
- Cricut Explore Air 2 (or similar machine)
- Heat Transfer Vinyl (HTV)
- Cutting mat
- Weeding tool or craft knife
- Iron or EasyPress
- Pillowcase or Teflon sheet
- Inkscape (free SVG editor)
- Stretchy suitcase cover (plain)
- A hard surface (a board wrapped in a towel)
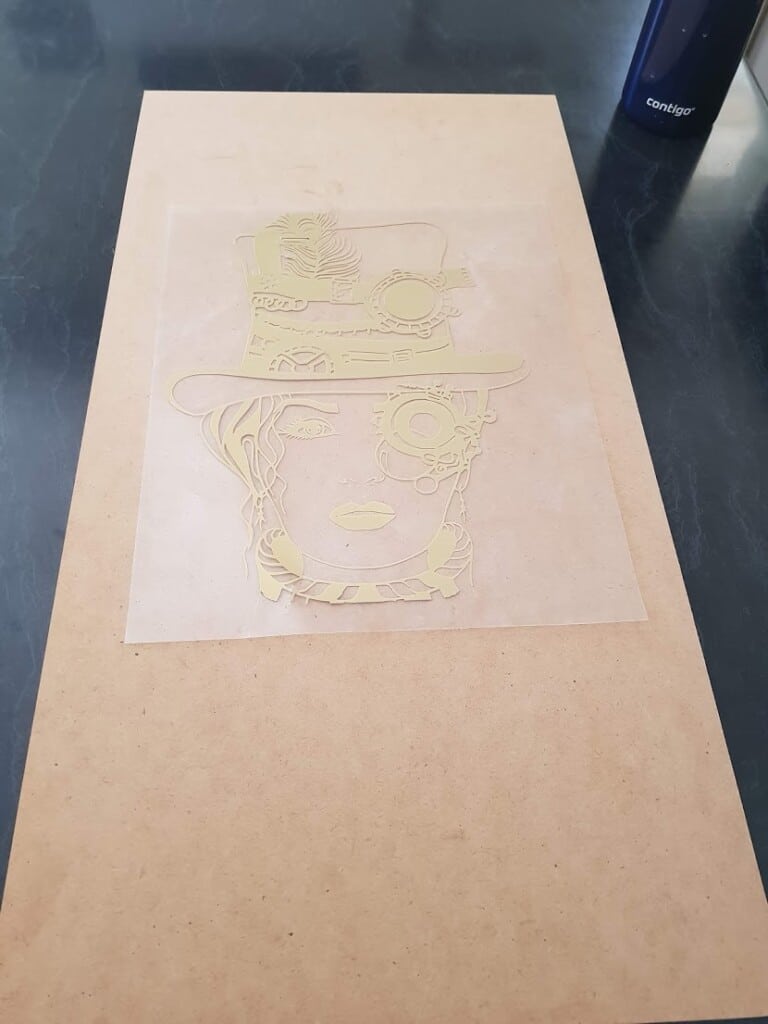
Step 1: Create Your Design
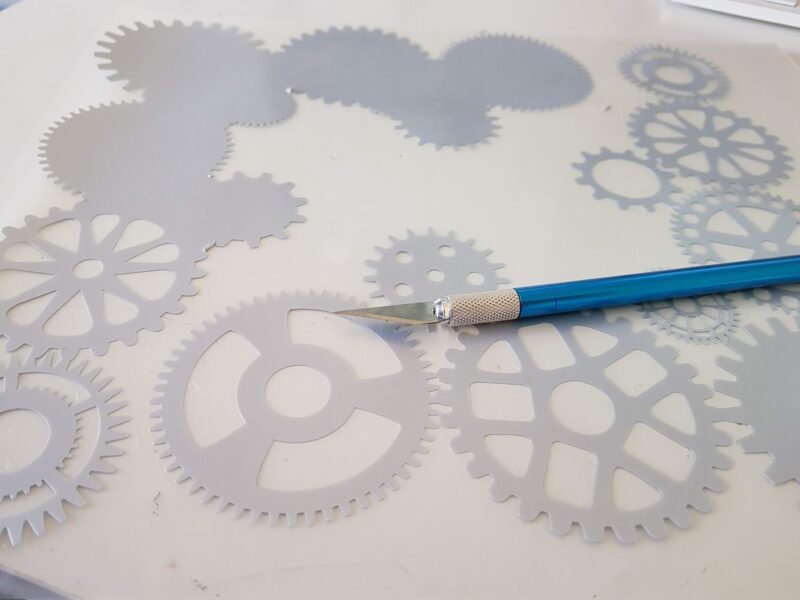
I used my Cricut Explore Air 2, which is a vinyl cutting machine perfect for DIY projects. For this design, I used Heat Transfer Vinyl (HTV) — it bonds to fabric with heat.

Cricut’s software, Design Space, is very beginner-friendly. You can upload your own SVG files or create them in Inkscape — a free tool that converts images into SVG format.

Make sure you check the licence if you’re planning to sell items. Some images are for personal use only.
Once your design is ready, upload it to Design Space. Position it as needed, then select your material. Load the HTV onto your mat shiny side down, mirror the image, and hit Make It.
Step 2: Weed and Prepare
After cutting, remove all the excess vinyl using a weeding tool or craft knife. Only the parts of the design you want to transfer should remain.

For my covers, I chose a steampunk theme because I’m a little steampunk mad right now!
Step 3: Stretch and Transfer
Important tip: Designs with thin lines can break once the cover stretches over your suitcase. I learnt this the hard way.
To avoid this, stretch the suitcase cover over your bag before transferring the vinyl. This helps keep the design in proportion and prevents cracking.

I placed a board wrapped in a towel under the suitcase cover to give a firm surface while ironing. The Cricut heat press works best because it covers more area at once, but a regular household iron works just as well. It’s not fancy, but it does the job!
Place your design onto the cover and put a pillowcase or Teflon sheet over the vinyl. Press down with your iron (or EasyPress) for 15 seconds at a time. Don’t move it around — holding it steady works best.

That’s It – TA-DA!
Now you have custom suitcase covers that are easy to spot and help protect your bags while travelling.
They’re practical, stylish, and fun to make. Plus, it’s another great way to use your Cricut machine!
More Cricut project Ideas
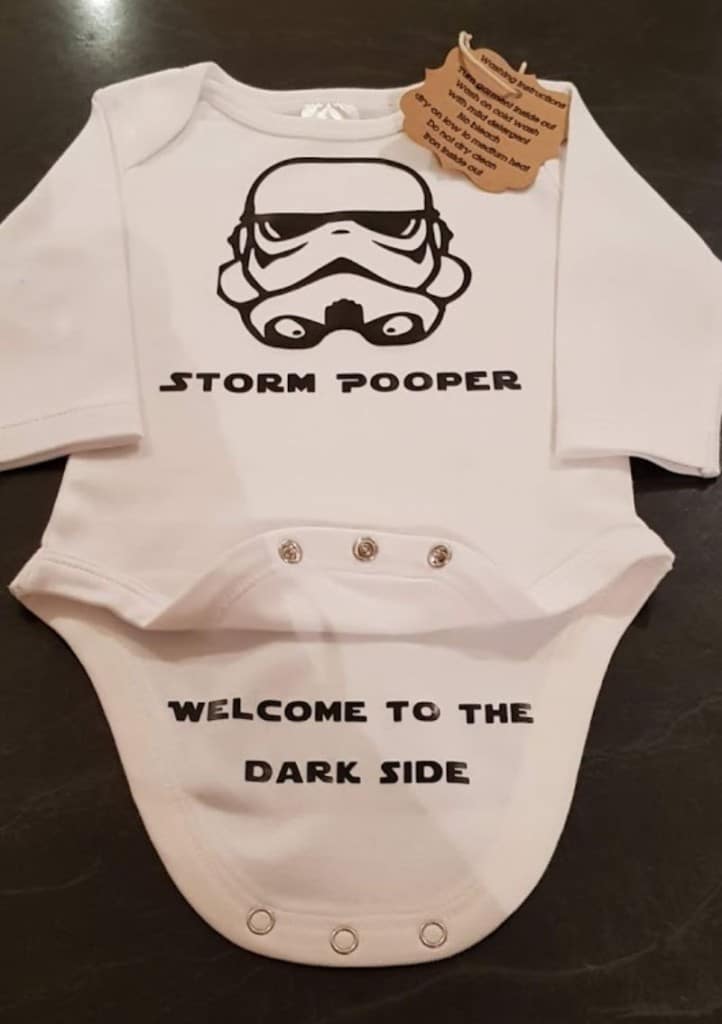
I made these novelty baby onesies using my Cricut — a fun and easy project that’s perfect for gifts or baby showers!
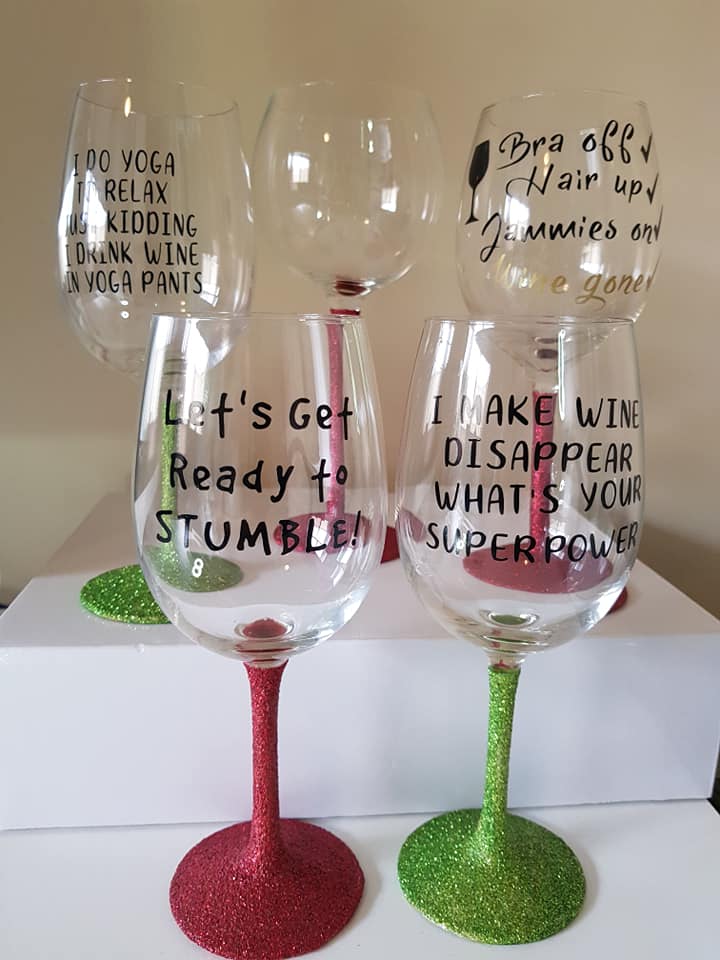
You can also make these novelty wine glasses using your Cricut, adding funny or cheeky phrases for the perfect personalised gift.


1 Comment
DIY Suitcase Cover with a Cricut Design – Home and Garden
April 26, 2022 at 4:07 pm[…] So many crafters have Cricut and silhouette cameos machine nowadays, and we all tend to do the same projects. But we all travel at some point or other so this project is for you. What better way to find your luggage on the airport carousel than with your own custom suitcase covers. They look great and protect your luggage at the same time. See the full tutorial here. […]