
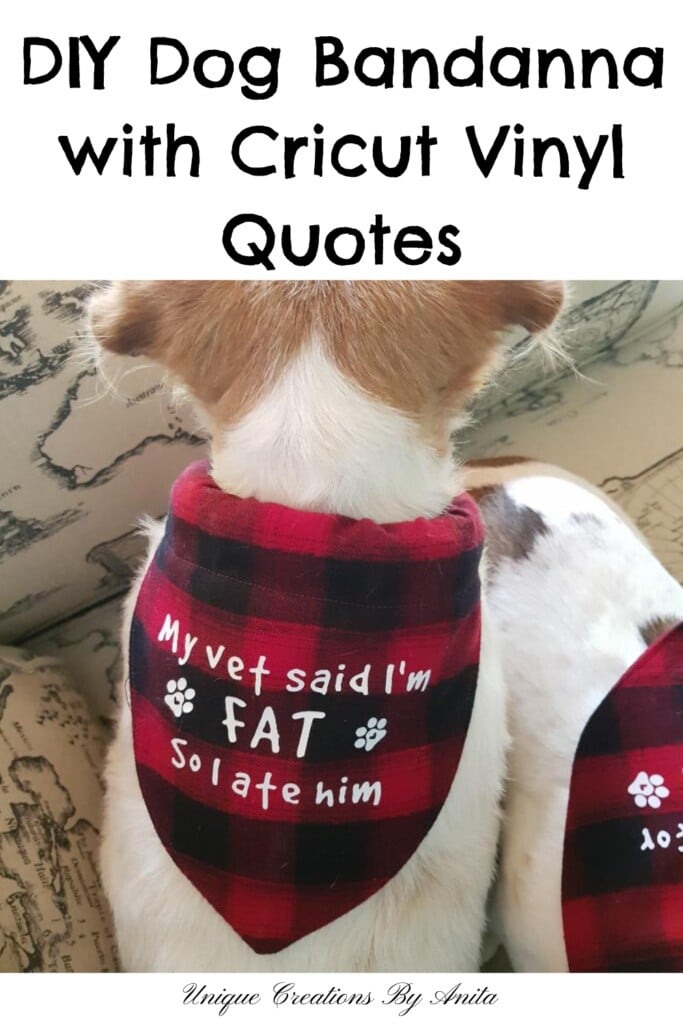
If you want to add some charm and colour to your dog’s collar, this DIY flannel dog bandanna is a fun, budget-friendly sewing project that’s perfect for beginners. With our kids all grown up and out of the house, our cheeky little Jack Russells have quickly become the new stars of my craft room. They love the attention (well, most of the time), and I couldn’t resist making them some personalised dog bandannas using an old flannel shirt destined for the donation pile. It’s a great way to upcycle fabric while creating something both adorable and practical—and with a little added vinyl, these bandannas are as unique as the pups who wear them!

Before we dive into this tutorial, be sure to subscribe to my bimonthly newsletter to be the first to see my latest projects. You can also follow me on Pinterest and Facebook, where I also include my unique mixed-media art projects.
How to Make a Novelty Dog Bandanna from an Old Flannel Shirt
**This post may contain affiliate links. This means I earn a small commission on links used at no extra cost to you. Please see my disclosure policy for more information.**
Materials Needed
- Old flannel shirt or flannel fabric
- Reuleaux triangle template
- Paper and printer
- Fabric scissors
- Sewing pins
- Sewing machine
- Ruler or point turner
- Iron
- Cricut or other vinyl cutter (optional)
- Heat Transfer Vinyl (HTV)
- Parchment paper or a thin cloth
- Dog collar
1. Choose Your Shape
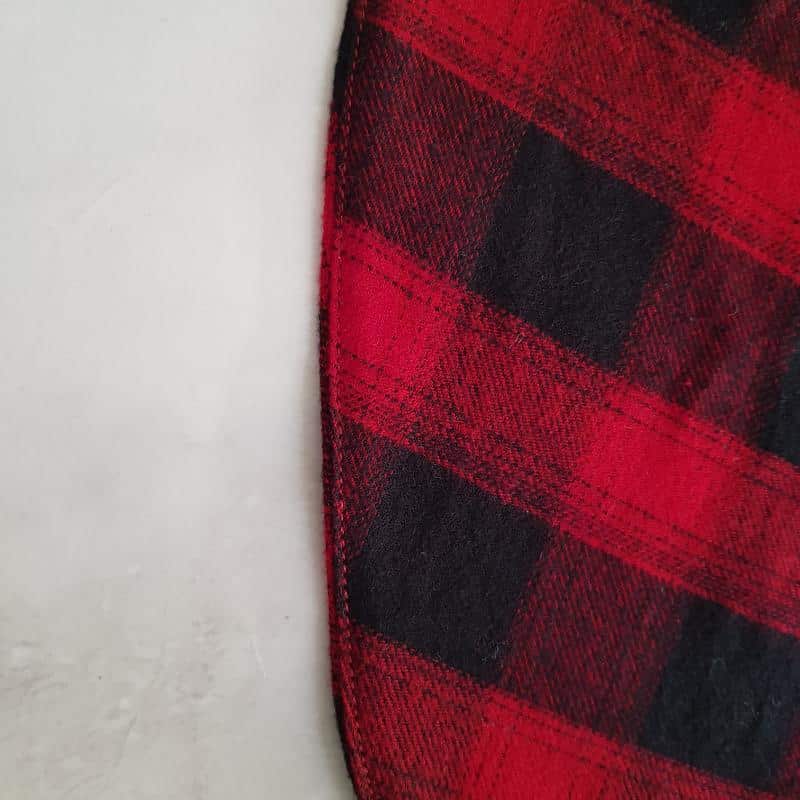
I used a Reuleaux triangle—a curved triangle that creates the perfect bandanna shape. Print the shape onto paper and use it to measure your dog’s neck (if they’ll stay still long enough!). Once you have the right size, fold your fabric in half, place the template along the fold, and cut out the shape.

This should be the shape you end up with.

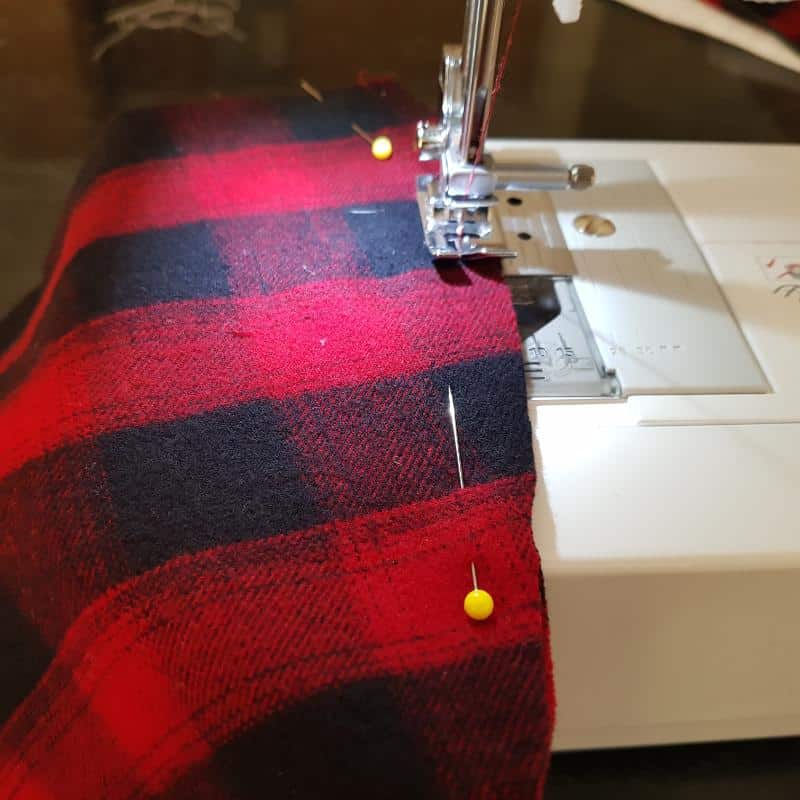
2. Sew the Bandanna
Fold the fabric right sides together. Pin the edges to stop them shifting as you sew.

Sew a seam around the edge, about 1 cm in from the border. Leave a small gap to turn it the right way out.
Before turning the bandanna right side out, trim the excess fabric around the seams. This will make the bandana less bulky. As an alternative, you could leave a gap on both sides and simply slide the collar through. I chose a sturdier method by sewing a collar pocket instead. My dogs tend to drag each other around by the bandannas, so a stronger design was definitely needed!

Turn the fabric right side out. Use a ruler or point turner to gently push out the corners and smooth the seams. Press flat with an iron, then topstitch close to the edge to give it a neat, finished look.
3. Create the Collar Pocket
Fold the top of the bandanna over your dog’s collar. Pin in place, making sure there’s room for any buckles or tags. Sew along the pinned edge. Backstitch at the beginning and end for strength.

The bandannas looked a little plain, so I added fun quotes using my Cricut and HTV vinyl.

Personalise It With a Quote
Design your quote in Cricut Design Space by simply adding a text box and typing your chosen phrase. You can experiment with different fonts until you find one you like—this one, funnily enough, is called Bad Dog!
You can also add images, but make sure they’re in SVG format. Once you’re happy with your layout, click Select All, then Group. This keeps everything in place exactly as it appears on the screen when you cut.

Cut the design using HTV vinyl with the glossy side facing down. Don’t forget to mirror the text before cutting. Once it’s cut, carefully weed away the excess vinyl, leaving only your design on the backing sheet.
")
Place the quote on the bandanna, cover with a cloth or parchment paper, and press with a hot iron (no steam) for 30 seconds. Check a corner—if it doesn’t peel easily, press for another 15 seconds. Avoid rubbing like ironing clothes—just press down firmly. The backing should peel away easily when transferred.

More Cricut Project Ideas.
I made this cushion for my son and daughter-in-law to celebrate their wedding day, featuring one of their wedding photos transformed into a spiral Betty design on the cushion.

Custom novelty baby onesies are a fun project to make—and they also tend to sell really well.


If you’d like to find any of the items used in this project, we’d greatly appreciate it if you used our affiliate links. These links provide us with a small commission at no extra cost to you, allowing us to continue creating and sharing more inspiring projects. We’d also love to hear your thoughts—feel free to leave a comment or share this post!


21 Comments
Katrin
October 21, 2019 at 8:13 pmAw too cute these bandanas you’ve made for your pups Anita! Cute & cozy!
Anita Holland
October 22, 2019 at 12:01 amThank you so much, Karin, and the quotes suit my dogs to a T. lol
Marie
October 21, 2019 at 10:15 pmThese are just too cute, Anita! Of course, my favorite is the I’m prowling for bitches. Almost spit the smoothie I was drinking all over my computer screen. Your doggies are so adorable!
Anita Holland
October 22, 2019 at 12:03 amThank you so much Marie, I had my doubts whether to add that one, but Michelle convinced me to leave it. We must have the same sense of humour.
Michelle Leslie
October 22, 2019 at 1:04 pmI LOVE these bandanas Anita. The best use of flannel ever!!! Oh my word, when I saw the piccy of “prowling for Bitches” I had to show my hubby, now he wants a male fur baby, just so we can make the bandanna 😀 and we already have four 😀 Oh well, there’s always space for another one
Anita Holland
October 24, 2019 at 4:23 amThank you Michelle, In my opinion you can never have too many dogs. I am sure I can come up with a good quote for your boys. 🙂
Carol
November 4, 2019 at 8:17 pmThe bandannas are almost as cute as the dogs! I love the idea of wrapping it around the collar.
Anita Holland
November 6, 2019 at 12:23 amThank you Carol, They are great little models, they always seem to get into my photos.
Carole @ From My Carolina Home
November 13, 2019 at 1:18 pmThanks for the laugh this morning, I loved the first one!!
Anita Holland
November 14, 2019 at 2:07 amThank you so much, they are good for a giggle. 😉
Pam
November 14, 2019 at 6:58 pmHaha, these are so cute! And the dogs are adorable too! My little Sunny (Yorkie) would look cute in these. I stopped by from the Classy Flamingos link party.
Anita Holland
November 14, 2019 at 11:28 pmThank you, they are cute dogs who follow me every where so it is only natural that they get some of the projects I make.😂
Teresa
November 15, 2019 at 11:18 amSo cute, I love them! Thank you for sharing the tutorial at The Really Crafty Link Party this week. Pinned!
Anita Holland
November 15, 2019 at 12:53 pmThank you Teresa!
Cecilia
November 18, 2019 at 3:32 amVery cute! Thanks for sharing at Vintage Charm!
Anita Holland
November 18, 2019 at 12:14 pmThank you so much.
Robin
November 18, 2019 at 3:51 pmYour fur babies don’t seem to mind being your craft victims! Thanks so much for sharing your talent with us at the Creative Muster. Looking forward to seeing what you’ll be sharing next week. Pinning!
Robin😊
Anita Holland
November 19, 2019 at 4:04 amThank you, they are always by my side photo bombing my pictures. So they might as well be a part of it. To be honest the first thing the did was roll in the dirt. 🤣🤣
Linda on Poinsettia Drive
November 19, 2019 at 2:49 amThank you for sharing on the Classy Flamingos Blog Party!
Anita Holland
November 19, 2019 at 4:07 amThank you.
How to Make Flip Flop Flannel Elf Slippers - A Crafty Mix
September 6, 2024 at 4:50 pm[…] Unique Creation by Anita | Raggedy Bits | Interior Frugalista […]