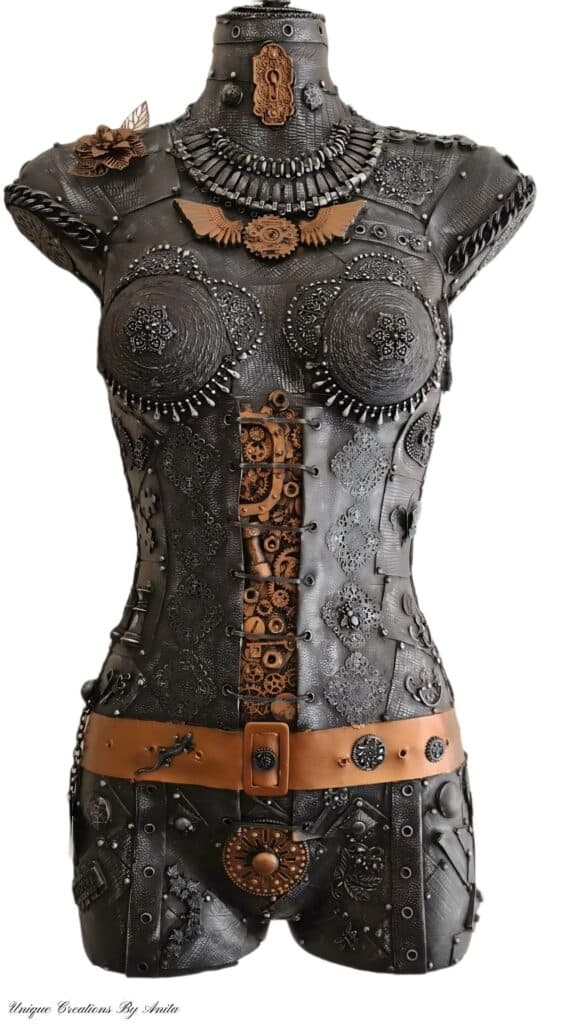
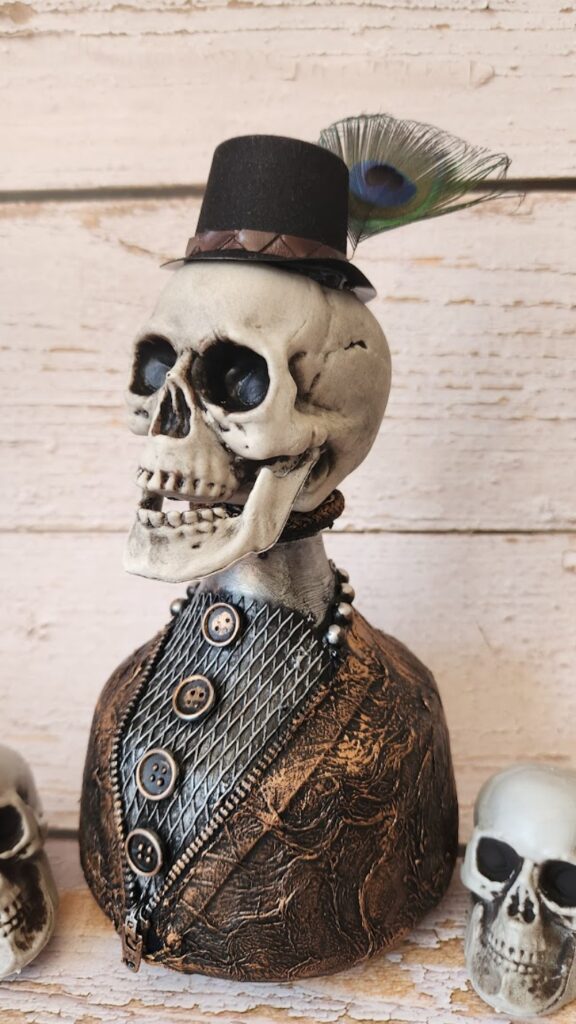
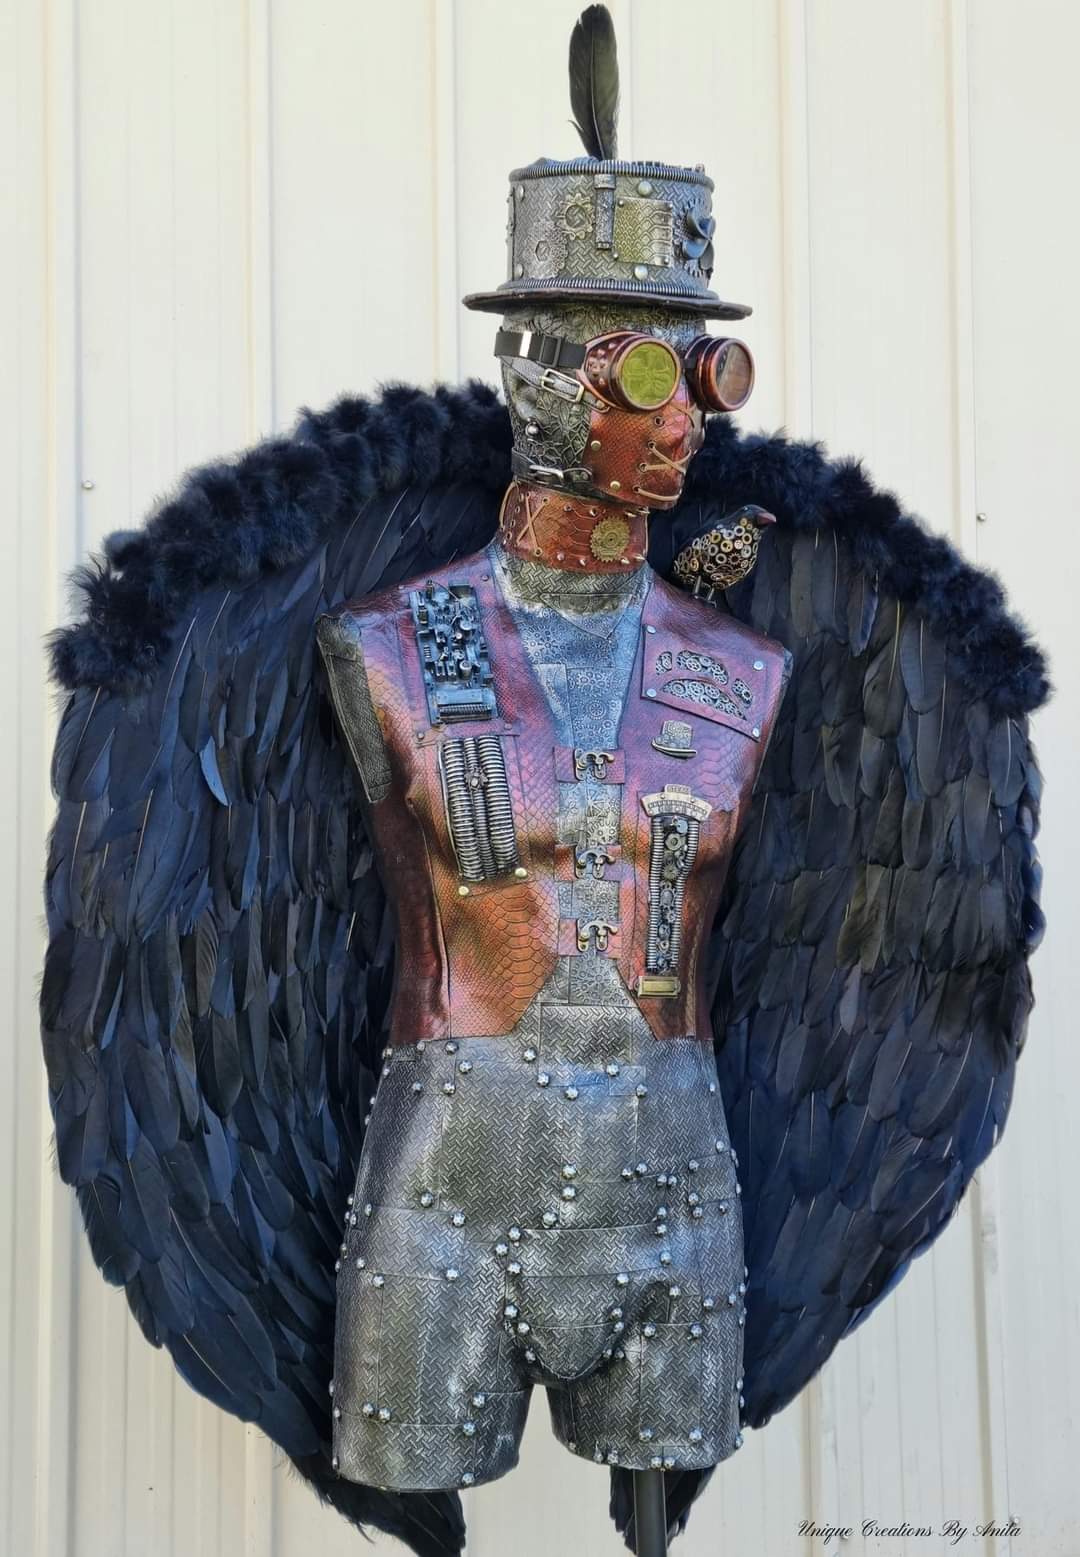
Browsing Category

Craft Projects

Beaded Garden Stakes

Looking for a creative way to upcycle old jewellery and add a touch of charm to your garden? These DIY beaded garden stakes, made with recycled jewellery and charms, are the perfect project! Not only do they make an eye-catching addition to flower beds and plant pots, but the beads beautifully reflect sunlight. These unique garden decorations also make fantastic gifts for garden lovers. I loved how mine turned out so much that I couldn’t resist sourcing more materials online to create a garden collection and gift to friends and family!

Read more: Beaded Garden Stakes

The possibilities for creating these beaded garden stakes are endless! I started by rummaging through my jewellery stash, much of it gifted by friends and family over the years. My local charity shop also sets aside broken jewellery and odd bits for me, knowing I love incorporating them into my Mixed media art projects.

I’ve used everything from wooden bead bracelets and broken brooches to single earrings and glass pieces from a shattered chandelier. For an extra creative touch, you can even make your charms using silicone moulds and resin. I’ll show you how to do this later in this tutorial!

Today, we’re excited to join the Do It Over Designers Blog Hop, hosted by Ann of The Apple Street Cottage. In this collaborative event, a group of bloggers transforms old or unused items into something fresh and new. Whether these treasures come from closets, barns, garages, yard sales, or thrift stores, we breathe new life into them. Be sure to explore the other creative projects linked at the end of this post!

Before we dive into this tutorial be sure to subscribe to my bimonthly newsletter to be the first to see my latest projects.  You can also follow me on Pinterest and Facebook where I also include my unique mixed-media art projects.

Beaded Garden Stakes from Threaded Rods and Recycled Jewellery

**This post may contain affiliate links. This means I earn a small commission on links used at no extra cost to you. Please see my disclosure policy for more information.**

Materials Needed

Assemble the beaded garden stakes

To begin, I cut my threaded rod into 35cm lengths using a grinder and filed down the ends to remove any sharp edges, ensuring they were safe to handle. After completing my first garden stake, I discovered that pre-cut threaded rods in various sizes are available on Amazon. This is a great alternative for anyone who isn’t comfortable using power tools or wants to save time.

After some quick planning, I decided to add 20 beads to each stake, ensuring there was enough exposed threaded rod at the bottom to anchor it firmly into the soil.

Next, I attached the glass door knob to the top of the rod. Using a pair of pliers to hold the rod steady, I carefully tightened the door knob securely in place.

For my first garden stakes, I used beads recycled from old Lovelinks and Pandora-style bracelets that were all the rage a few years ago. However, be sure to double-check your stash before using the beads—some might be original and quite valuable! I discovered a few branded with the 925 silver stamp, indicating they weren’t cheap. It seems the charity shop that donated the beads didn’t sort for these hidden treasures, so it’s worth taking a closer look.

Start by sliding a few beads onto the stake beneath the glass door knob, followed by a spacer bead. These spacers will serve as attachment points for the charms you’ll add later. I chose to add two spacer beads to each garden stake, but you can customize this step based on your style and preference.

Attaching the charms

To attach charms to the spacer beads, use a pair of pliers to gently open the metal rings. This method worked perfectly for me because I have chunky fingers!

I replaced the original charms with ones from my mixed media art stash, along with repurposed pieces like old earrings, broken brooches, and glass beads from a shattered chandelier. These unique additions gave each garden stake a one-of-a-kind look.

Add the remaining beads to the garden stake and secure them in place with a nut. Be careful not to tighten the nut too much, as this could crush or shatter the glass beads. Just tighten it enough to hold the beads securely without damaging them.

My Completed beaded garden stakes.

Making resin embellishments for the beaded garden stakes

I loved these beaded garden stakes, but I wanted to take the idea a step further. I decided to experiment with creating custom embellishments using silicone moulds and epoxy resin, adding mica powders to give them a beautiful shimmer. This way, they would reflect the sunlight even more, making an even bigger statement in the garden. Because I am a huge Steampunk fan I chose to use this steampunk dragonfly for my beaded garden stakes.


I used polyurethane casting resin for my first attempt because it set in under 10 minutes. While it worked in terms of speed, the colours didn’t come through as I had hoped. This resin turns white as it sets, which distorts the colours and affects the overall look.

Adding Mica Powder to resin

For my second attempt, I brushed a layer of mica powder into the surface of the mould before adding the polyurethane resin.

While this improved the result, it still wasn’t quite the look I was aiming for.

Slow Dry Epoxy Resin

I decided to try a different approach and picked up a clear resin kit from Kmart for $12. I added some glitter and mica powder, and the result was much closer to what I had envisioned. However, the downside was that the resin took 24 hours to fully cure.

I began by marking where I wanted the bead with the dragonfly to sit, making sure to leave enough space above for the other beads to fit in. It’s important to measure carefully, as failing to do so could create a gap between the beads and ruin the overall look. My initial plan was for the resin to attach to the textured bead, allowing me to simply slide it onto the threaded rod. However, this didn’t go as expected. The resin also adhered to the threaded rod, which made the bead more secure, but it also prevented me from being able to move the dragonfly around.

Although this last attempt gave me the look I was aiming for, I did lose some of the definition of the dragonfly. To restore the details, I rubbed silver wax paste over the surface, which really brought the intricate design back to life.

Where you can use Beaded garden Stakes

Decorative beaded garden stakes are versatile and can add charm and personality to various areas around your home. Here are some great places to use them:

Flower Beds – Add a pop of color and sparkle among your flowers and plants.

Potted Plants – Insert them into indoor or outdoor planters for a stylish touch.

Herb Gardens – Use them to label herbs or simply decorate your kitchen garden.

Garden Borders – Line them along pathways or borders for a whimsical look.

Patios and Balconies – Place them in potted plants to enhance your outdoor seating areas.

Planters Indoors – Brighten up your indoor greenery with a decorative stake.

Succulent Arrangements – Add height and interest to a succulent display.

Window Boxes – Make your window gardens more unique and eye-catching.

Terrariums – Use small stakes to add detail to terrarium arrangements.

Special Occasions – Use them to decorate plants for weddings, birthdays, or seasonal holidays.

Do over designers’ blog hop

As I mentioned, this is the ‘Do It Over’ Designers Blog Hop, and there are some great projects to explore! Be sure to check out the links below for some inspiring ideas.

Modern on Monticello

Pandora’s Box

Purple Hues & Me

Southern Sunflowers

Unique Creations by Anita

Sum of Their Stories

Birdz of a Feather

Tea and Forget-Me-Nots

Vintage Style Gal

The Apple Street Cottage

Exquisitely Unremarkable

Little Vintage Cottage

Pinterest pin

If you’re interested in any of the items used in this project, we’d appreciate it if you used our affiliate links. Clicking these links earns us a small commission at no extra cost to you, helping us create more inspiring and exciting projects to share. We’d also love to hear your thoughts—feel free to leave a comment or share this post!


DIY skull bottle

If you are looking for a quick and easy project for Halloween this one is for you. I am sharing how I made this simple DIY skull bottle using easy-to-find items. This is also a great project for beginners who would like to get into doing mixed media art. My idea for this project was to use a ceramic bottle and decorate it to look like my skull bottle was wearing clothes.

Continue Reading →

How to make feathered Angel Wings

Apart from being a lover of DIY and I am also a mixed-media artist.  I love to take everyday items and give them a mixed-media makeover. This was a shop mannequin that I was given which I decorated in a steampunk theme using lots of recycled materials.  Once it was completed I felt it was missing something. I came up with the idea to make some large angel wings using real feathers. Continue Reading →

DIY Sliding door safety decals

This week’s post is the next challenge for our international blogger’s Club (IBC).  More about IBC is at the end of this post. Our theme this month is “Glass etching” which thankfully is down to interpretation.  Because I have done a post before on glass etching I wanted to try something different for this challenge. I thought it was time to try out my new etch sea glass vinyl and make new sliding door safety decals for my door. Unfortunately, the photos did not turn out so well due to photographing through the glass but they will give you an idea of how it will turn out. Continue Reading →

Bamboo Steamer Toilet Roll Holder

As usual, my two Jack Russel terrorists were the inspiration for this project. They have recently taken to stealing our toilet paper rolls and ripping them apart.  I have always had them stored on a pole on the floor next to the toilet. This meant I had to try and come up with a way to store the extra toilet rolls on the wall rather than the floor.  Upcycling a large bamboo steamer worked perfectly as wall mounted toilet roll holder. Continue Reading →

Steampunk Jelly Bean Dispenser

Jelly bean dispenser

If you follow my blog, you will know that besides DIY I also love to do mixed media art.  I am always on the lookout for interesting items that I can turn into unique home decor by giving them a mixed media art makeover. On a recent visit to our local markets, I spotted this jelly bean dispenser in one of the junk boxes.  I knew straight away I would be giving, this jelly bean dispenser a steampunk makeover. Continue Reading →

Leather belt wall hanging

Repurpose old belts

I approached my local charity shop and asked them if they would be able to collect the damaged belts that were in poor condition and said I would pay for them.  Little did I know I would end up with loads of them.  I hate wastage so I wanted to try and turn them into something I could use in my home.  This leather belt wall hanging was the result. Continue Reading →

Geometric Lion Wall Hanging

I have recently taken a few months off from blogging to repaint the inside and outside of my house.  Instead of putting the same wall decor back up, I wanted to create all new ones. My bedroom decor is all heavy wood with African themed bedding, so I wanted to try and create a geometric lion wall hanging made from faux leather. Continue Reading →

How to add texture to mixed media art

How to add texture to mixed media art

This weeks post is our next IBC (International bloggers club) Challenge. Our theme this month is “All bottled up”, the challenge is to create a project using a bottle in some way.  If you follow my Facebook page you will know that doing mixed media art bottles is a hobby of mine.   I felt like I was cheating in this challenge because I felt it was going to be easy for me. More about IBC at the end of this post. Continue Reading →

Steampunk Book Lamp

DIY Steampunk Lamp

This weeks post is our first IBC (International bloggers club) Challenge of 2022. Our theme this month is “Bodacious Books”, the challenge is to create a project using a book in some way. My idea for this project was to create a lamp with a book as the base.  And if you follow my blog you will know I am steampunk mad, so it will be no surprise that I chose to make a steampunk-themed book for my lamp. Continue Reading →

Steampunk Nutcracker

Handmade steampunk Christmas nutcracker

It is time for our next international blogger challenge (IBC) and the topic this month is “Felted fixation”.  I chose to make a steampunk nutcracker. The challenge is to create a project using felt in any way shape or form. More about (IBC) at the bottom of this post. Continue Reading →

Beaded Wall Hanging

It is time again for this months international blogger Challenge (IBC).  This months topic is “beads galore”, our challenge is to create a project using beads in any way we wish.  I chose to make a beaded wall hanging. This should have been a simple challenge but everything that could go wrong did. More about IBC at the bottom of this post. Continue Reading →