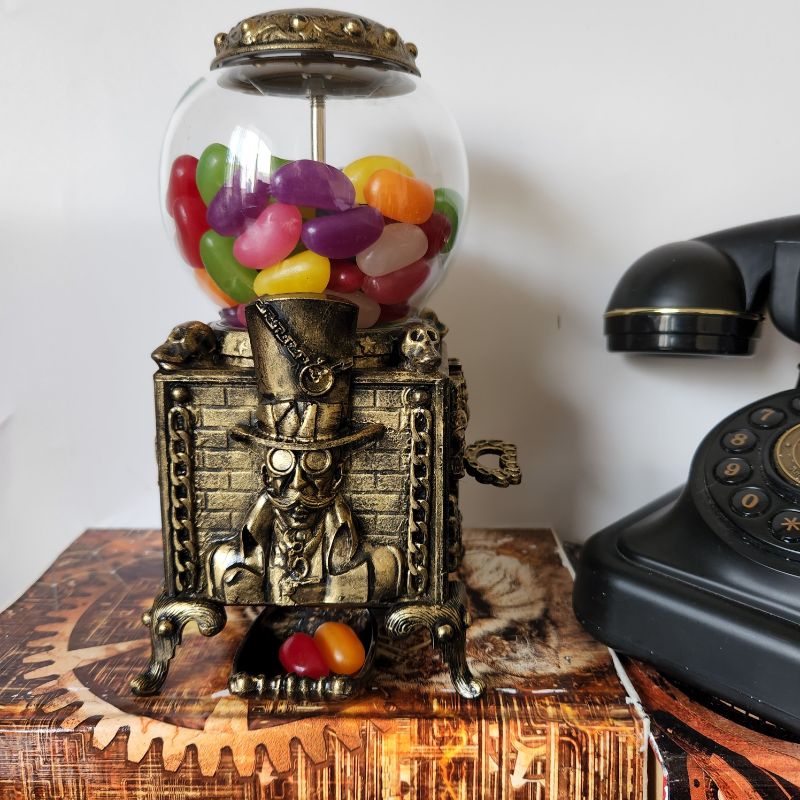
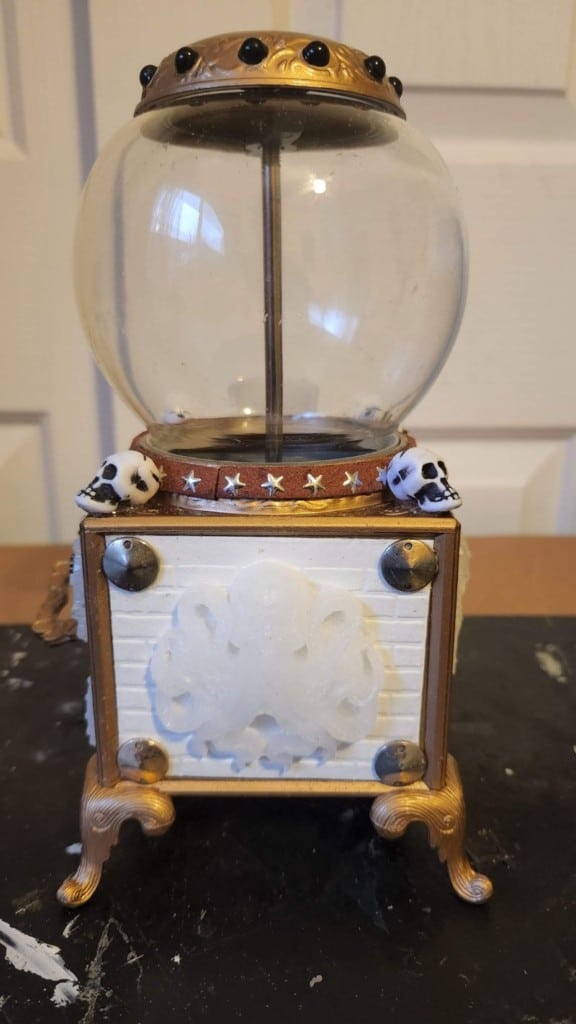
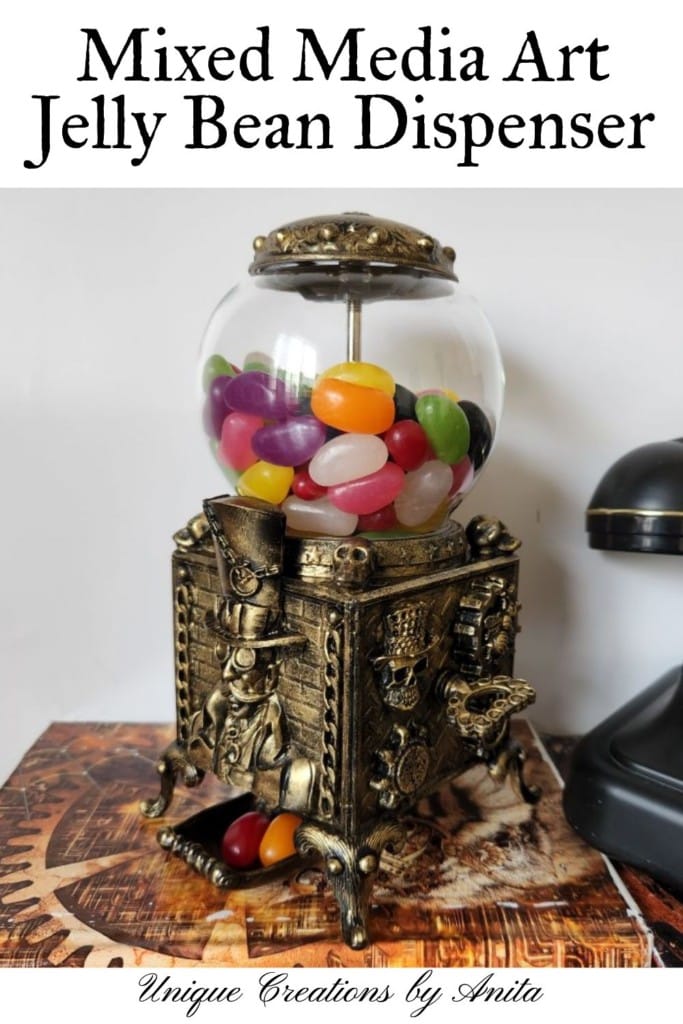
If you follow my blog, you will know that besides DIY, I also love creating mixed media assemblage art. I am always on the lookout for interesting items that can be turned into unique home décor pieces by giving them a mixed media makeover. On a recent visit to my local markets, I came across a quirky jelly bean dispenser in a junk box. The moment I saw it, I knew this jelly bean dispenser was destined for a steampunk makeover. With a bit of imagination, embellishments, and paint, I transformed this ordinary piece into a statement steampunk jelly bean dispenser that looks right at home on a bar counter.
Assemblage mixed media art is a creative form of expression that combines found objects, recycled materials, and traditional art supplies into one unique piece. Each artwork tells a story by layering textures, colours, and shapes to transform ordinary items into something extraordinary. This style of art embraces experimentation, encouraging artists to repurpose and reinvent materials while adding personal meaning and depth.
DIY Steampunk jelly bean dispenser
*This post may contain affiliate links. This means I earn a small commission on links used at no extra cost to you. Please see my disclosure policy for more information.**
Materials Needed
- Jelly bean dispenser (metal base is best)
- Cardstock
- Embossing machine and embossing folders
- Skull charms or Halloween decorations
- Decorative trim
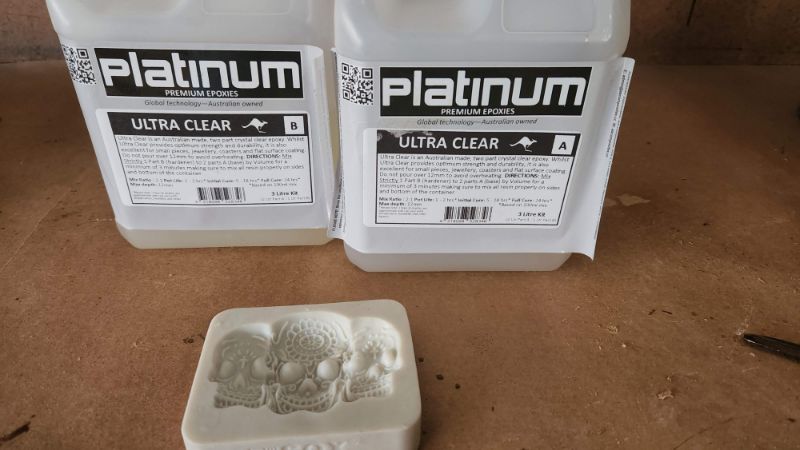
- Silicone moulds
- Epoxy Resin
- Hot glue gun and glue sticks
- Mixed media embellishments – gears, chains, charms, beads
- Acrylic black paint or black gesso
- Metallic wax paste (gold, bronze, or copper)
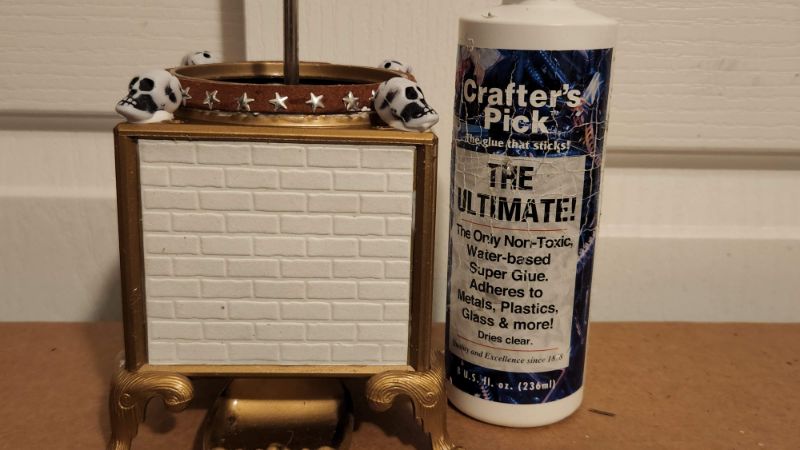
- Strong craft glue or tacky glue
- Paintbrushes
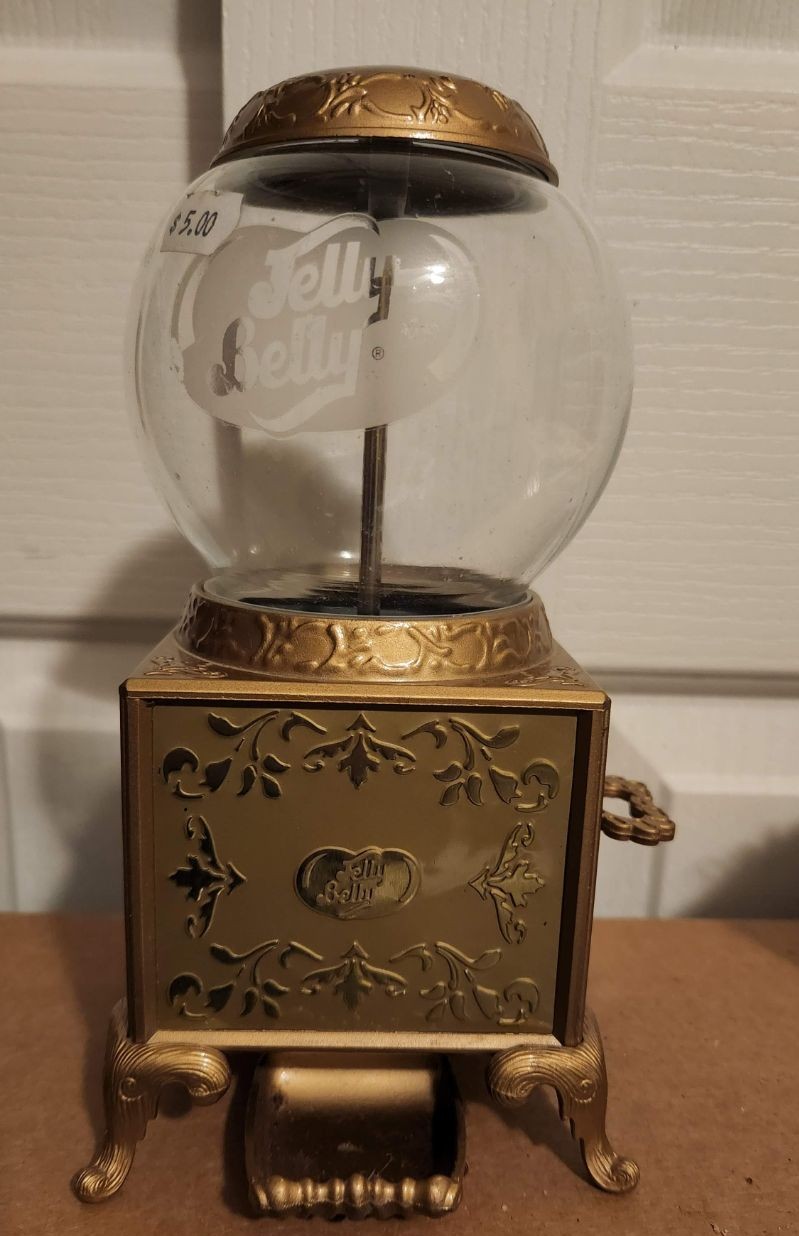
Finding the Jelly Bean Dispenser
I googled the dispenser for inspiration and discovered it was a rare jelly bean machine from 2007, valued between $35 and $85. Since I only paid $5, it felt like a lucky find. Of course, I knew that giving it a makeover would decrease its collector’s value, but that didn’t matter to me—I wanted a fun and unique piece of home décor. Thankfully, the base was metal, so if I ever change my mind, I can remove the embellishments and restore it to its original state.
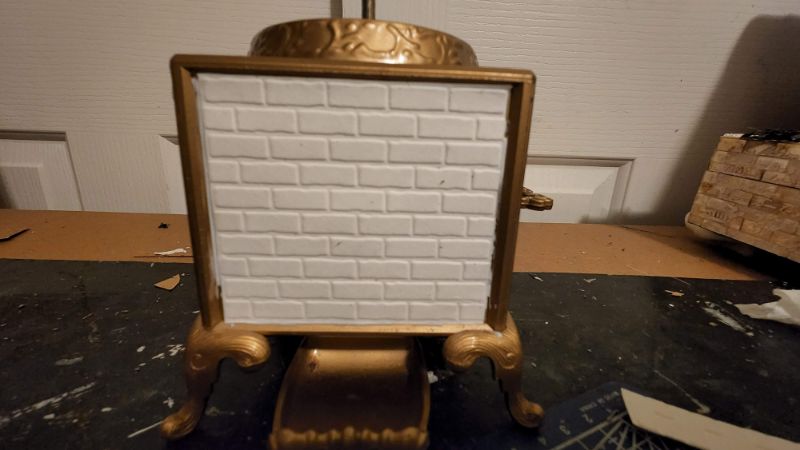
Creating the Textured Background
To give the surface more character, I made textured background panels using cardstock. I embossed the card with an embossing machine, which is one of my favourite tools for mixed media art. These machines are very affordable and can be used with endless embossing folders to match any theme.
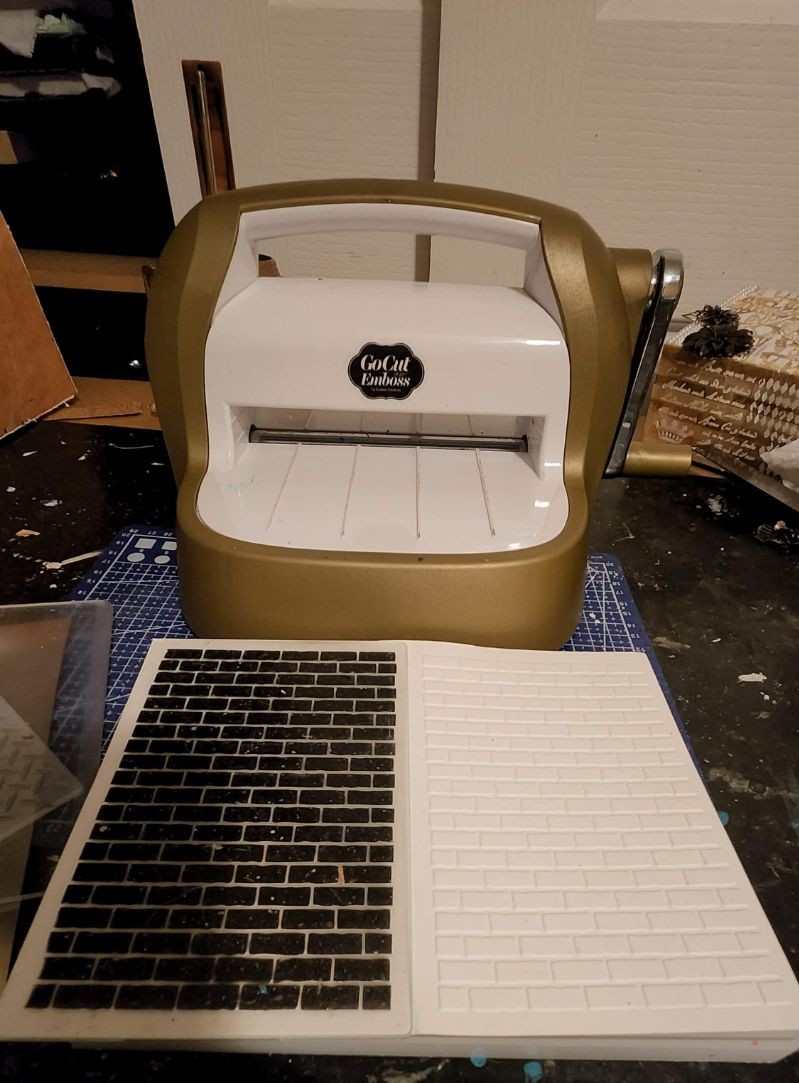
After embossing, I cut the card to fit the recessed areas and glued it around the sides of the dispenser. Cardstock isn’t your only option for creating texture—this post shares plenty of creative ways to add depth and detail to mixed media assemblage art.
Making the Embellishments
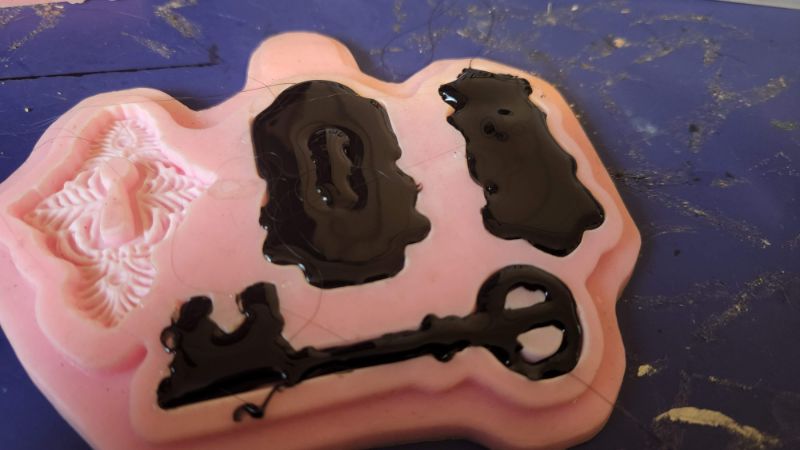
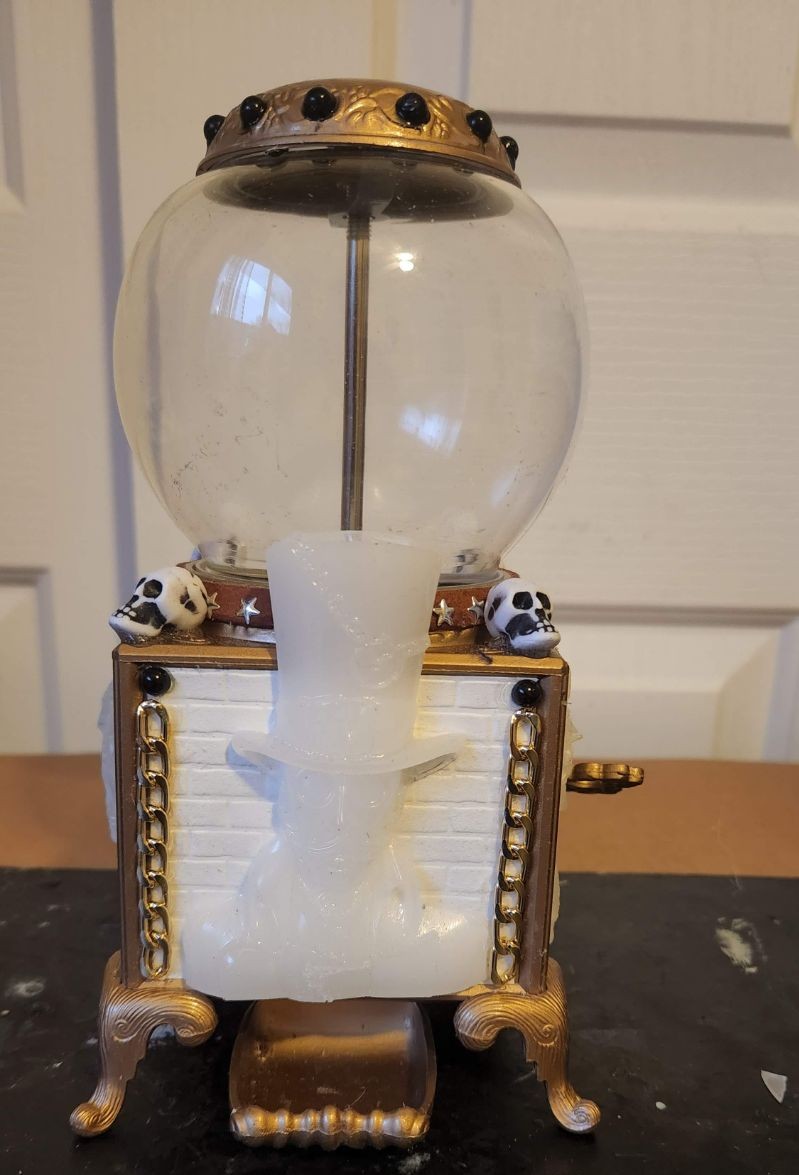
I used silicone moulds to create my embellishments. Normally, I cast them in resin and keep a box of ready-made pieces for projects like this.
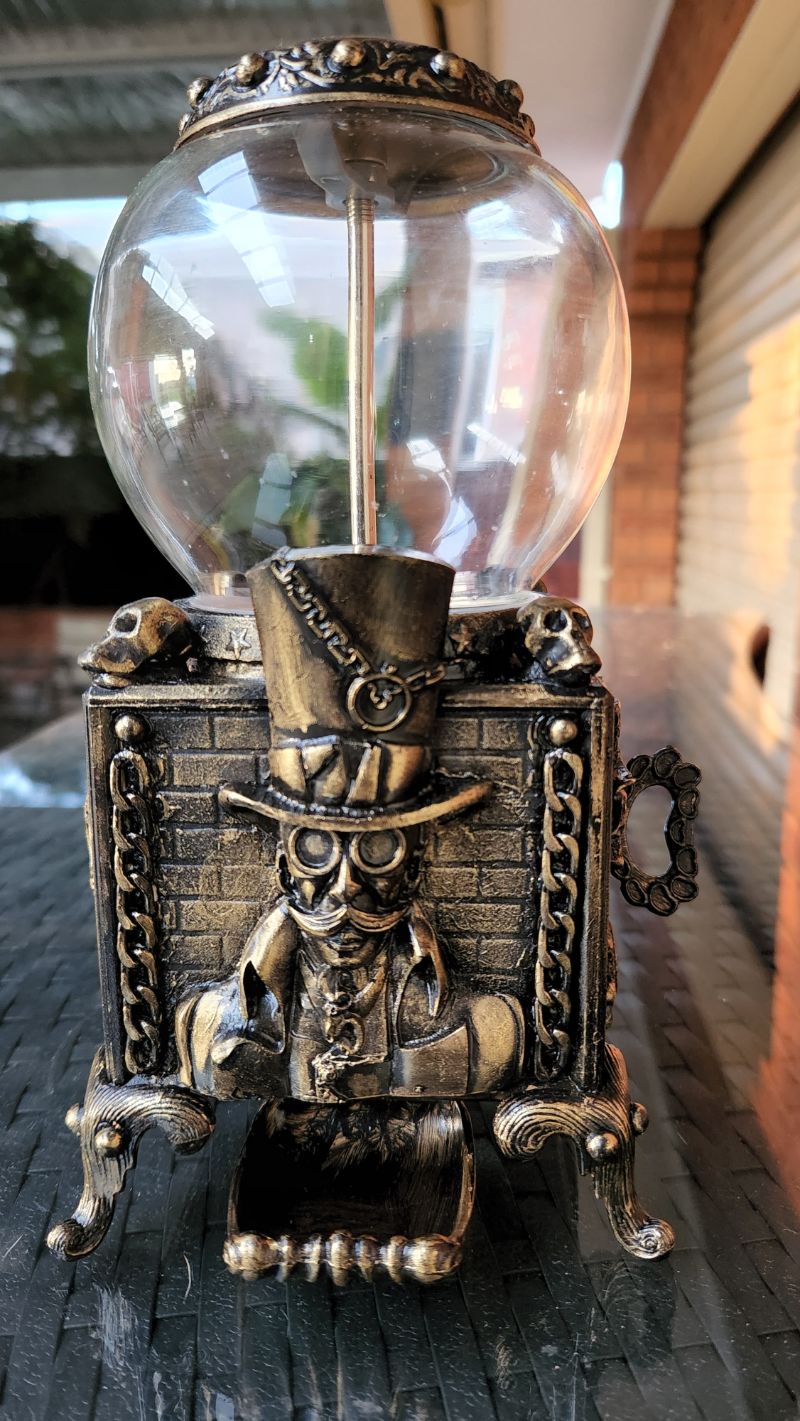
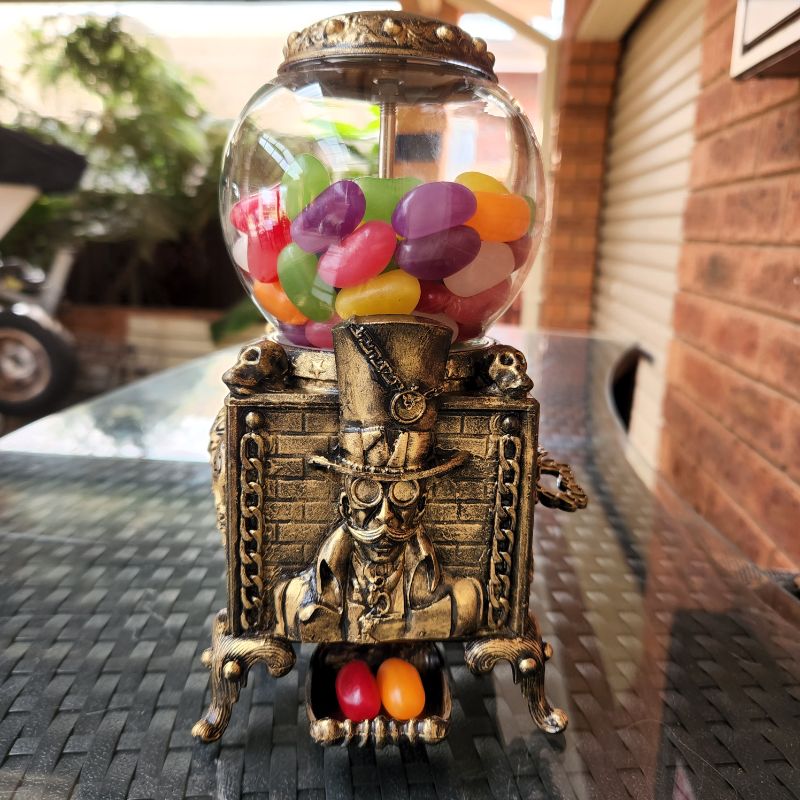
For this dispenser, I used a mix of gears, a steampunk-style man (a Stamperia Sir Vagabond mould), and broken jewellery pieces. However, when I want a quick result, I use hot glue in the moulds instead of waiting hours for resin to set.
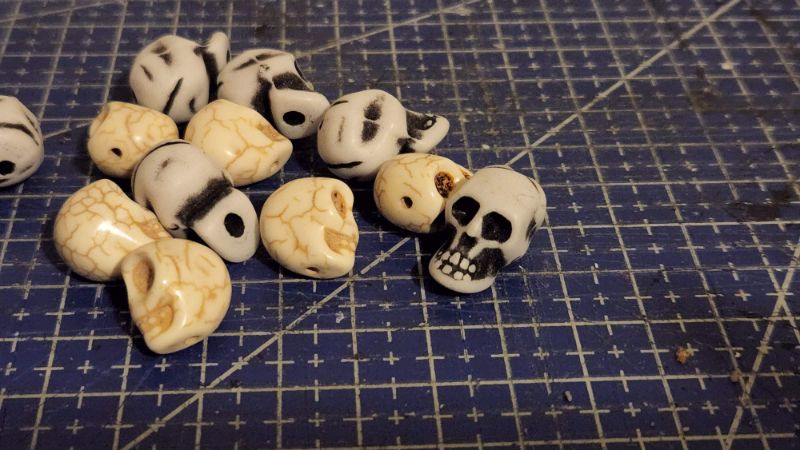
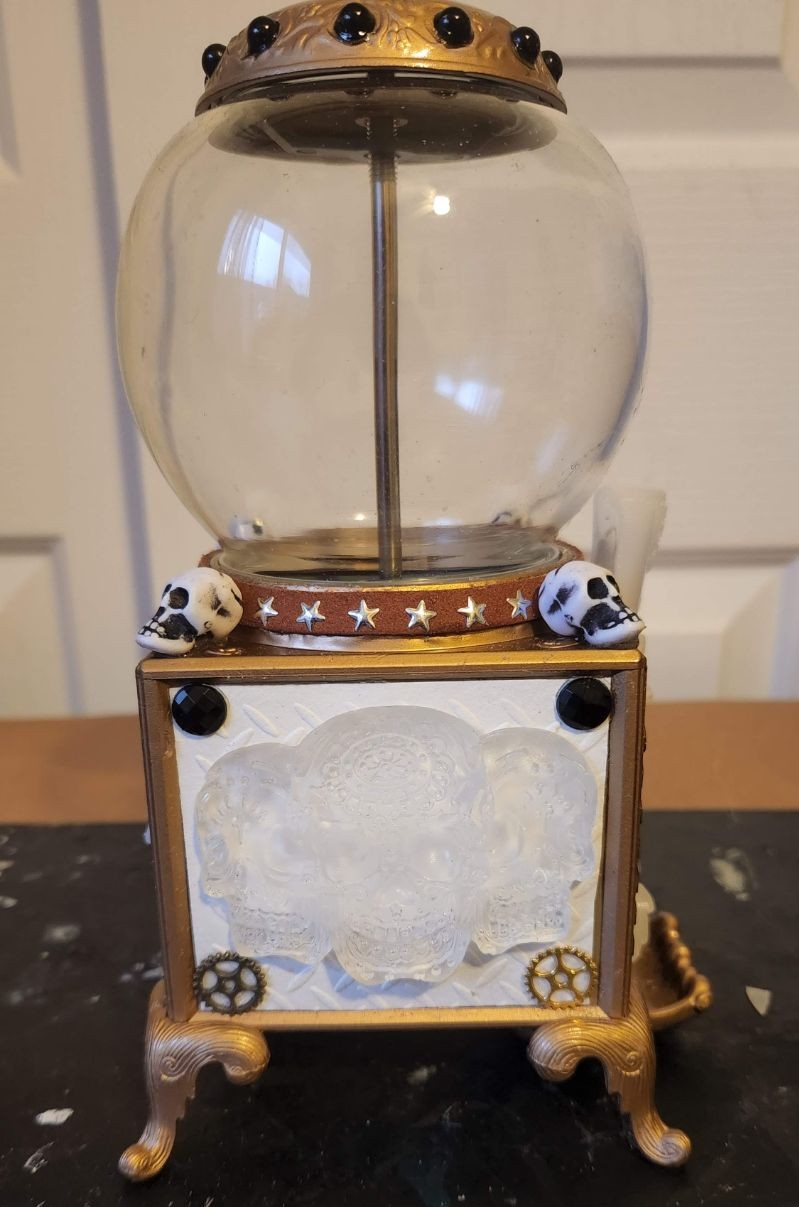
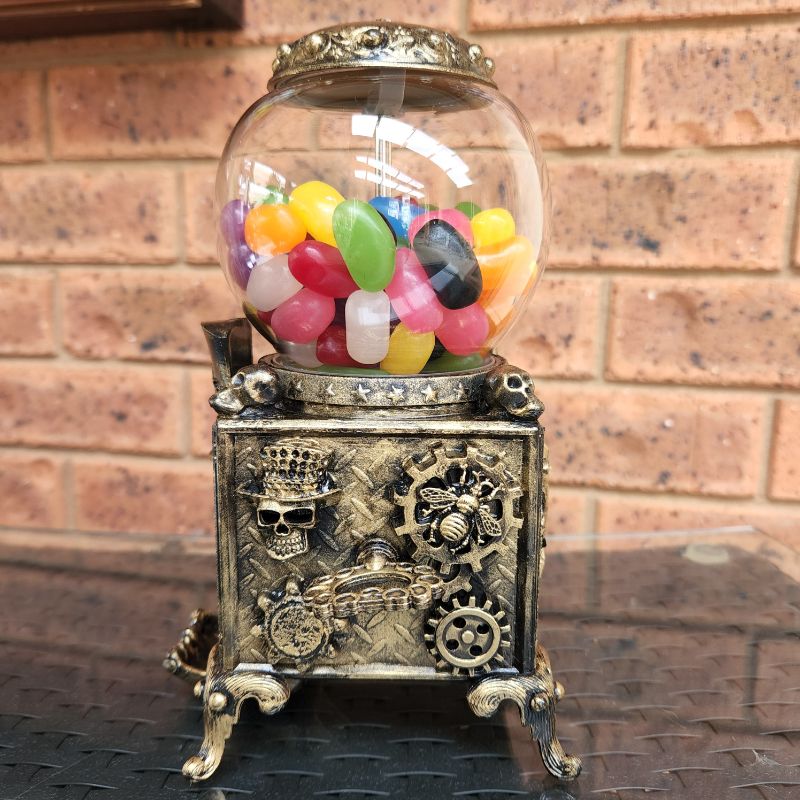
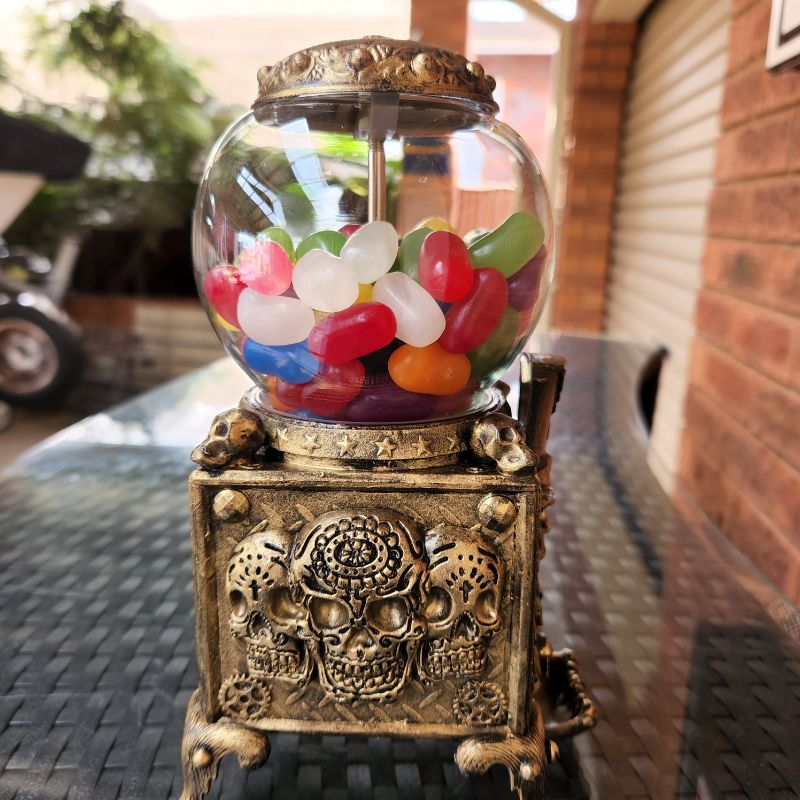
I had plenty of small skulls left over from my Halloween decorations, so I glued one to each corner for extra detail.
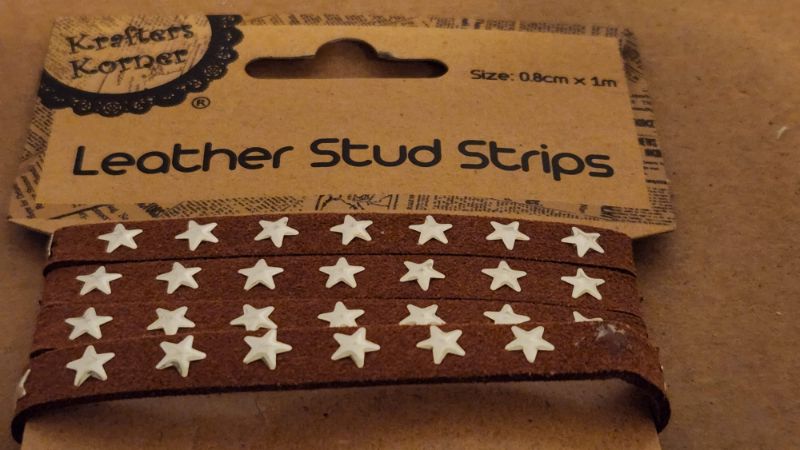
A leather stud strip was added around the top.
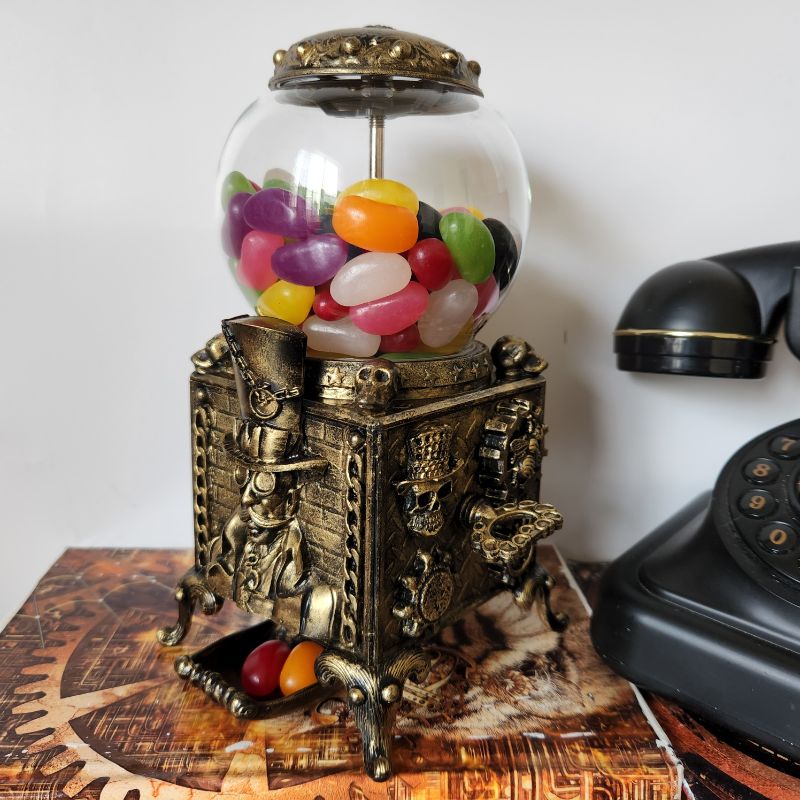
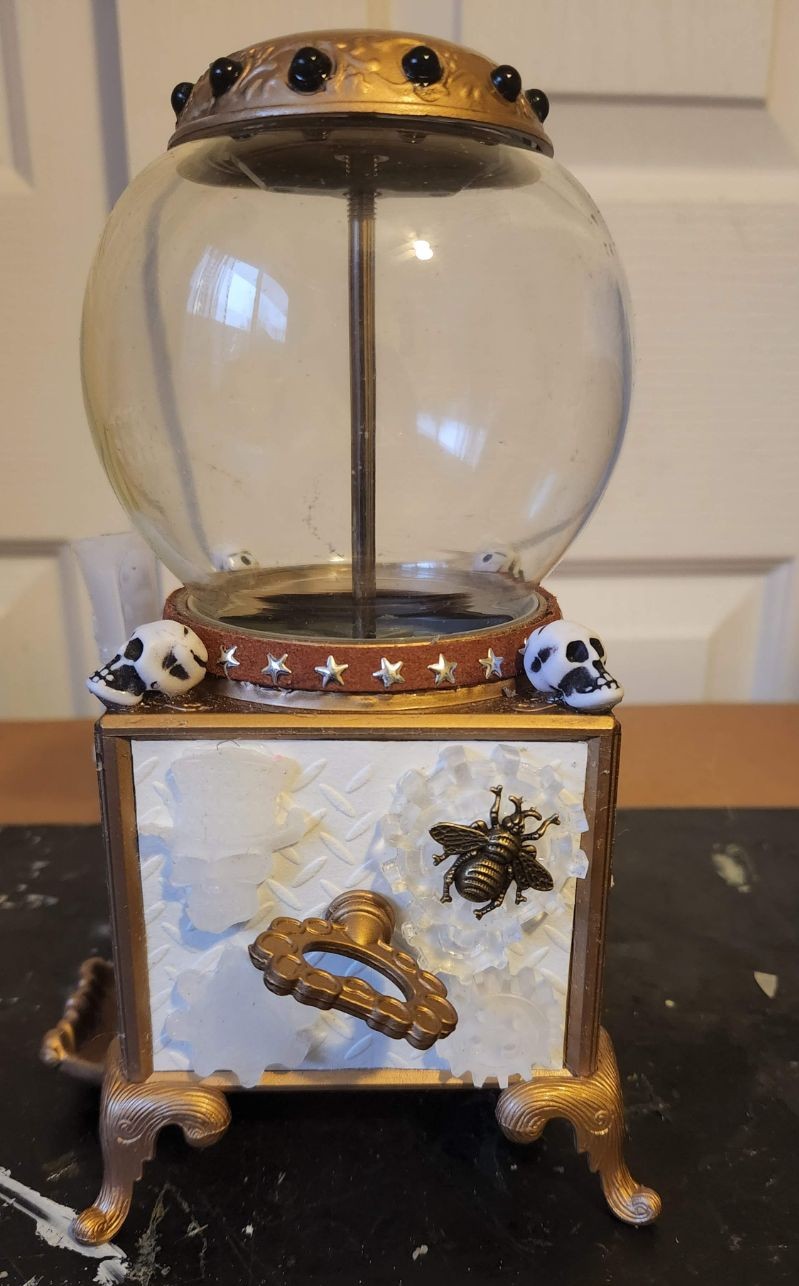
I glued the embellishments directly onto the textured cardstock and decorated each side differently to make the dispenser more visually interesting.
To enhance the design, I added broken chains, metal charms, and beads
Don’t worry if everything looks mismatched or messy at this stage—the next step with paint will tie it all together
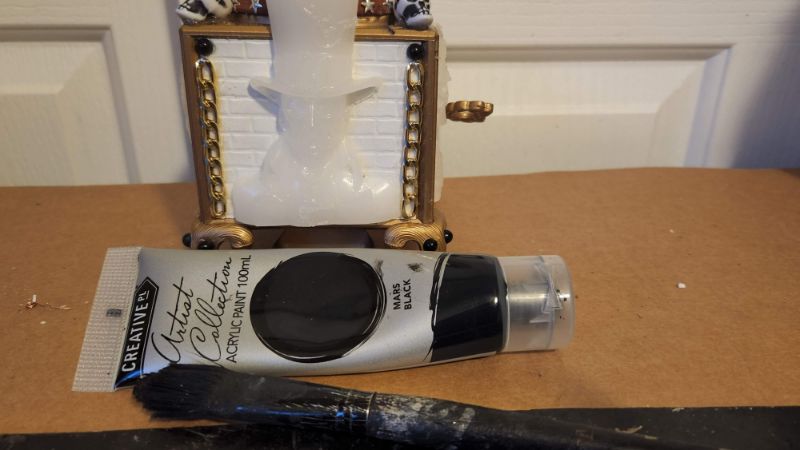
Painting the Jelly Bean Dispenser
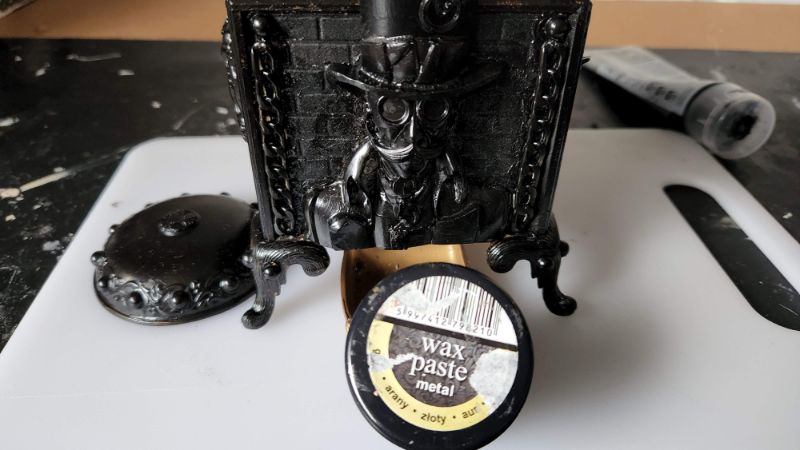
Once all the pieces were glued in place, I painted everything black. In the past, I always used black gesso for mixed media projects. It was easy to apply, but it left a dull finish that needed a clear coat to bring it to life. Lately, I’ve switched to acrylic paint instead. The cheaper brands work surprisingly well and leave a nicer finish without the extra step.
When the paint dried, I lightly rubbed gold metallic wax over the raised textures using just my fingertip. This technique highlights the details beautifully, while still leaving enough black paint to create depth. You could use bronze or copper wax for a different metallic look. If you don’t have gold wax paste at home, you might already have the ingredients to make your own, and this post will show you how.
The Final Touches
To finish, I gave the glass globe a deep clean in the dishwasher before filling it with jelly beans. The final result is a unique steampunk jelly bean dispenser that blends fun and function. It looks fantastic on display and is guaranteed to grab attention.
This project shows how a little creativity can turn ordinary finds into striking home décor.
I added a few close-up photos of all the sides.

More mixed media assemblage project tutorials
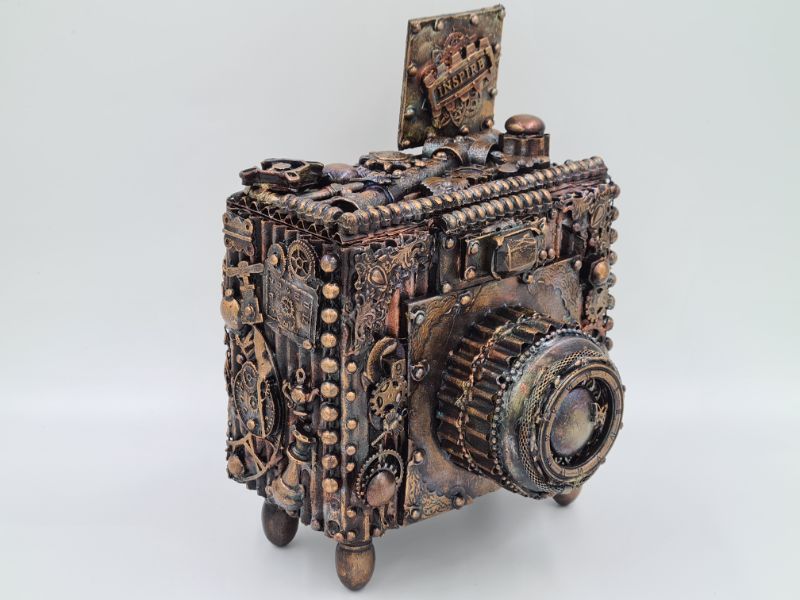
This tutorial will guide you step by step in creating a steampunk prop camera using cardboard, a soda can, and various found items.
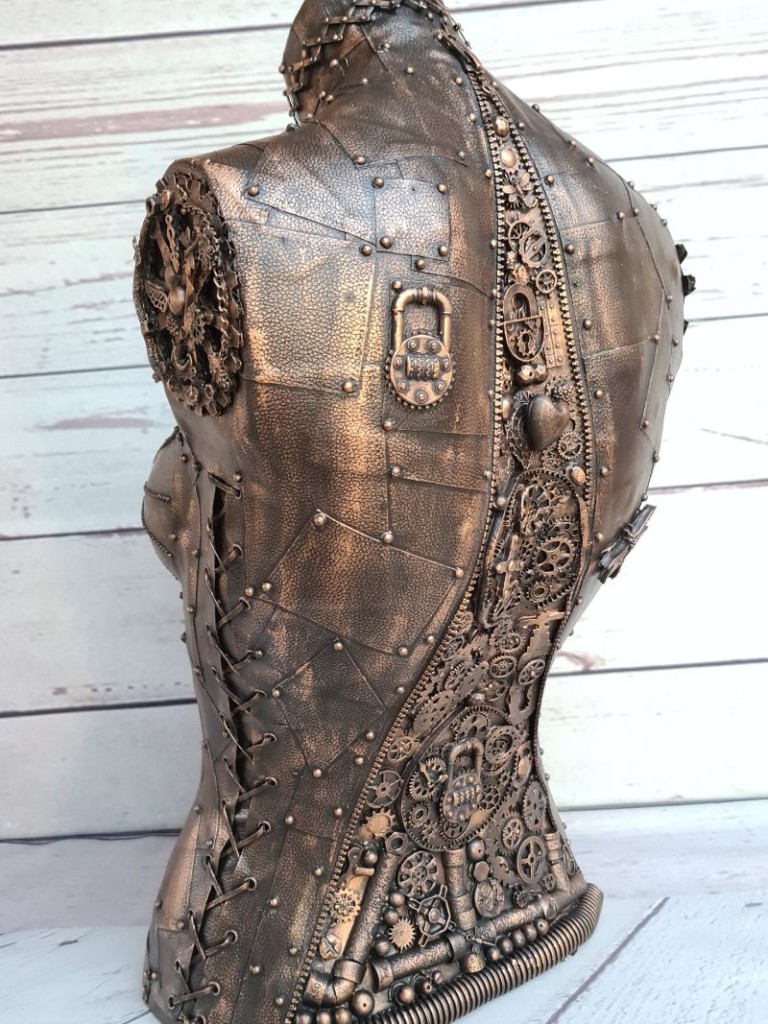
This steampunk mannequin was created in a similar way, with added layers and textures built around the steampunk theme. You can explore all of my mixed media assemblage tutorials here.

If you’re interested in any of the items used in this project, we’d appreciate it if you used our affiliate links. Clicking these links earns us a small commission at no extra cost to you, helping us create more inspiring and exciting projects to share. We’d also love to hear your thoughts—feel free to leave a comment or share this post!


6 Comments
Michelle Leslie
August 23, 2022 at 4:42 pmIn my personal opinion, you definitely increased the value with your creativity, Anita. I wouldn’t have looked twice at the original but would buy the Steampunk version in a heartbeat. Does it come filled with jelly beans 😉
On the gesso vs. paint thing. I’ve always made my own gesso, except for the black one. I just can’t seem to get a deep, dark, black with my homemade recipe, so buy it when I can find it. Do you order yours online? Our shops don’t seem to stock it anymore?
Sara
August 23, 2022 at 9:47 pmThis is A-MAZ-ING Anita! Rare or not, I actually think you’ve actually increased the value of this piece WAY more! What a great find!
Marie B
September 8, 2022 at 5:14 amIt has way more character now! How fun for dishing out candy at a Halloween or costume party. I bet it sold quickly.
Anita Holland
September 9, 2022 at 2:26 pmThanks so much Marie, I ended up keeping it for myself, the jelly beans keep me in energy while typing my tutorials.
Linda Harrison
April 29, 2023 at 10:37 am! I am wanting to try doing the lamp for my granddaughter. Love your work!!
Anita Holland
April 30, 2023 at 3:34 pmThank you, good luck and I would love to see it.