
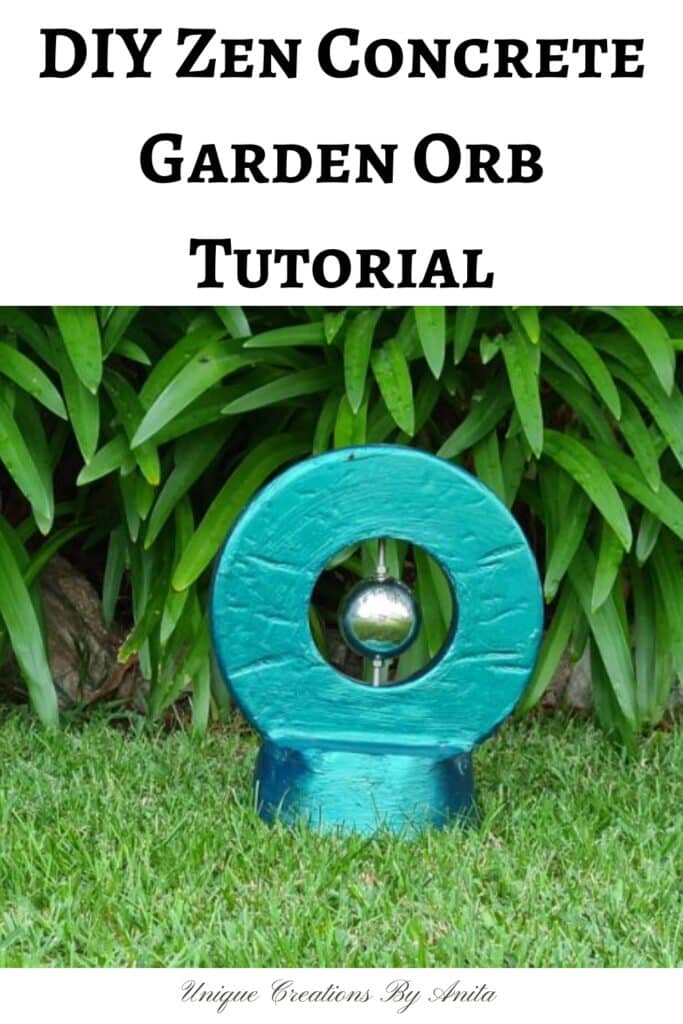
From the moment I imagined my Cast in Concrete: DIY Zen Garden Decor, a peaceful accent gracing my yard, I knew I wanted a splash of colour and a reflective focal point. My new puppies, however, had other ideas—excavating every flower bed until nothing remained but bare soil. Instead of despairing over their enthusiastic digging, I decided to harness the chaos and create a small, vibrant structure crowned with a gleaming silver orb to catch the sun’s rays and restore harmony to my yard.
Today’s post launches our next International Bloggers Club challenge (IBC), and this week’s theme is “Cast in Concrete.” We were tasked with creating something using concrete in any shape or form, so I decided to craft Zen-style garden decor. Having never worked with concrete before, I didn’t hold out high hopes for the result. Stay tuned for more about IBC at the end of this post.

Before we dive into this tutorial, be sure to subscribe to my bimonthly newsletter to be the first to see my latest projects. You can also follow me on Pinterest and Facebook, where I also include my unique mixed-media art projects.
Cast in Concrete: DIY Zen Garden Decor for Beginners
**This post may contain affiliate links. This means I earn a small commission on links used at no extra cost to you. Please see my disclosure policy for more information.**
Materials Needed
- Repurposed metal circle or bowl mould
- Cement mix (Portland cement or premixed concrete)
- Water
- Thick plastic sheeting
- Hot glue gun and glue sticks
- Plastic lid from an adhesive can
- 80 mm stainless steel hollow ball
- Threaded rod with nuts
- Plastic chocolate container for the base
- Orbital sander and fine‑grit sandpaper
- Long drill bit
- Craft knife
- White masonry paint
- Blue mica powder pigment
- Paintbrush
Creating Your Mould
I found an old metal circle extension from my glass‐bowl convection oven and cut it in half so I could easily release the casting later.

Taped back together, it formed the perfect ring for my Zen disc.

Underneath, I secured thick plastic sheeting with hot glue to seal any gaps and added a plastic lid at the centre for the sphere recess.

Preparing and Pouring the Mix
Mix cement and water in a plastic bowl until you achieve a smooth, pourable consistency—think pancake batter rather than mortar.

Pour the mix into your taped‑together mould, tapping gently to release air bubbles, and let it cure for at least 48 hours to ensure full strength.

Removing and Refining Your Casting
Once fully cured, carefully remove the tape and slide your concrete disc free.

Although I attempted vinyl “cracks” for future gold‑leaf accents, the thin material didn’t produce deep fissures—note to self: thicker inserts next time!

Trim away the plastic lid with a craft knife, then sand the surfaces to smooth out rough edges and glue residue.

Adding the Stainless Steel Sphere
Drill a hole straight through the centre of the cement disc and the 80 mm mirror‑finish stainless steel ball using a long drill bit. Thread the rod through both pieces and secure with nuts above and below the sphere.

My first attempt was slightly off‑centre, but it adds character rather than perfection!

Building the Stand
First, seal the chocolate container’s lid thoroughly with hot glue to prevent any leaks.

Next, use a craft knife to cut a hole in the centre just large enough for your concrete disc.

Finally, mix a fresh batch of cement and pour it into the container, tapping it gently to settle and remove any air bubbles.

Press the top disc into position, smooth the joint, and allow another 48 hours to cure.

Remove the plastic shell and reinforce the interior ridges with a thin cement skim coat.


Painting Your Zen Decor
To enliven the grey cement, coat the surface with leftover white masonry paint tinted with blue mica powder pigment for a soft, ethereal hue. The result is a serene, sculptural piece that reflects light and invites contemplation.

More project ideas for your garden
I transformed an old pallet into this charming multi-tiered planter.

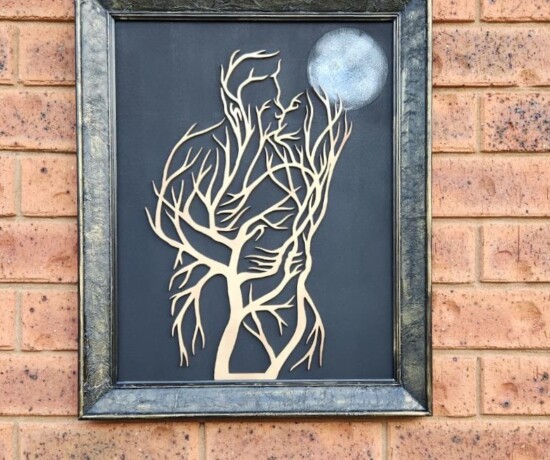
I crafted this wooden suncatcher from a slice of wood, drilling decorative holes and filling them with vibrant coloured resin.

More about IBC
If you follow my blog, you will know I am part of the IBC (International Bloggers Club), which is a group of talented bloggers from around the world. We have members from Spain, South Africa, Australia, the United States, and Canada. Each month, we come together and create a project with a common theme.
If you missed last month’s “Resin Challenge” theme, here is the link to my wooden African-themed suncatcher. The contributions from my fellow bloggers for this month’s challenge are listed below. Please feel free to jump over and give them some love.
Projects
- Meegan Makes| How to make a cement block garden planter
- A Crafty Mix|DIY Rustic Avocado sailboat
- Raggedy bits |Vintage Farmhouse Faux Concrete Eggs
- Birdz of a feather | How to make a cement planter
- ME
- Interior Frugalista|Funique DIY Concrete Succulent Planter


If you’re interested in any of the items used in this project, we’d appreciate it if you used our affiliate links. Clicking these links earns us a small commission at no extra cost to you, helping us create more inspiring and exciting projects to share. We’d also love to hear your thoughts—feel free to leave a comment or share this post!


36 Comments
Sara
February 16, 2021 at 12:40 amThat mica finish is the bomb! I just love how this turned out. I want to make one for my garden now – though I have to wait until we come out of our deep freeze – lol!
Anita Holland
February 17, 2021 at 3:13 pmThank you Sara, I am a huge fan of mica powder. I am using it in my new project together with alcohol ink and the results are awesome.
Marie B.
February 16, 2021 at 1:37 amVery cool concrete garden decor idea, Anita! I have a little Zen garden in a shady part of my yard and something like this would be perfect. Love the pretty pop of color and the gazing ball in the center is FABULOUS!
Anita Holland
February 17, 2021 at 3:14 pmThank you Marie, my dogs are actual afraid of the mirror ball because they can see their own reflection.
Michelle Leslie
February 16, 2021 at 1:38 amGosh, Anita, that color is exquisite. Absolutely bowled over by how inventive you are with all the different molds you used to create the zen feature. It turned out perfectly and I don’t think your fur babies will be able to dig this one up 😉
Anita Holland
February 17, 2021 at 3:15 pmThank you so much, you know the old saying ” a Boer maak a plan” lol
Deana Landers
February 16, 2021 at 2:03 amAnita, I love this. I’m going to share it with my daughter.
Anita Holland
February 17, 2021 at 3:15 pmThank you so much Deana
Maria
February 16, 2021 at 1:48 pmWhat a great garden art! love that color so bright and goes perfect with the plants.
Anita Holland
February 17, 2021 at 3:16 pmThank you Maria, it is the only other colour apart from green now. lol
Meegan
February 17, 2021 at 4:45 amOh my goodness, Anita! This Zen cement piece is just incredible. I love the innovative molds and colors you chose for this project. Everything says “Zen” and ideal for my cottage apartment back porch.
Thanks so much for sharing your amazing creativity.
Anita Holland
February 17, 2021 at 3:17 pmThank you so much Meegan, I was stumped on what to make so these were my tests and they worked.
Sam - Raggedy Bits
February 17, 2021 at 9:41 amThis is such a cool piece for the garden!! You would never have picked out that the base was made from a chocolate container!!! So very creative and you should have your own line of garden decor in Bunnings!!!
Anita Holland
February 17, 2021 at 3:18 pmAWW that is an awesome compliment, one of my strange ideas that actually worked.
How To Make Vintage Farmhouse Faux Concrete Eggs - Raggedy Bits
February 17, 2021 at 11:25 am[…] Zen Styled Garden Decor | Unique Creations By Anita […]
Leanna
February 19, 2021 at 3:57 pmI like your unique yard decor, but oh my that suncatcher board is gorgeous. I can’t believe I haven’t seen it before. I love how one of a kind everything you make is. The only time I ever worked with concrete is pouring a driveway, and it wasn’t nearly as artsy as this lol. Have a great week.
Anita Holland
February 22, 2021 at 2:39 pmThank you so much Leanna, I love the challenge of making something unique. That was my first time using cement, I did have some flops but got there in the end.
Kim Purvis
February 20, 2021 at 5:47 amVery crafty and the color is pretty! I love seeing what you come up with each week.
Kim
Anita Holland
February 22, 2021 at 2:40 pmThank you so much Kim, I love trying new things to keep my hobby exciting.
Libbie
February 22, 2021 at 10:07 amThis turned out so pretty! Perfect for Spring.
Anita Holland
February 22, 2021 at 2:42 pmThank you Libbie, that is so awesome of you to say.
Hannah
February 23, 2021 at 12:17 amWow this is so clever! I love the colour 🙂 #MMBC
Anita Holland
February 24, 2021 at 10:45 amThank you so much, the colour was made up so I don’t think I would be able to reproduce it. lol
Michele Morin
February 23, 2021 at 10:27 pmGood work !
Anita Holland
February 24, 2021 at 10:47 amThank you!
Christina Woodcock
February 24, 2021 at 4:11 amI love this Anita! And the pretty blue you used screams “Spring”!
Anita Holland
February 24, 2021 at 10:48 amThank you Christina, it really stands out now because my garden is so plain.
Michele Michael
February 28, 2021 at 3:28 amHi Anita. Thanks for sharing at Funtastic Friday. I think your cement project worked out well. I started reading the other blog posts too. Have a good weekend.
Anita Holland
March 1, 2021 at 7:32 pmThank you so much for the great comment and for stopping by.
Cecilia
March 1, 2021 at 6:00 amAnita, your creativity never ceases to amaze me! Love this garden sculpture! Thanks for sharing at Vintage Charm–pinned!
Anita Holland
March 1, 2021 at 7:33 pmThank you Cecilia, my brain never seems to switch off and comments like yours keep you going.
Naush Samama
March 2, 2021 at 11:12 amAnita, I love Cement sculptures. Your garden sculpture looks stunning ! Thank you for sharing with us at Meraki Link Party.
Much Love
Naush
Linda
March 2, 2021 at 11:40 pmYou always make everything look so easy. Thank you for sharing on the Classy Flamingos.
Anita Holland
March 7, 2021 at 12:12 pmThank you so much Linda. I think I am just not afraid to try and fail because I use mainly recycled materials.
Anita Holland
March 12, 2021 at 8:13 amThank you so much Shelbee, for the awesome comment.
DIY Rustic Avocado Sailboat - Easy Coastal Decor - A Crafty Mix
September 6, 2024 at 7:20 pm[…] really clever way to make a zen-styled garden orb from Unique Creations by […]