
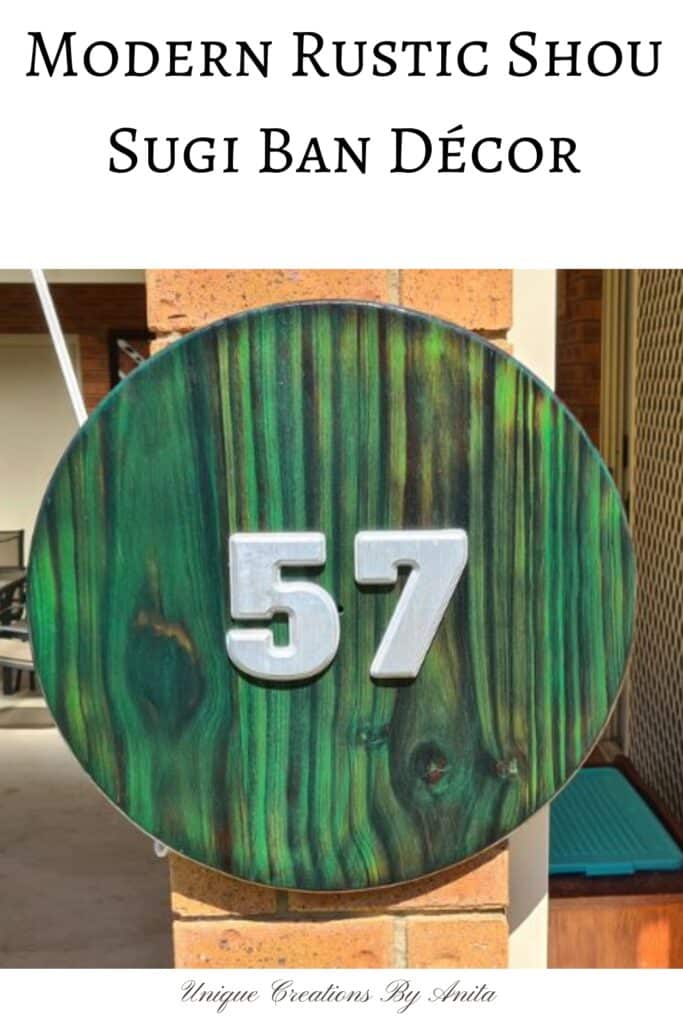
DIY Shou Sugi Ban House Numbers with Unicorn Spit Stain merges the time‑honoured Japanese wood‑burning method with vivid Unicorn Spit colour to create a truly eye-catching outdoor sign. In this tutorial, you’ll learn how to craft a wooden house number with a Shou Sugi Ban textured finish and single‑colour stain that reveals stunning colour variations—perfectly suited to modern rustic décor.
Our “Do It Over Designers” blog hop is here again! Each month, our creative community of bloggers shares fresh recycling, upcycling and DIY projects. Don’t miss their inspiring ideas—check out the links below to see what everyone’s been crafting this month.

What is Shou Sugi Ban
Shou Sugi Ban is a centuries-old Japanese technique for wood preservation that involves charring the surface with fire, brushing away loose soot, and then sealing it. This process creates a durable, weather‑resistant finish and beautifully emphasises the wood grain.
Today’s DIYers have taken Shou Sugi Ban beyond siding and fencing. They use it to craft striking wall art, custom furniture and home décor, often layering on coloured stains or paints—like vibrant Unicorn Spit—to highlight the rich textures and give each piece a unique, modern twist.
DIY Shou Sugi Ban House Numbers with Unicorn Spit Stain
**This post may contain affiliate links. This means I earn a small commission on links used at no extra cost to you. Please see my disclosure policy for more information.**
Materials Needed
- A piece of pine or scrap wood
- Blow torch
- Wire brush
- Coarse nylon flap brush (for drill)
- Respirator mask & safety glasses
- Unicorn Spit Dragon’s Belly green stain
- Clear oil‑based exterior polyurethane
- Interlocking wall brackets
- House number digits
- Strong wood‑bonding adhesive (e.g., No More Nails)
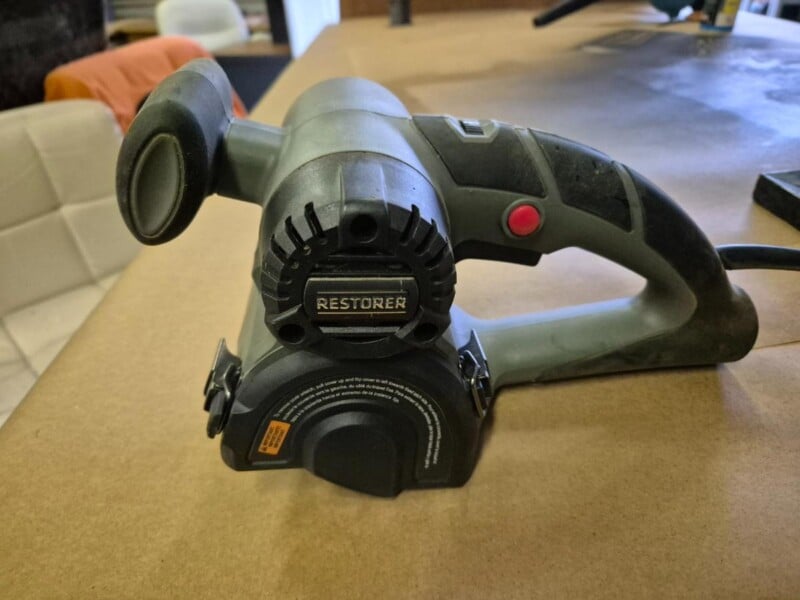
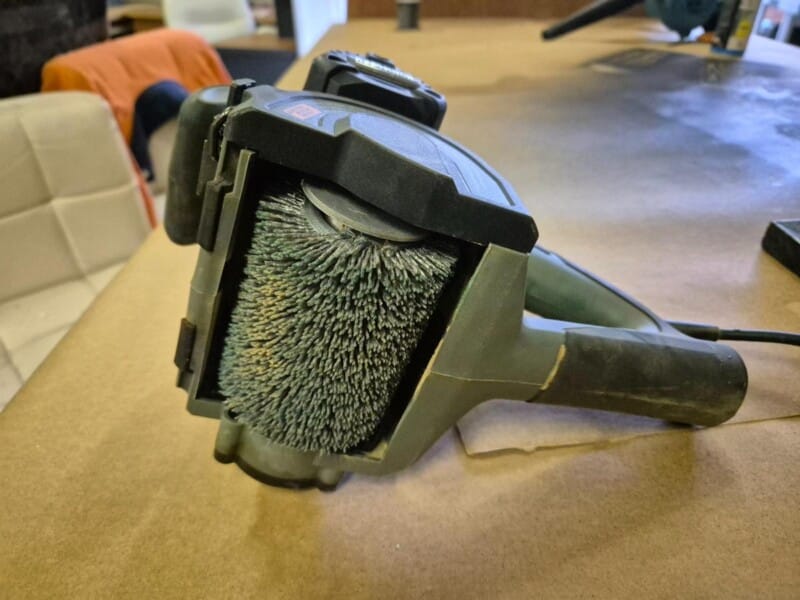
- Restorer tool or similar/ drum sander
Find Suitable wood
From my tests, pine delivers the most dramatic results: its soft fibres burn quickly and reveal striking grain contrast. While most woods will work, I chose reclaimed pine for this project.
Burning the wood
Hold your blow torch about 10 cm from the surface and move it evenly until shallow cracks begin to appear in the grain. Avoid overburning, as you can always re-torch areas later. I use Map gas because it burns hotter than propane and butane, but they all work well.

If you apply heat to large pieces of thin wood for too long, there is a risk of the wood drying out too quickly, which can lead to cracking or warping. Therefore, it’s better to burn multiple times for thinner wood.

Knots may take longer to burn and may exude sap, which will add extra colour variation once stained.

Remove the Charred Surface
To remove the first charred layer, you can use a wire brush. This step can be very messy, so be sure to wear a respirator and safety glasses. When using the wire brush, make sure to rub along the grain of the wood.

Next, you can switch to a coarse nylon flap brush attached to a drill to sand deeper into the wood. While you can continue to use the wire brush, it requires more effort. The more you use the brush, the lighter the wood will become and the more vibrant the Unicorn SPiT colours will show. If you look closely at the image below, you will notice the light wood is a few millimetres deeper than the wood grain. This is what you are aiming for.

If you find yourself hooked on Shou Sugi Ban projects like I am, I highly recommend investing in a drum sander with coarse nylon‑brush attachments—it will slash your sanding time dramatically.
Add the Unicorn Spit Stain
I used Unicorn Spit’s green shade, Dragon’s Belly, though other paints work too. I’ve tested many colourants on Shou Sugi Ban; you can see the results in this tutorial. Unicorn Spit is highly concentrated, so dilute a small amount with water.

Applying undiluted stain to bare wood can yield patchy colour and spoil the finish. Use a brush, cloth or foam pad to apply it like any stain, always following the grain. Wipe away excess with a paper towel. If areas appear too dark, mist lightly with water and wipe away some of the colour with a cloth.

Seal the Wood
Wait for the stain to dry to a powdery finish. Brush on two coats of clear oil‑based exterior polyurethane on all sides.

The sealant enhances colour contrast, brings out hidden tones, and protects against weather. Avoid water-based polyurethane when sealing Unicorn Spit—it will reactivate the stain. Instead, use an oil‑based polyurethane or tung oil.

Attach Your Numbers
Once fully cured, adhere your house number digits using a strong wood adhesive. Press firmly and let dry according to adhesive instructions. I used interlocking brackets to mount the house number to the wall.
Taken in front of our house, this photo shows how changing light alters stain hues and highlights wood texture.

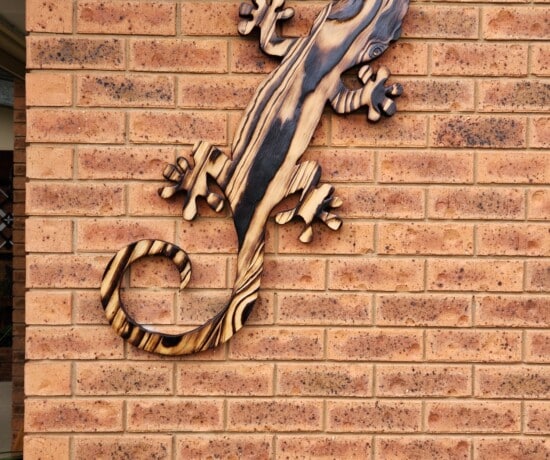
More Shou Sugi Ban project Ideas
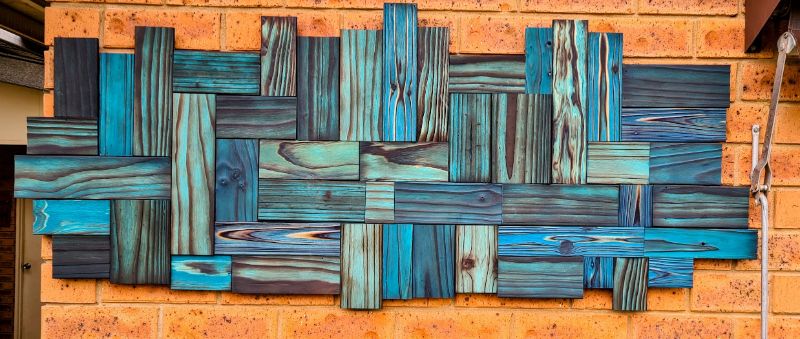
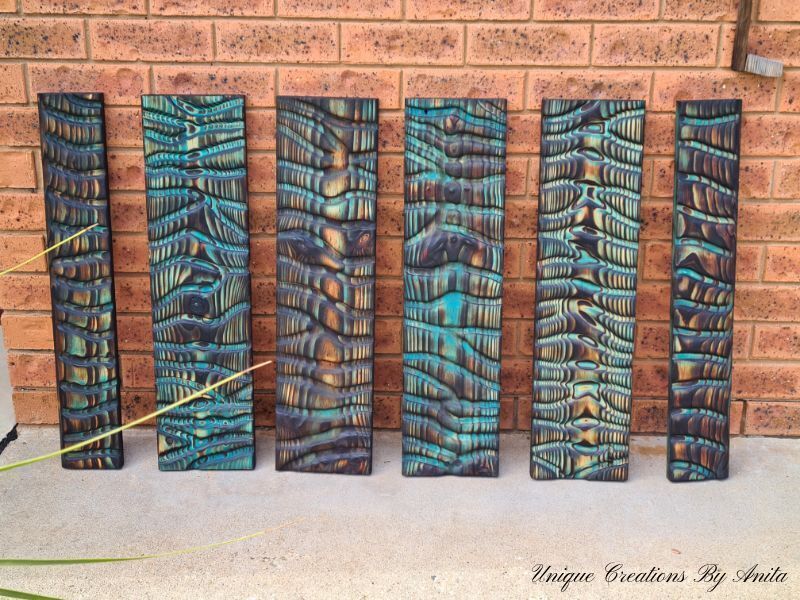
I sourced recycled pine, charred the surface with Shou Sugi Ban, then added extra texture using a wood router for these wooden wall‑art panels.
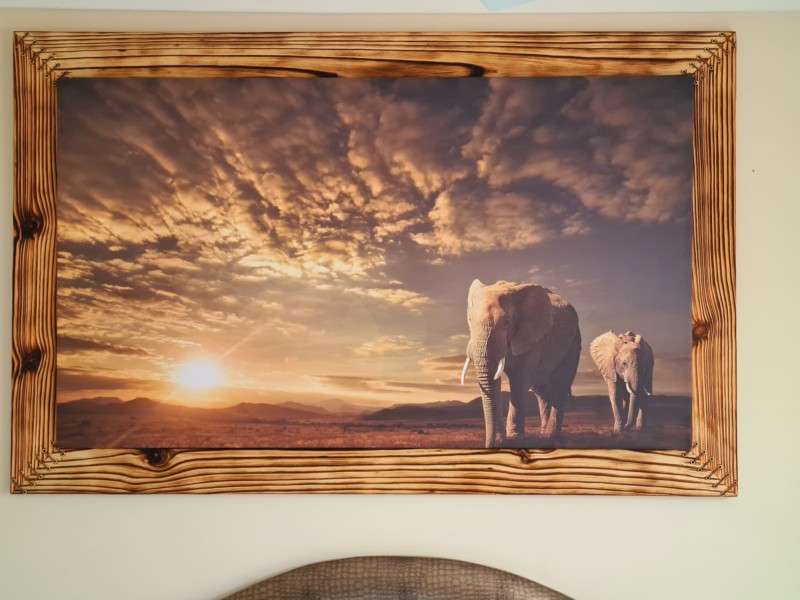
You don’t need to add colour to Shou Sugi Ban – its natural, textured finish looks just as striking, as shown in this large picture frame.
Do It Over Designers Blog Hop

Now it’s time to visit the rest of the team. Be sure to stop by each blog for some amazing Upcycling/Recycling/DIY projects. You will find their links listed below.

If you’d like to find any of the items used in this project, we’d greatly appreciate it if you used our affiliate links. These links provide us with a small commission at no extra cost to you, allowing us to continue creating and sharing more inspiring projects. We’d also love to hear your thoughts—feel free to leave a comment or share this post!

25 Comments
Sara
March 28, 2021 at 9:52 amWowsers! It’s almost psychedelic at certain angles; what an awesome effect. I can’t wait to try this!
Patti @ Pandora's Box
March 28, 2021 at 10:21 amI have never heard of this technique! Very interesting effect – thanks for sharing!
Anita Holland
March 28, 2021 at 2:09 pmThank you so much and thanks for stopping by.
Ann
March 28, 2021 at 11:54 pmThis is the first I’ve heard of the Shou Sugi Ban technique – what a great way to give wood a new look! The unicorn spit really gives it more interest and depth. Thanks for sharing this with us, Anita.
Anita Holland
March 30, 2021 at 1:02 pmThank you so much Ann, I think I am hooked on the method.
Michelle Leslie
March 29, 2021 at 1:05 amOh my, Anita. I’ve just finished making some junk birds and did almost the exact same thing with the little guys. Unicorn SPiT does look so amazing when it’s applied on top of the burnt wood. It’s almost as if it takes on a life of its own, and it’s already stunning when you apply it to plain wood. I can’t wait to play with some of the Sparkling SPiT to see how that works.
Anita Holland
March 30, 2021 at 1:03 pmThank you so much Michelle, I did love the unicorn spit. I am now messing around with other colours to make more wall hangings.
Maria
March 29, 2021 at 11:10 pmWow what a unique way of staining apiece of wood, I would’ve to try it, I wonder if could use large candle flame and hold it over the candle. Beautiful job.
Anita Holland
March 30, 2021 at 1:03 pmThank you so much Marie, I dont think a candle flame will burn the wood deep enough to get the same effect.
Brooke
March 30, 2021 at 7:49 amThis project turned out amazing! The wood is beautiful with thus technique. I will be sharing this with Pinterest so I can find it quickly when I’m ready to give this a try. Thank you for sharing.
Anita Holland
March 30, 2021 at 1:05 pmThank you so much for the comment and the share. It is greatly appriciated.
Donna @ Modern on Monticello
March 31, 2021 at 3:03 amVery interesting project, Anita. I have not used either one of these techniques so I definitely learned something new reading your post. I definitely like the shade of green you used. The table is also gorgeous.
Anita Holland
April 3, 2021 at 5:24 pmThank you so much Donna, I love learning new techniques to share and keep my hobby interesting.
Debbie-Dabble
March 31, 2021 at 8:39 amWOW!! what a great transformation!! Interesting!!
Thanks so much for stopping by!!
Stay safe, healthy and happy!!
Hugs,
Debbie
Anita Holland
April 3, 2021 at 5:24 pmThank you so much Debbie.
Karen the next best thing to mummy
March 31, 2021 at 11:08 pmSuch an amazing project #alittlebitofeverything@_karendennis
Anita Holland
April 3, 2021 at 5:25 pmThank you so much Karen I really do appreciate the comment.
Meegan
April 1, 2021 at 12:31 amWhat a great way to add a unique look and style to wood. Unicorn spit can really make all the difference, can’t it? I am excited to give this a try using your tutorial. Definitely pinning!
Anita Holland
April 3, 2021 at 5:26 pmThank you meegan, I do love using unicorn spit, but I have done a new project using assorted inks and the results are even better.
Rosemary Palmer
April 2, 2021 at 1:10 amI love this. I’ve seen the Unicorn Spit but haven’t tried. I think I will look around for something. Green is a fabulous color.
Anita Holland
April 3, 2021 at 5:27 pmThank you so much, Unicorn spit have so many different colour and even have a sparkling range.
Allyson
April 4, 2021 at 1:20 amYour project looks amazing!! I’ve never heard of the burning technique or Unicorn Spit. Happy Easter!
Anita Holland
April 6, 2021 at 3:30 pmThank you so much Allyson, Hope you had a great Easter
Marie B.
April 8, 2021 at 12:37 amWow, this is really cool Anita! My thoughts instantly went to peacock feathers. The colors and the knots in the wood remind me of the eye in the feathers. It’s quite stunning!
Anita Holland
April 13, 2021 at 11:10 amThank Marie, I totally agree, I think I will try another one with multiple colours next.