
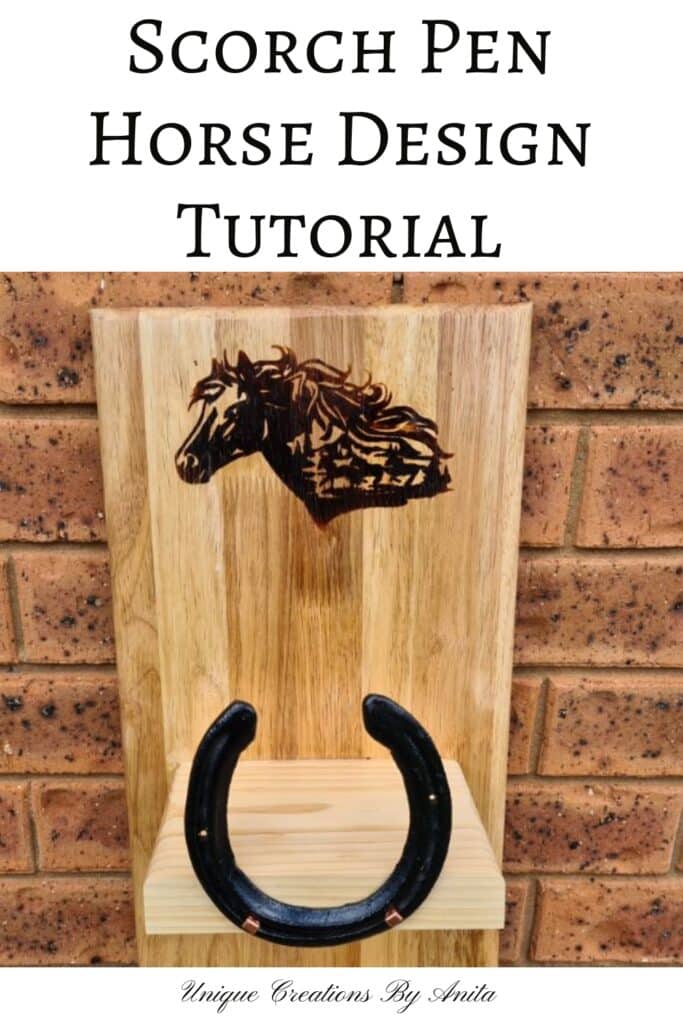
Ever since I first spotted a horseshoe towel rack on Pinterest, I’ve been itching to make one of my own. Luckily, a mate from work who races horses had a stash of discarded shoes, so I collected plenty for this project. I’d planned to add a custom horse motif using traditional pyrography, but my arthritic hands quickly sidelined the burner. That’s when I discovered a scorch‑pen stencil method that delivers the same rustic, hand‑burned look—no special skill required. In this guide, I’ll show you how to create a DIY Rustic Horseshoe Towel Rack with Easy Scorch Pen Horse Design that’s as charming as it is functional.

Before we dive into this tutorial, be sure to subscribe to my bimonthly newsletter to be the first to see my latest projects. You can also follow me on Pinterest and Facebook, where I also include my unique mixed-media art projects.
DIY Rustic Horseshoe Towel Rack with Easy Scorch Pen Horse Design
**This post may contain affiliate links. This means I earn a small commission on links used at no extra cost to you. Please see my disclosure policy for more information.**
Materials Needed
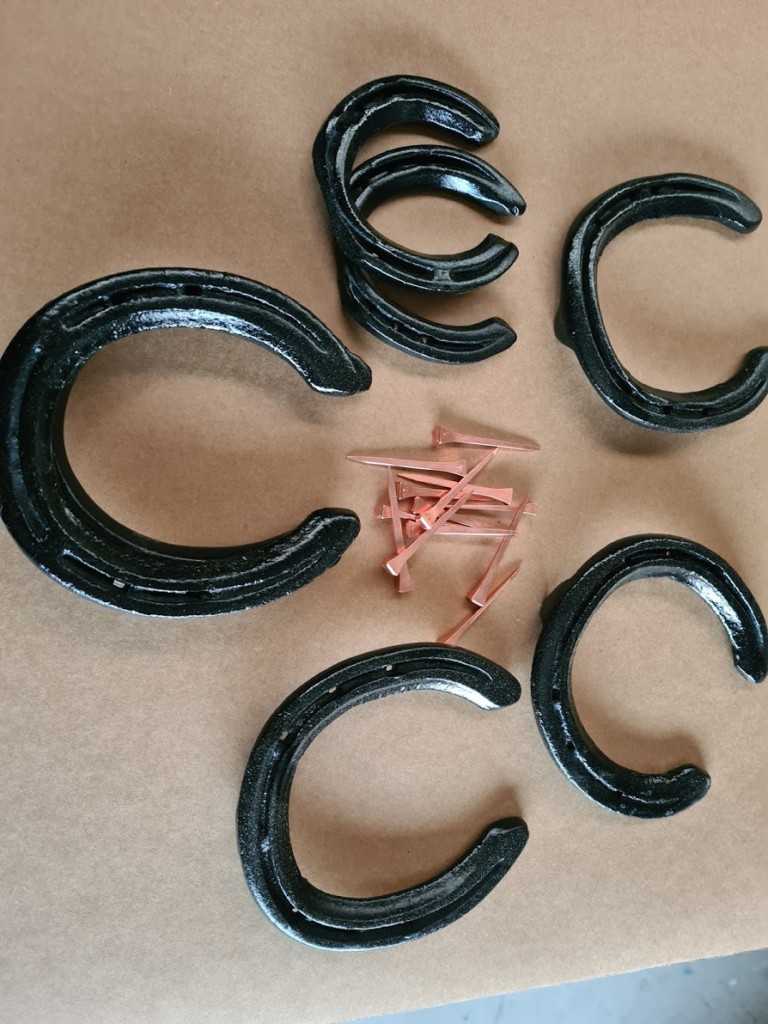
- Recycled horseshoes (3 full-size + 2 small)
- Undiluted white vinegar
- Plastic bowl
- Wire or stiff brush
- Primer spray paint
- Paint for horseshoes
- Wood board (1000 mm × 250 mm × 20 mm)
- Wood offcuts for shelves (180 mm × 130 mm × 35 mm)
- Wood planer
- Router with round-over bit
- Orbital sander (120–240 grit disc)
- Stencil or vinyl decal and transfer tape
- Scorch pen (woodburning marker)
- Heat gun or blow torch
- Clear polyurethane
- Horseshoe nails and hammer
- Wood glue, clamps, screws, drill and drill bits
- Optional: Cricut machine for intricate decals
Cleaning the Horseshoes
Place all rusty horseshoes in a plastic bowl and cover with undiluted white vinegar. Soak for 24 hours.

Use a wire brush to remove mud and corrosion from the grooves.

I used a screwdriver to pull out all the nails.
")
Dry thoroughly, then apply one coat of primer.

Once dry, paint both sides for a polished finish.
Preparing the Wood Shelves
Cut your baseboard to 1000 mm × 250 mm × 20 mm and shelves to 180 mm × 130 mm × 35 mm. Plane away old stain and varnish until the surface is clean. If you are using recycled wood like I did.

Round over all edges with your router for a softer look.

Sand from 120 grit up to 240 grit—aim for at least 220 grit where you’ll apply the scorch pen.

Assembling the Shelving Unit
Mark shelf positions on the base and drill centred pilot holes.

Countersink so the screws sit flush at the back.

Apply wood glue to each small shelf, clamp in position, then flip and secure with screws from the back.

This is how the shelf should look so far.
")
Transferring and Scorching the Horse Design
I discovered the scorch pen while practising woodburning, and it completely changed the game. You don’t need pyrography skills—just a stencil or decal. To match my horse theme, I sourced silhouettes from Etsy. If you prefer custom motifs, use a Cricut vinyl cutter to create your decals. I use my Cricut in nearly every DIY project and can’t recommend it enough. I added my horse graphics to Cricut Design Space, then cut and applied the stencil for crisp scorch‑pen results.

Use transfer tape to apply the stencil to the wood. Peel away the tape so only the vinyl remains.


To prime the scorch pen, press its tip firmly onto a paper towel until the liquid flows to the nib. Then, with the stencil in place, colour in the exposed areas of your design—working top to bottom helps prevent smudging. You’ll see the wood begin to lighten to a pale orange as the scorch‑pen solution soaks in.

Avoid colouring along the stencil edges immediately after priming the pen, as excess fluid can seep underneath. You can see in the photo below where the scorch‑pen missed spots and left white gaps—simply go back and fill in any areas before you heat the design.

Now gently peel off the stencil—although the scorch‑pen liquid may look dry, it’s still embedded in the wood, ready for heat activation.

Heating and Finishing the Graphics

As you heat the stencil, the scorch‑pen ink will slowly darken over several minutes, first appearing pale yellow before deepening to rich brown. Keep the heat gun moving in smooth, sweeping passes; lingering in one spot can char the wood. You may notice a little ink bleed around the edges where the pen was heavily loaded, and I did the edges.

When the burning is complete, you can leave the design as‑is or lightly buff it with a fine scouring pad to gently remove any stray scorch marks and soften the edges.

Seal the wood and graphics with two coats of clear polyurethane to enhance contrast and durability.

Attaching the Horseshoes
Attaching the horseshoes turned out to be the trickiest—and most time‑consuming—step. I assumed I could simply drill holes and screw them in, but these things are practically forged steel. After snapping two drill bits, I ditched the screws and used traditional horseshoe nails instead.

A quick trip back to my horse‑racing mate scored me a handful of sturdy nails, and they drove in far more easily than anything I’d tried before.

Because I had some small horseshoes, I thought they would look good attached to the sides to hang wet towels on. The small shoes were already sort of flat on the bottom, but they did not sit flush with the wood.
")
I smoothed the overhanging edges on a benchtop sander until the horseshoes sat flush, but the metal heated up fast, so I wrapped a cloth around my hand to protect my skin from getting burnt. I attached them to the sides in the same way as the front.

For the final installation, secure the shelf to the wall with interlocking metal hinges for a sturdy, flush mount.
")


More woodworking project ideas
I repurposed old kitchen cupboard doors into a stylish headboard, giving them new life as a standout feature in the bedroom.

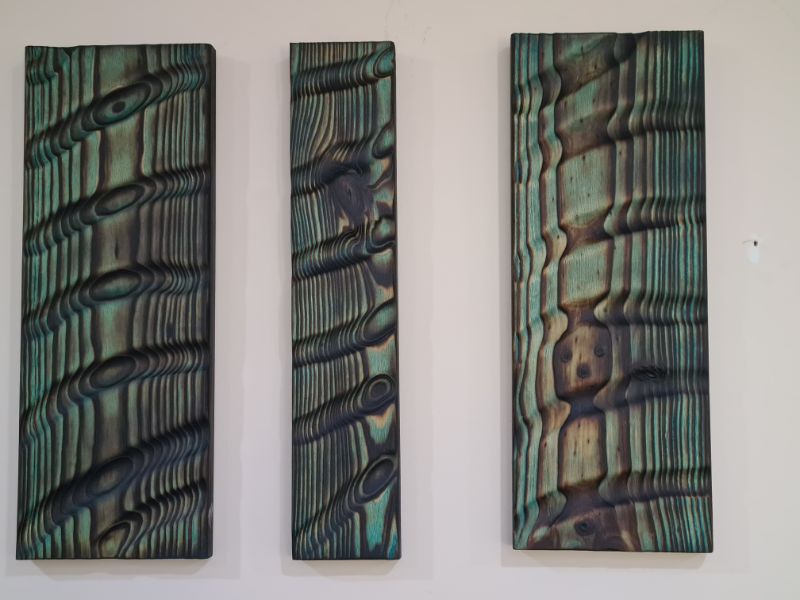
I transformed reclaimed timber into striking wall‑art panels using the traditional Japanese shou sugi ban wood‑burning technique.

If you’d like to find any of the items used in this project, we’d greatly appreciate it if you used our affiliate links. These links provide us with a small commission at no extra cost to you, allowing us to continue creating and sharing more inspiring projects. We’d also love to hear your thoughts—feel free to leave a comment or share this post!

38 Comments
Julie
August 17, 2020 at 8:52 pmWhat a cool and clever upcycle.
Anita Holland
August 18, 2020 at 8:02 amThank you Julie, that is so kind of you to say.
Sara
August 17, 2020 at 9:41 pmAwesome project! I just picked up a horseshoe from an antique market, but they are pricey. I need to make friends with someone who rides – lol!
Anita Holland
August 18, 2020 at 8:03 amThank you Sara, it is handy having a friend with horses.
Michelle Leslie
August 17, 2020 at 11:01 pmGoodness Anita, what a lovely idea for a shelf. So perfect for someone who owns a ranch or stays in the country. I gave up trying to work with horse shows ages ago. Those things are really tough.
Michelle Leslie
August 17, 2020 at 11:03 pmOh I forgot to say, I’d love to play around with the Scorch pen. What a fun concept to add art to wood.
Anita Holland
August 18, 2020 at 8:05 amI was so excited when I found this pen, I love finding new products to try.
Anita Holland
August 18, 2020 at 8:04 amThank you Michelle, I must be honest I will not be doing much with horseshoes again. Those things are rock solid and not worth the damage to my tools.
Lynn Spencer
August 17, 2020 at 11:15 pmWhat a great gift for my horse-loving friends! Thanks
Anita Holland
August 18, 2020 at 8:06 amMy friend loved it, they are horsie people so it fits into their house perfectly.
Julie Briones
August 18, 2020 at 3:19 amLove this, Anita! I’m a horse-lover, so this really ‘speaks’ to me. 😉 Would be so cute at a cabin, or even outside to hold beach towels! Pinned!
Anita Holland
August 18, 2020 at 8:07 amI am scared of horses but it was a project I have wanted to try for a long time.
Janet
August 18, 2020 at 8:02 amYou are so darned creative Anita!
Kim Purvis
August 18, 2020 at 8:56 amOoh I am likeing the scorch pen! So cool! Now i need to figure out what I want to burn! Live this project!
Anita Holland
August 18, 2020 at 9:46 amI know the feeling I was so excited when I got it but could not come up with a project. They are not the cheapest so I did not want to waste it. lol
Maria Brittis
August 18, 2020 at 12:15 pmWhat a creative Idea. Love the horseshoes, perfect for a rustic theme/
Anita Holland
August 21, 2020 at 8:48 amThank you Maria, the horseshoes were a nightmare to work with. lol
Danielle
August 19, 2020 at 9:56 pmWow!! This turned out amazing! Such a great idea for upcycling!
Anita Holland
August 21, 2020 at 8:52 amThank you so much Danielle.
creativejewishmom/sara
August 20, 2020 at 11:47 pmLove it Anita! And this is the first time I’ve heard about a torch pen, which may be an excuse to also get a heat gun! thanks for sharing on craft schooling sunday!
Anita Holland
August 21, 2020 at 8:55 amThank you so much. Now I have finally used the scorch pen I think I am hooked.
Anita Holland
August 22, 2020 at 10:59 amThank you so much for the invite, I would love you join your party.
Marie-Interior Frugalista
August 23, 2020 at 1:17 amVery clever idea, Anita, and girl can you rock the power tools! I bet your friend was thrilled with his new equestrian shelf rack. I have a heck of a time with the woodburning tool so learning about this amazing torch pen is right up my alley.
Anita Holland
August 24, 2020 at 1:26 pmThank you for the lovely comments, Marie. It was supposed to be for the stables but his wife loved it so much she wanted it in her house. The scorch pen is really great and so easy to use.
Jo (A Rose Tinted World)
August 23, 2020 at 7:01 pmWhat a great idea! I would never have thought to use old horseshoes like this! #MMBC
Anita Holland
August 24, 2020 at 1:26 pmThank you so much, I would have to admit they are very hard to work with because they are solid.
Laura Walters
August 27, 2020 at 6:19 amWhat a great addition to our linky party! We are so happy to have you!
Anita Holland
August 27, 2020 at 12:02 pmThank you so much Laura. I have added you to my list, So will be back. lol
Beth Watson
August 27, 2020 at 6:20 amThank you so much for sharing! Your project is absolutely darling!
Anita Holland
August 27, 2020 at 12:19 pmThank you so much, I will pop by again next week.
Meg Daves
August 27, 2020 at 6:20 amWe are so excited that you participated! Thank you for sharing your creativity! This is so cute!
Anita Holland
August 27, 2020 at 12:17 pmThank you so much Meg.
Ann Butler
August 27, 2020 at 6:21 amThank you for participating in our linky party!
Carol
August 28, 2020 at 12:45 amYou could sell these like crazy in my neck of the woods! So cool. Featuring when my link party opens tonight!
Anita Holland
August 29, 2020 at 11:38 amThank you so much for the feature Carol.
Cindy@CountyRoad407
August 28, 2020 at 12:18 pmThis turned out great! Love the added burning. I need to try that sometime. Thanks for linking up at Farmhouse Friday! We greatly appreciate it!
Anita Holland
August 29, 2020 at 11:39 amThank you so much, those scorch pens are a game-changer.
Anita Holland
August 29, 2020 at 11:38 amThank you so much for the feature.