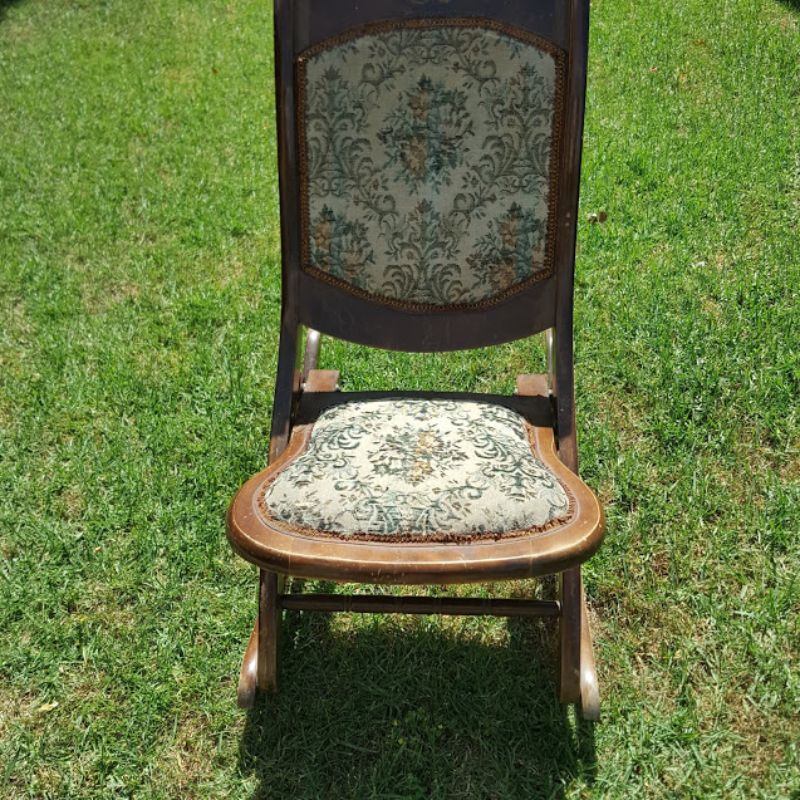
There’s something special about bringing vintage furniture back to life. I found this antique rocking chair on a local buy, swap and sell group for just $25. The shape and detail caught my eye immediately. I already had some leftover fabric from a previous project, so this felt like the perfect opportunity to practice and improve my furniture restoration skills without spending much.

What looked like a simple project turned out to be a bit more challenging, but the results were well worth the effort. This makeover includes removing old fabric, stripping stain, sanding, staining, and reupholstering with a gorgeous braid trim. Whether you’re new to upcycling or a DIY enthusiast, this guide will help you take on a similar project confidently.
Before we dive into this tutorial be sure to subscribe to my bimonthly newsletter to be the first to see my latest projects. You can also follow me on Pinterest and Facebook where I also include my unique mixed-media art projects.
How to restore an antique rocking chair
**This post may contain affiliate links. This means I earn a small commission on links used at no extra cost to you. Please see my disclosure policy for more information.**
Materials Needed
- Fabric of choice
- Old gold gimp braid trim
- Citri-Strip paint remover
- Paint scraper
- Scrubbing brush
- Dark mahogany wood stain
- Oil-based gloss polyurethane
- Staple gun and staples
- Pliers
- Staple remover
- Rubber mallet
- Spray adhesive
- Contact glue
- MDF board for the seat base
- Foam cushion
- Jigsaw
- Hot glue gun
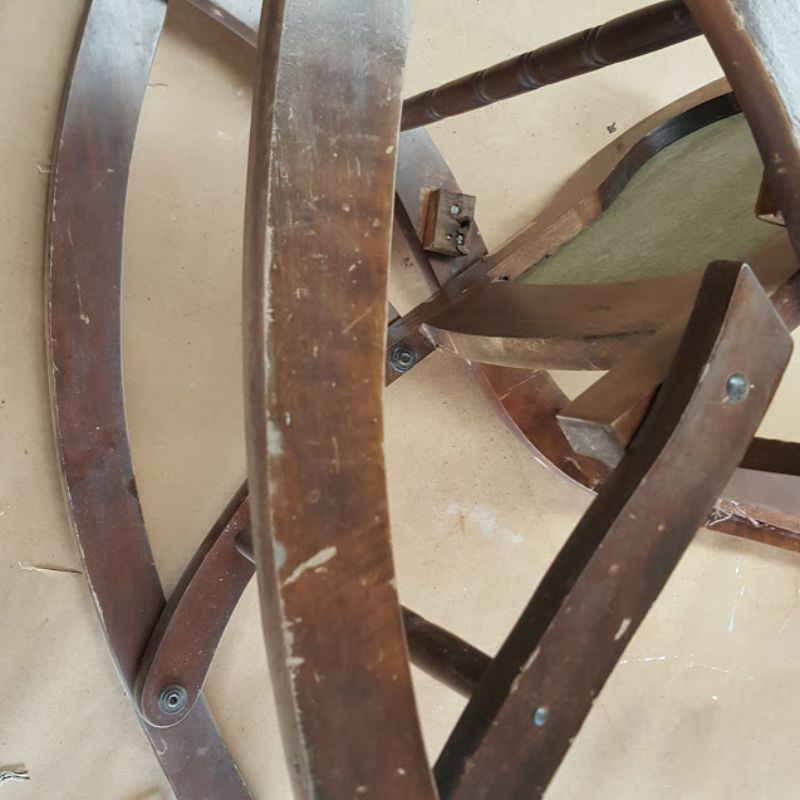
Assessing the Chair
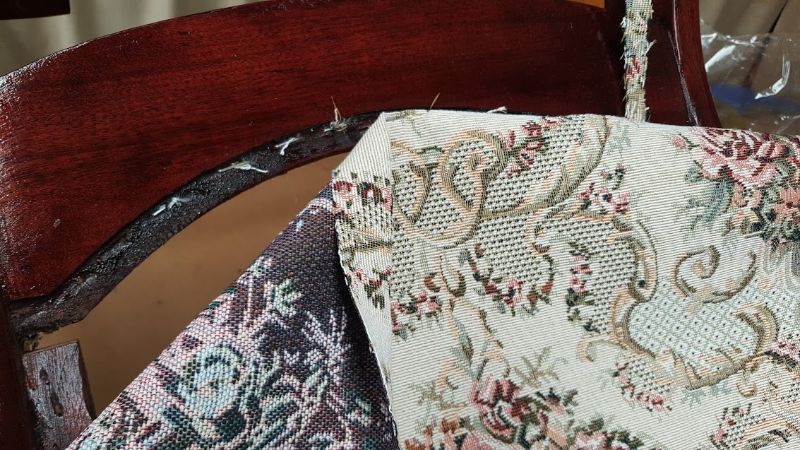
In photos, the chair looked okay, but up close the fabric was threadbare and falling apart. The braided trim came off with just a gentle tug. The wood, however, was in decent shape—scratched, but not cracked or broken.
Removing the Old Fabric and Trim
Start by removing the braid. It’s usually glued on to hide staples. Then use a staple remover to lift a corner of the fabric. Grab it with pliers and roll it out—this also lifts the staples, making them easier to remove.
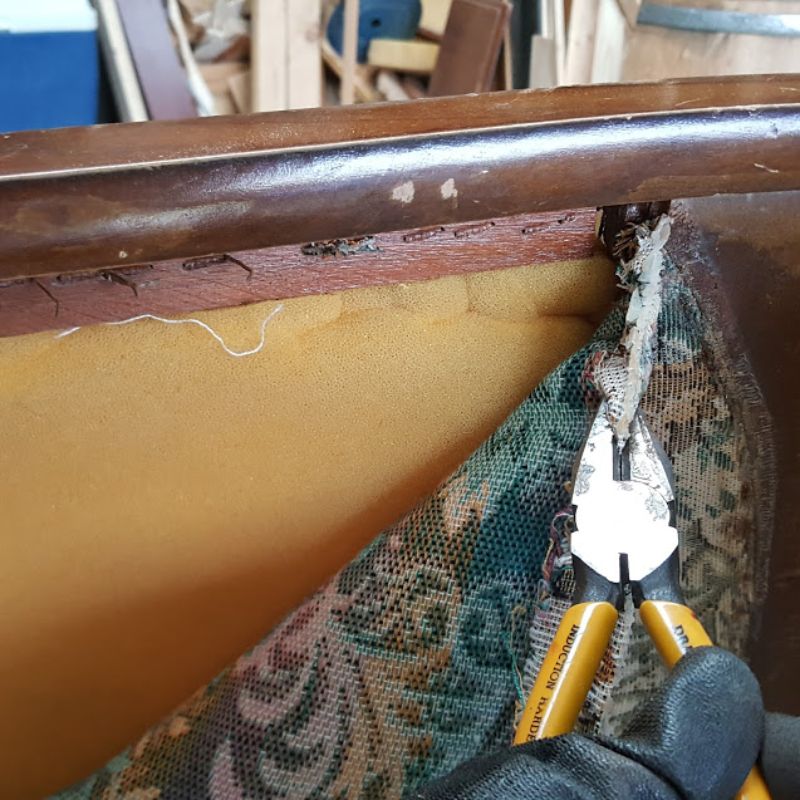
Remove all the staples to avoid hitting them when applying new fabric. This also allows stain and varnish to fill any old staple holes.
Stripping the Old Stain and Varnish
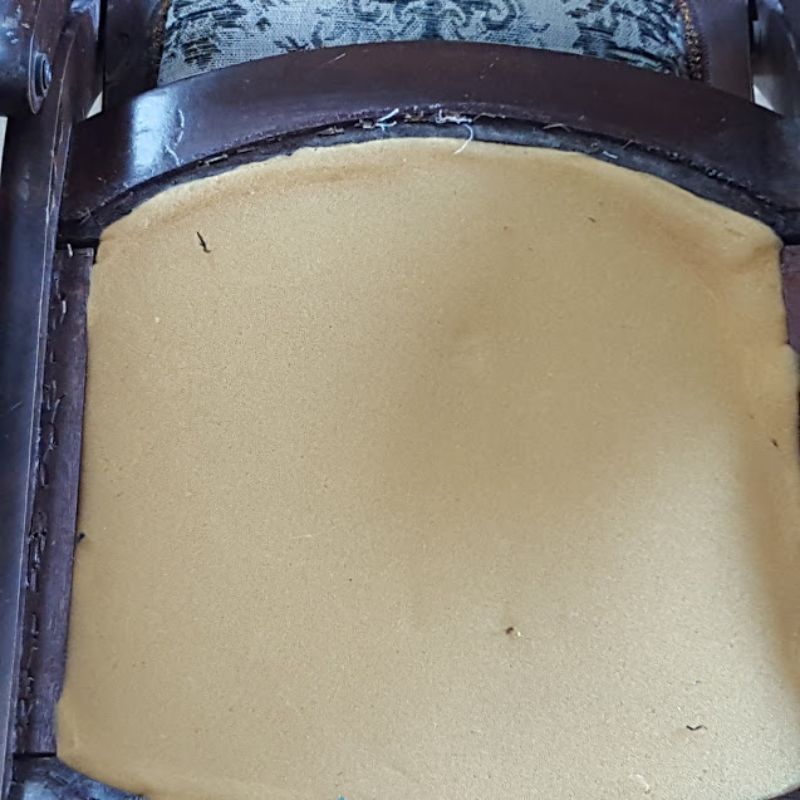
At first, I thought I could disassemble the chair for sanding. Unfortunately, the joints were riveted, so I had to work with it fully assembled. The flat areas were easy, but the carved parts were a hassle.
I switched to Citri-Strip to remove the old stain and varnish. It takes a few hours but works well. Once the old finish begins to bubble, scrape it off with a paint scraper. Use a stiff brush to clean any carved details or appliques.
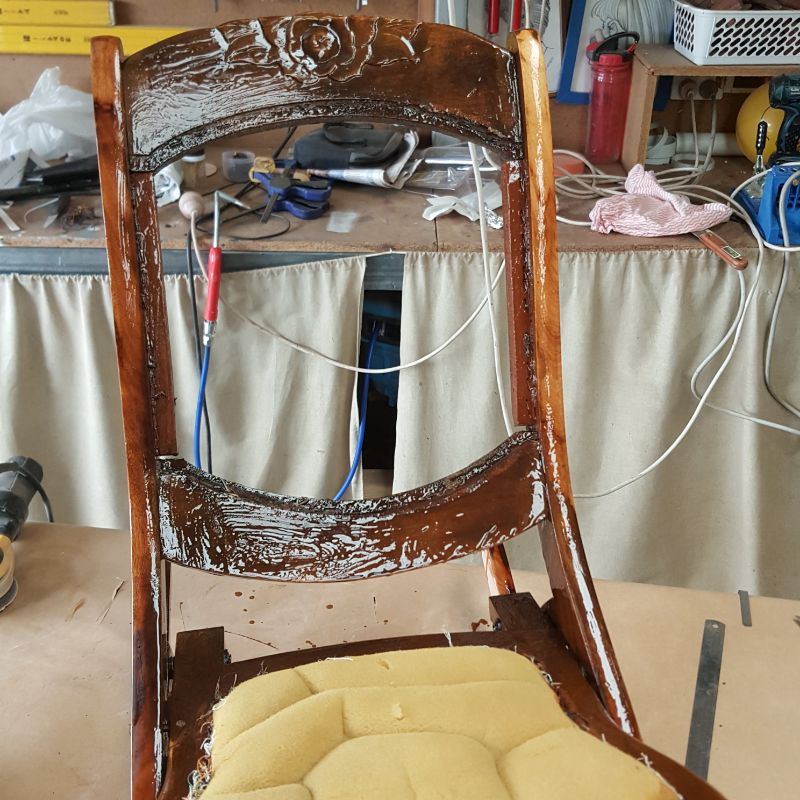
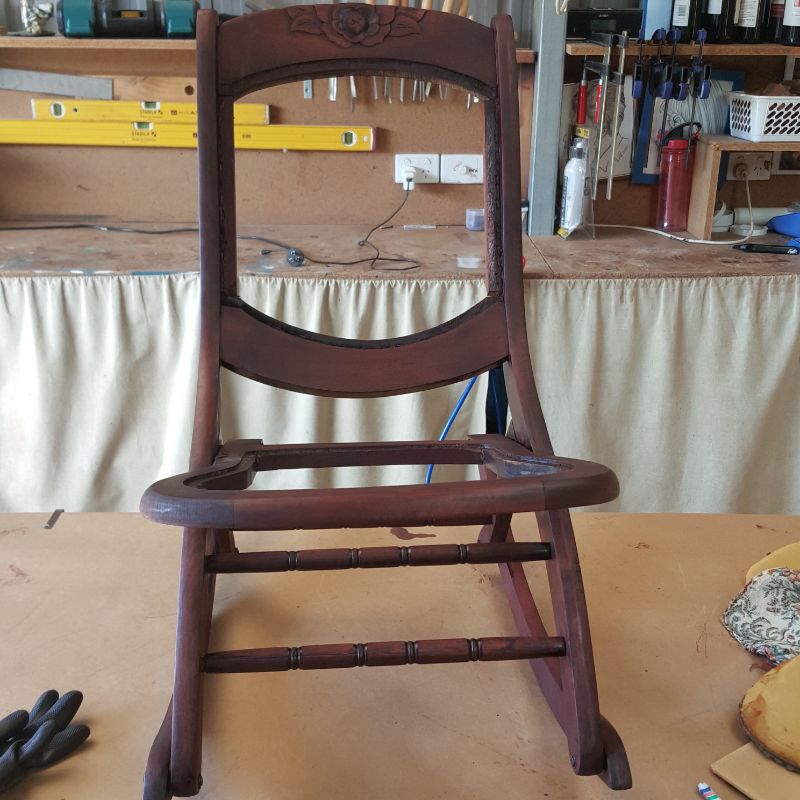
Staining the Wood
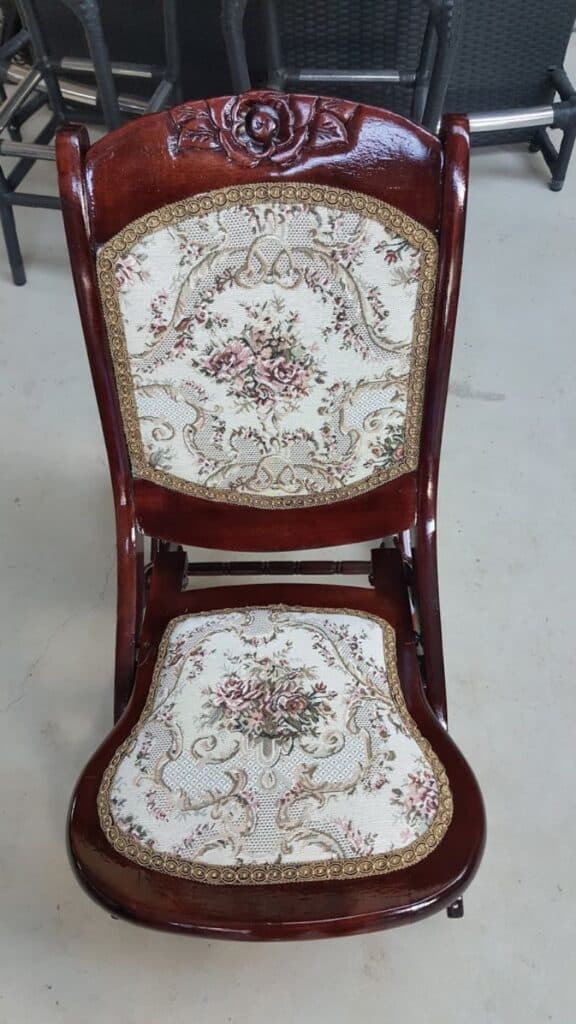
Once fully stripped and dry, apply your stain. I used Dark Mahogany for a deep, rich tone. Allow it to dry, then apply two coats of oil-based gloss polyurethane for a durable finish.
Allow it to dry, then apply two coats of oil-based gloss polyurethane for a durable finish.
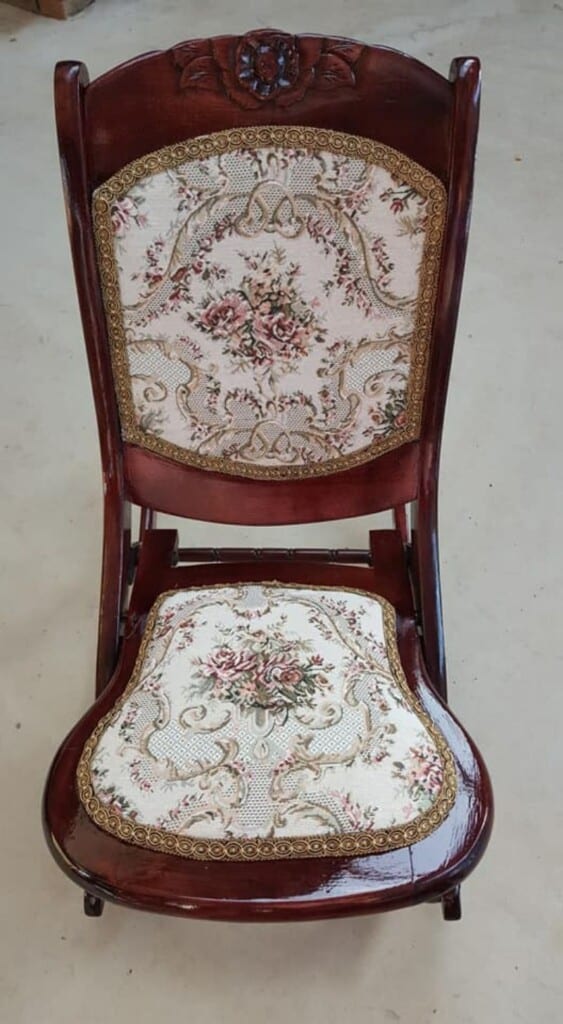
Upholstering the Chair
Pick a feature section of your fabric and centre it on the backrest. Start by stapling the top, bottom, and sides. Then work your way around. Fold the fabric over by at least 1cm to prevent fraying.
Use plenty of staples to secure the hem firmly.

If your foam is still in good shape, you can reuse it. Secure the fabric to the back panel the same way.

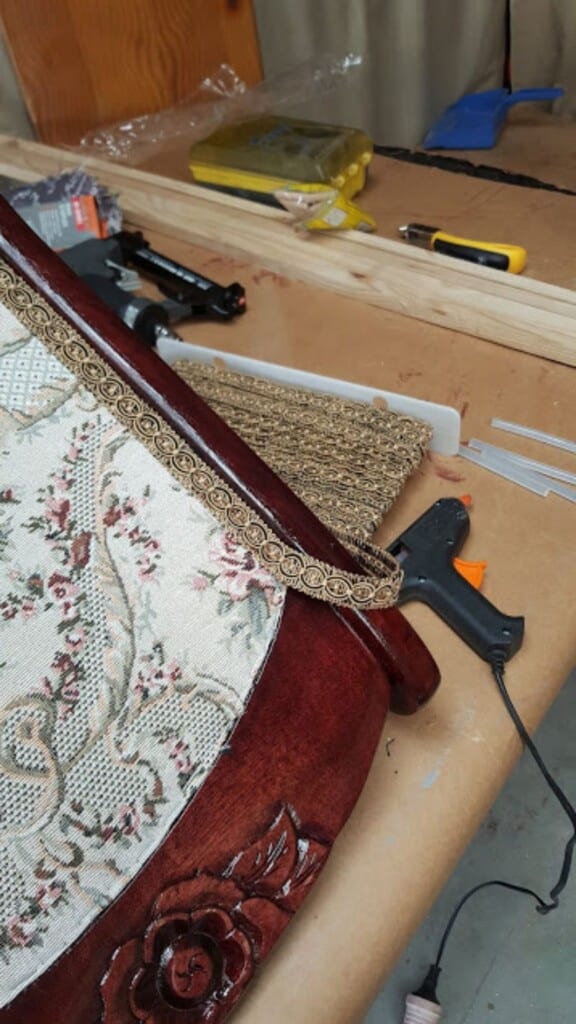
Adding Decorative Trim
Use a hot glue gun to apply gimp braid trim over the staples. Start at the bottom to hide the seam. This gives a clean, professional look to the chair.
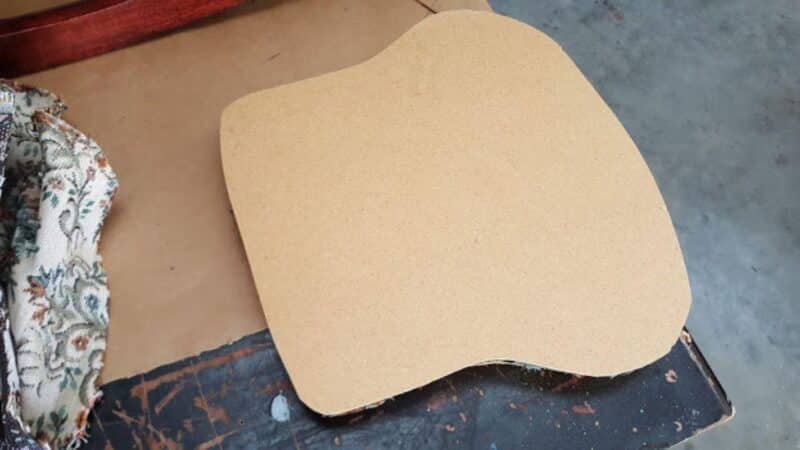
Replacing the Seat Base
The original seat base was broken. I knocked it out with a rubber mallet and used it as a template to cut a new one from scrap MDF.
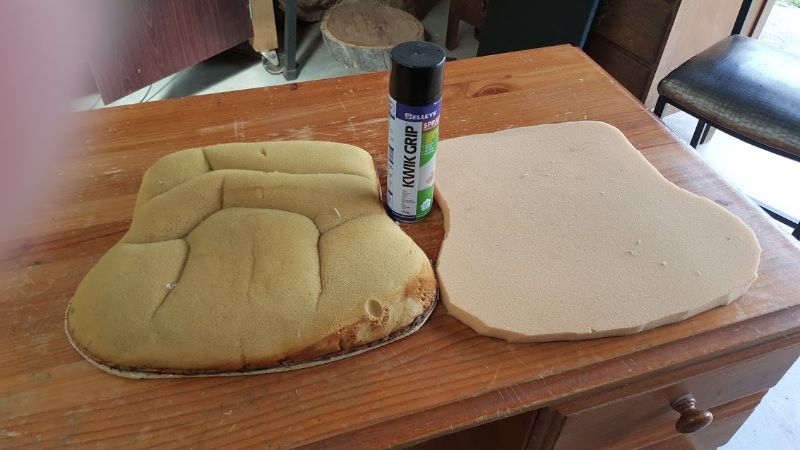
The new MDF base was glued to the original one for added strength. Fresh foam was attached using spray adhesive and contact glue for a secure hold. The seat was then upholstered using the same method as the backrest and finished neatly with braid trim.
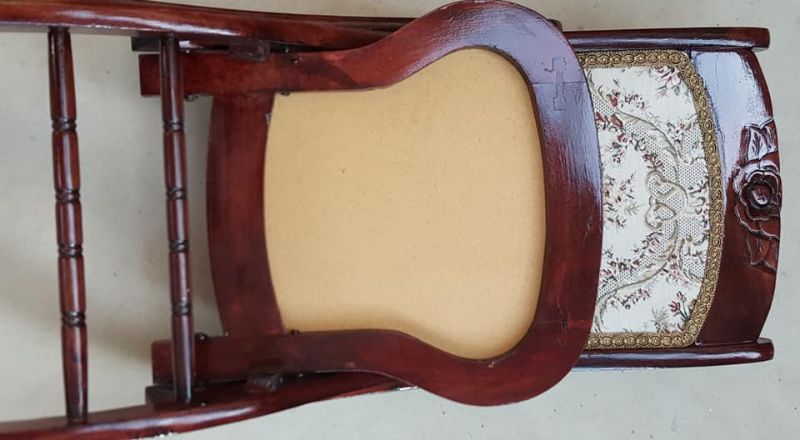
I refit the seat, this is the view from below.
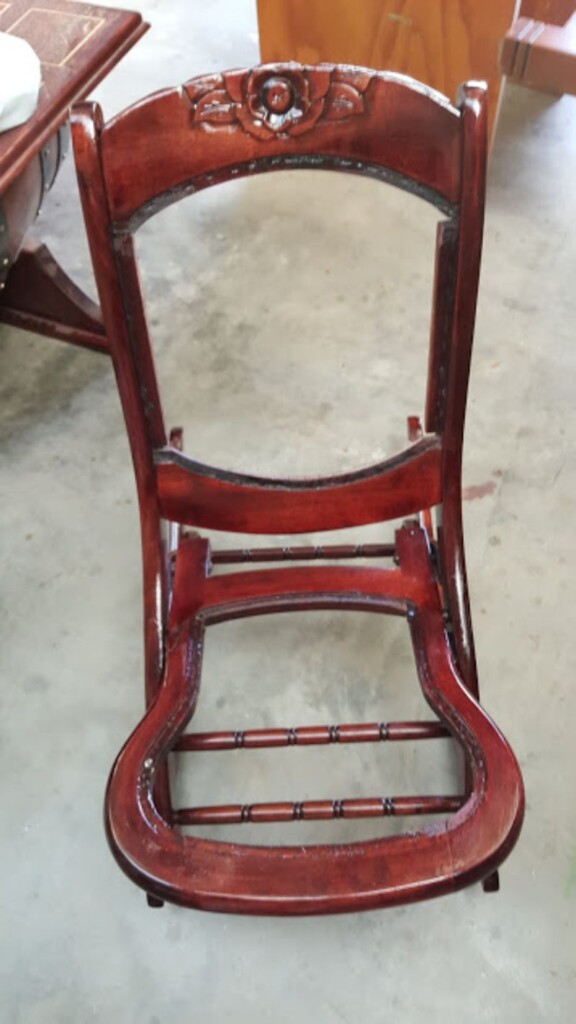
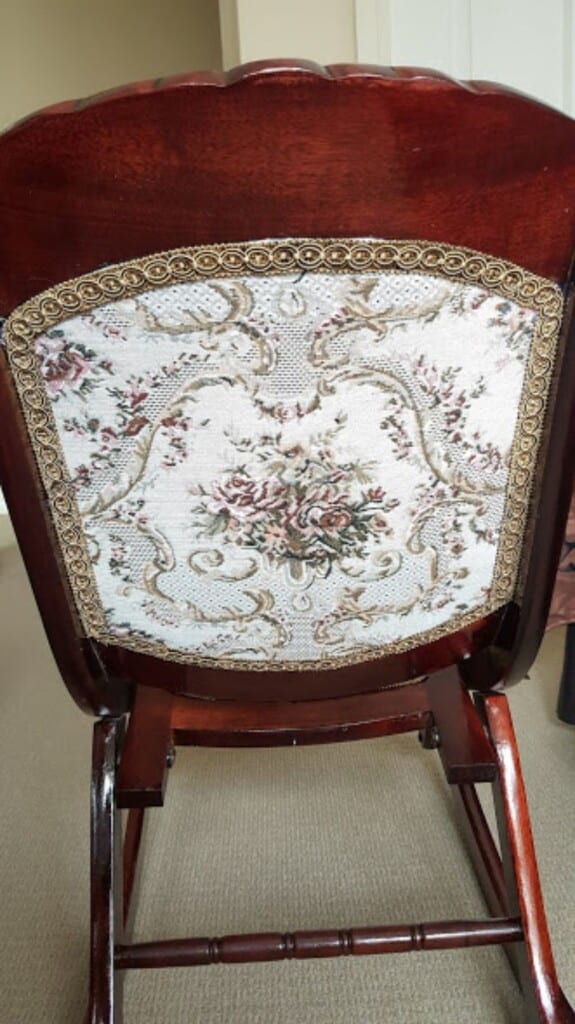
Back view
More Furniture Makeovers
This dresser should have gone to the landfill but my daughter loved the shape, so I gave it a makeover.

This old commode chair was giving a new lease on life and repurposed into a beadroom feature chair..


If you’d like to find any of the items used in this project, we’d greatly appreciate it if you used our affiliate links. These links provide us with a small commission at no extra cost to you, allowing us to continue creating and sharing more inspiring projects. We’d also love to hear your thoughts—feel free to leave a comment or share this post!

10 Comments
Deanna Lee
December 13, 2019 at 4:09 pmwhat about webbing? you must have used something besides foam and fabric so it wouldn’t push out the back and the seat.
Anita Holland
December 14, 2019 at 8:23 pmThere was no webbing just the board that was already there.
Teresa S Cornelius
January 16, 2023 at 10:56 pmI have this same chair and it needs repaired as well. Thanks for the information. May I ask were you found the material? Online?
Anita Holland
January 17, 2023 at 6:01 pmIt was from aliexpress ifi remember correctly.
Lynda HALL
November 25, 2023 at 9:35 pmi have just been given the identical chair ,, and am looking forward to following your instructions, , ,
Anita Holland
November 28, 2023 at 8:58 pmThat great, I am happy to help if you need further assistance 😄
Omi
April 24, 2023 at 11:56 pmI just got the same exact chair from a friend. I’m excited to make it new again!
Anita Holland
April 25, 2023 at 6:37 pmIt was a very easy makeover, and it looks like new again.
Cynthia
June 20, 2023 at 12:19 amI see that you mentioned AliExpress who you purchase from. Are they cheaper than Amazon and better quality?
Anita Holland
June 20, 2023 at 10:01 amYes they are so much cheaper than Amazon. I buy lots from them and a new company called Temu in china is even cheaper. I buy lots from them too. The quality depends on what you are buying, I have not no problem with fabrics and braided trim or all my art and craft supplies.