
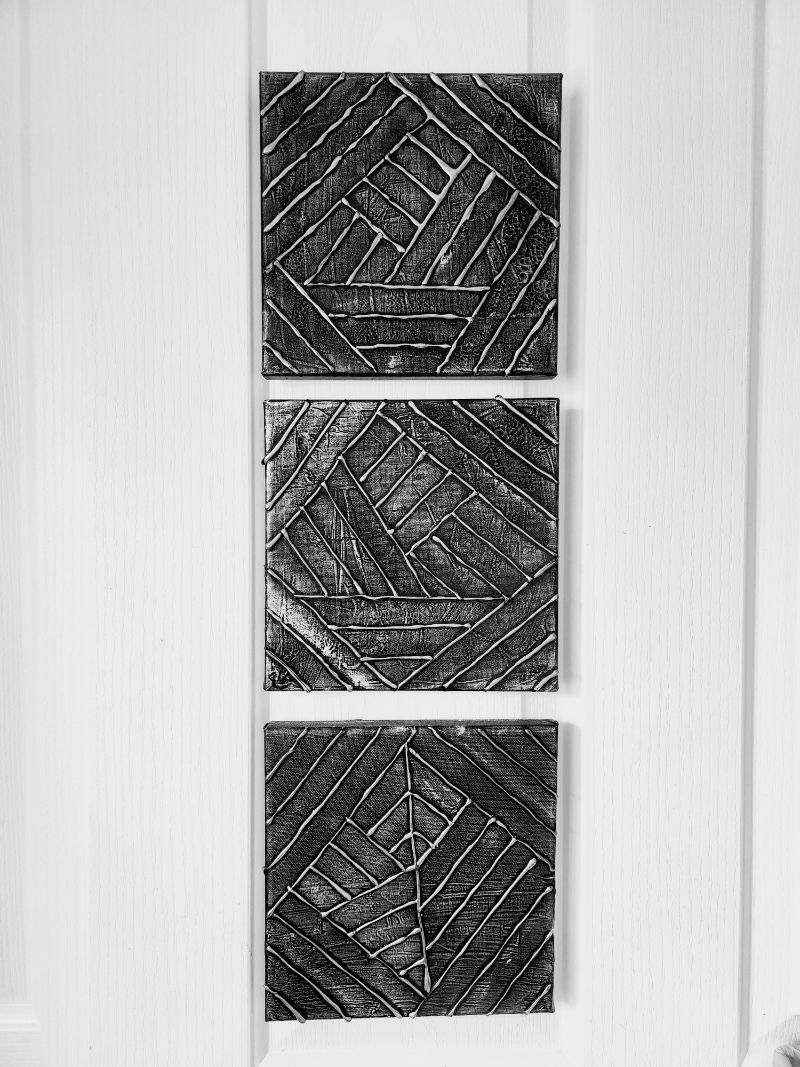
Besides my love for DIY projects, I’m also passionate about mixed media art. In this tutorial, I’ll show you how to create hot glue gun wall art on canvas, using recycled materials, metallic paints, and wax pastes to bring out stunning textures. The beauty of this project is that it doesn’t require advanced artistic skills—just a hot glue gun, a few basic supplies, and some creativity. Once the metallic wax is applied, all the hidden details come alive, turning a simple canvas into striking wall décor.
If you’ve ever wanted to try modern mixed media art but weren’t sure where to start, this project is perfect. It’s simple, affordable, and a great way to reuse old canvases from past projects or thrift stores. I’ll walk you through my experiments and share a few different methods, so you can create your own unique piece of textured canvas art at home.
Hot Glue Gun Wall Art – DIY Mixed Media Canvas
**This post may contain affiliate links. This means I earn a small commission on links used at no extra cost to you. Please see my disclosure policy for more information.**
Materials Needed
- Recycled or new canvas
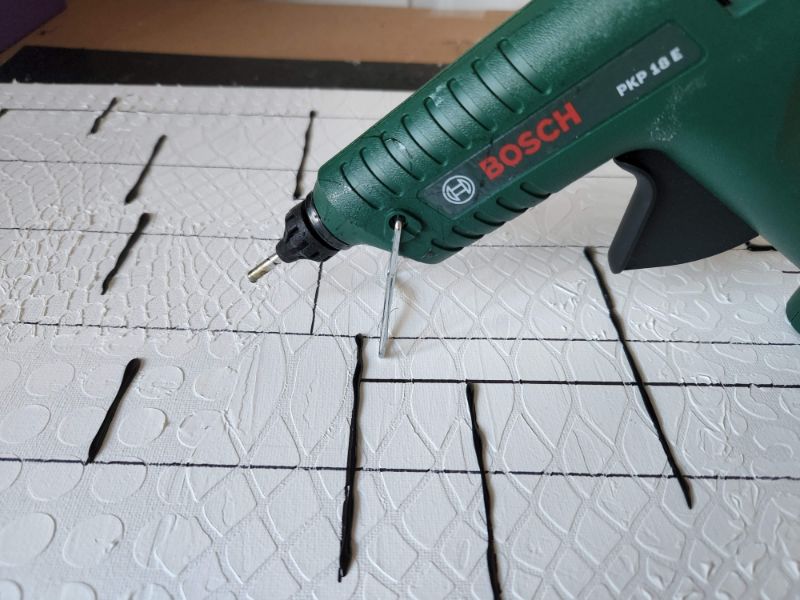
- Hot glue gun (large works best)
- Black hot glue sticks (preferred) or clear
- Black acrylic paint
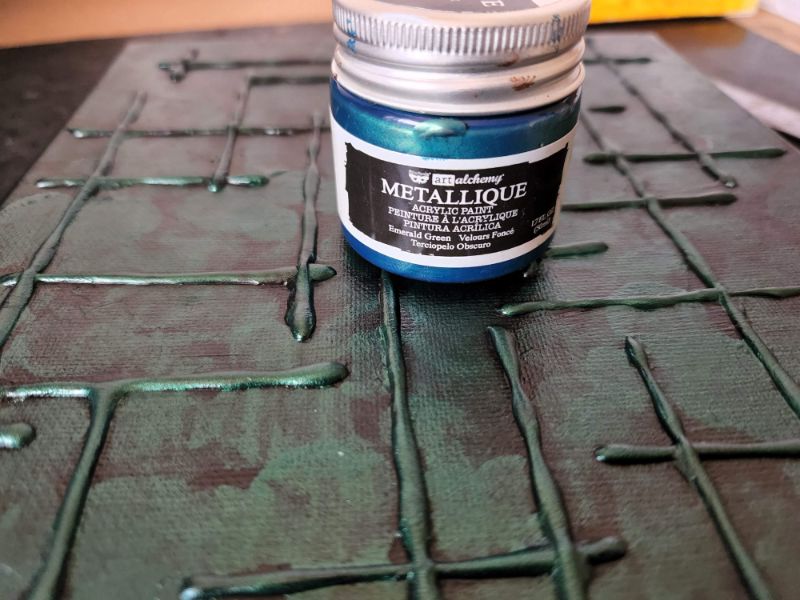
- Metallic acrylic paints (Prima or similar)
- Small sponge or applicator
- Silver metallic wax paste (or homemade alternative)
- Stencils
- Texture/modelling paste
- Marker pen and ruler
- Hair dryer (optional for quick drying)
- Scraper or old credit card
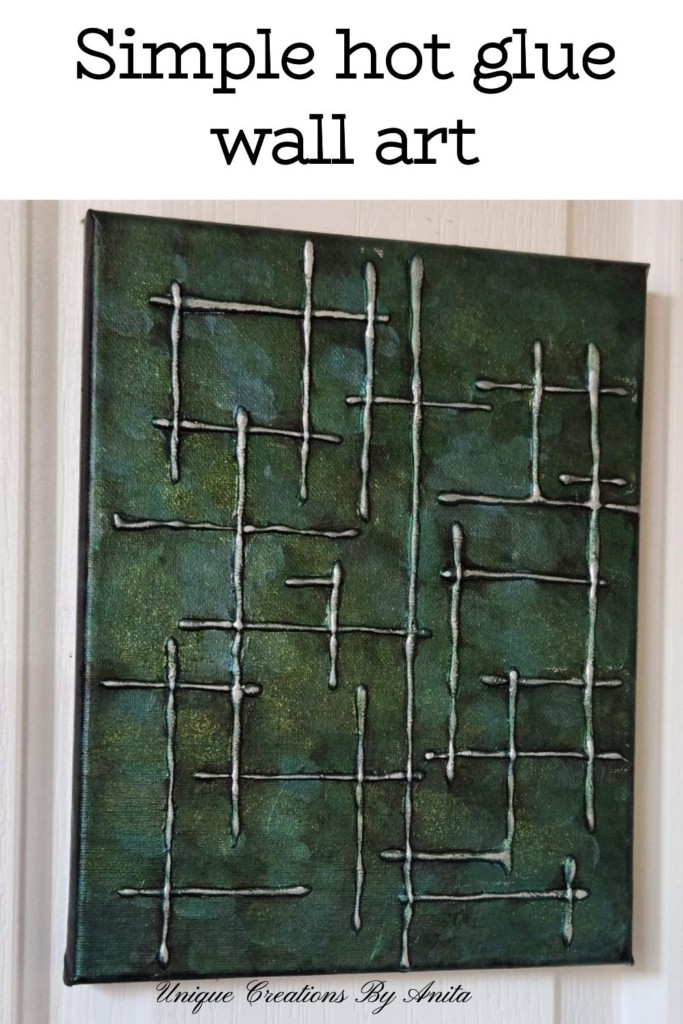
Creating Your First Hot Glue Gun Design
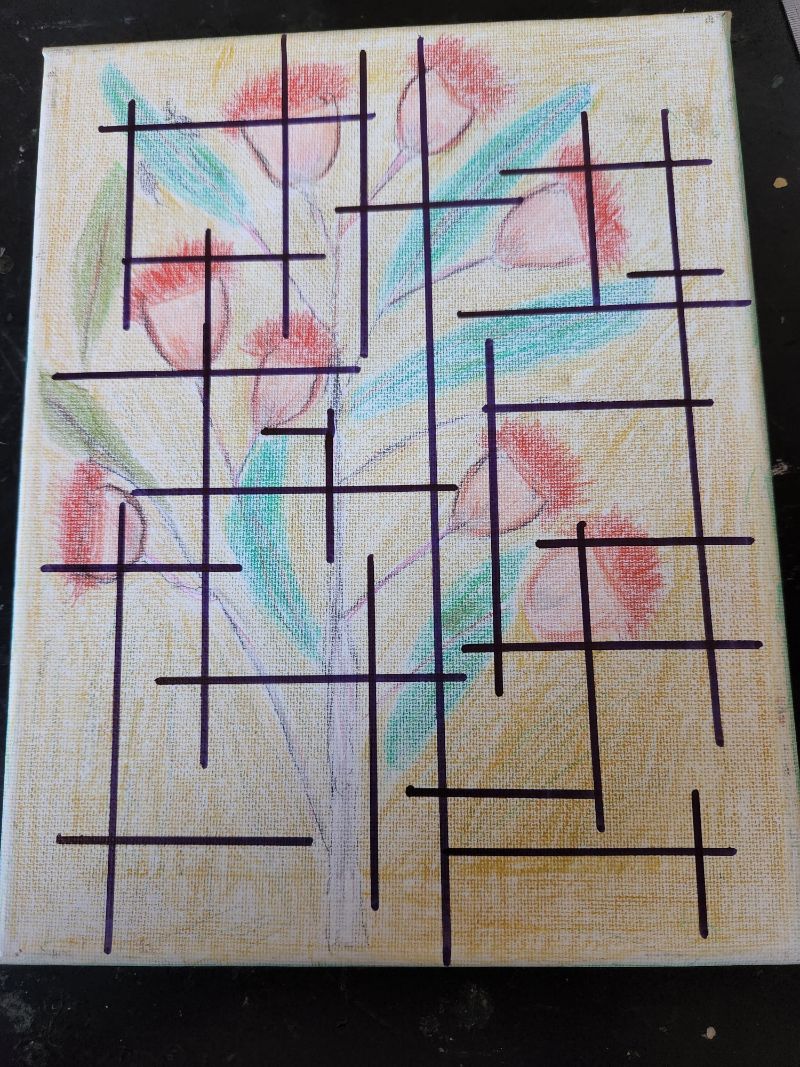
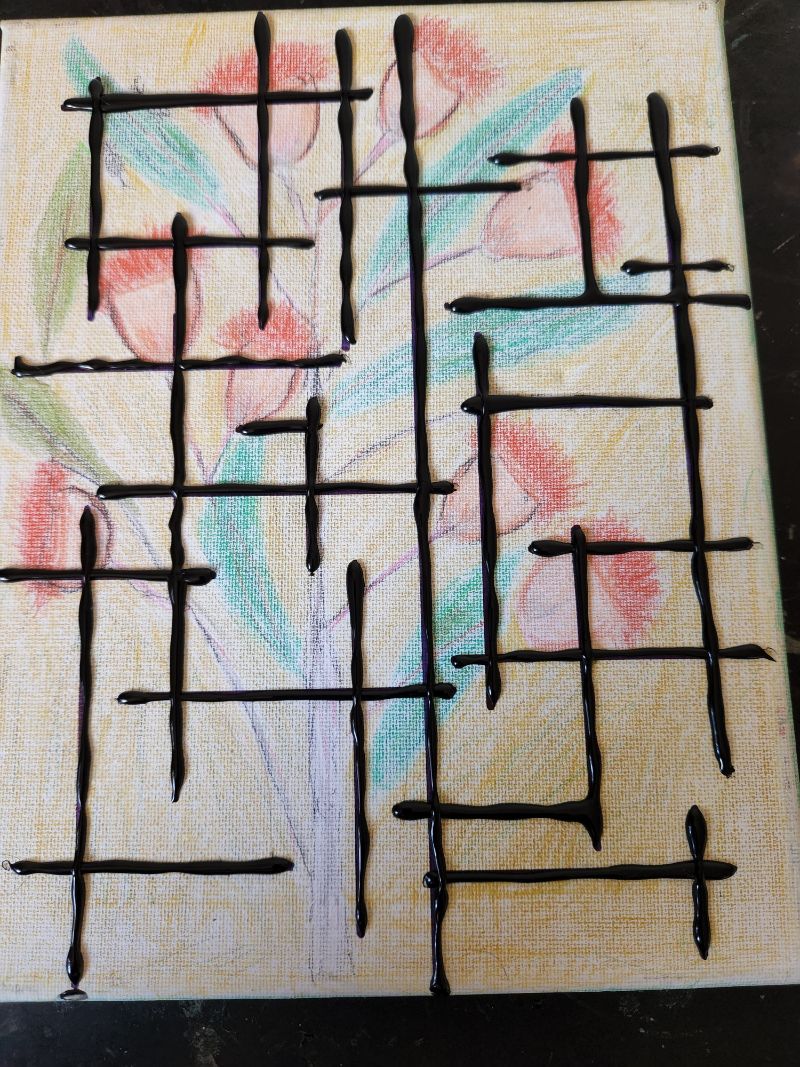
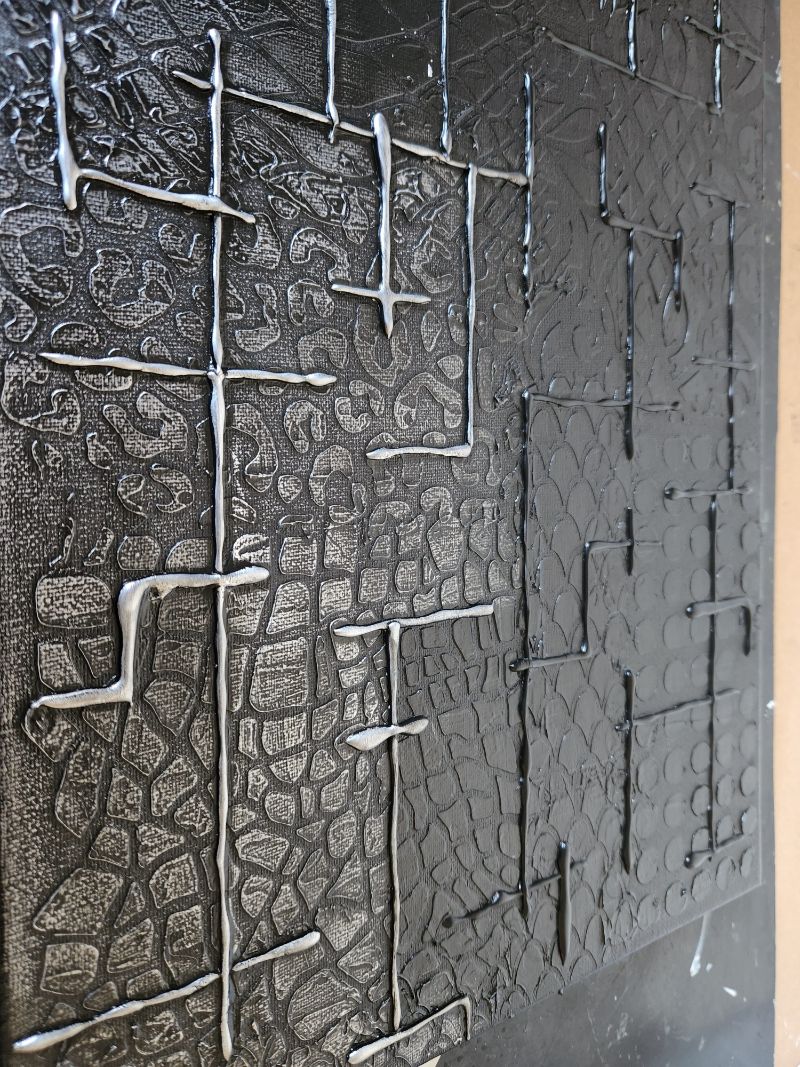
My first test canvas started with simple lines drawn using a marker. These lines guided where the hot glue would be applied. If you’re not sure what design to use, search for geometric or linear patterns for inspiration. I found black hot glue blends in better than clear, and a large hot glue gun makes the job easier.
To reduce glue strings, I doubled back at the end of each line, which worked well. Allowing the glue gun to rest for a minute before long lines also helped create smoother results.
Painting the Canvas
Once the glue was set, I painted the entire canvas with black acrylic paint. This gave me a solid base for the metallic colours. I prefer Prima metallic acrylic paints for their iridescent finish, but any brand will work.
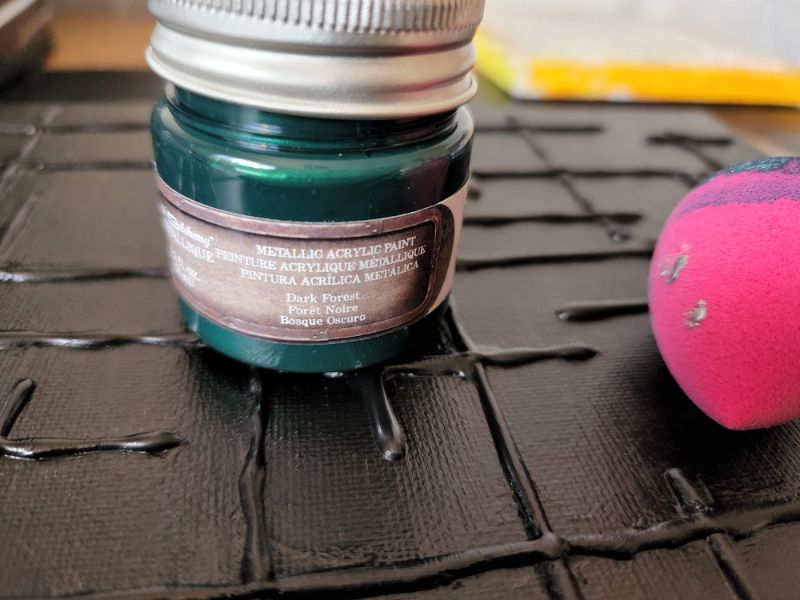
Small sponges were dipped into metallic paint, blotted on plastic to save excess, then pressed randomly across the canvas.
I layered three colours, leaving small areas of black showing through. For faster drying, a hair dryer works perfectly.

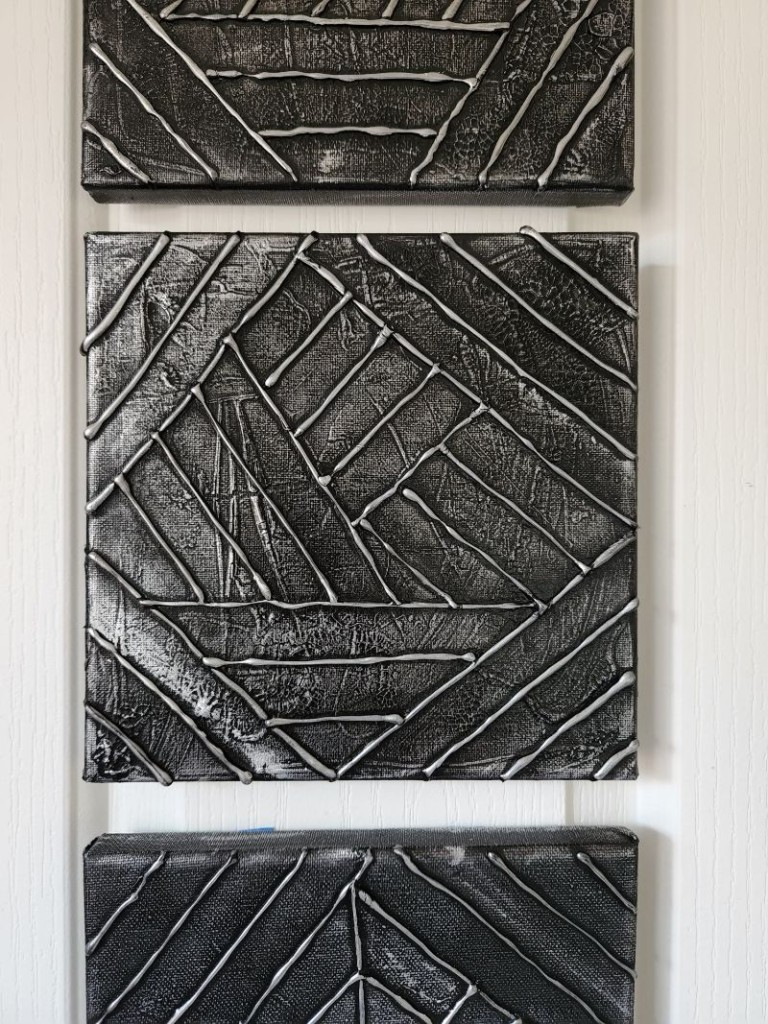
Highlighting with Metallic Wax
The magic happens when you add metallic wax paste over the glue lines.
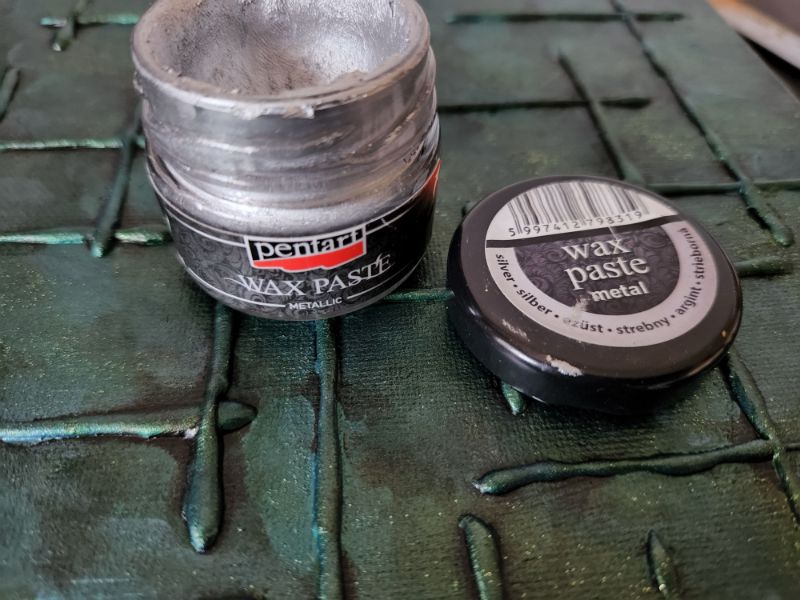
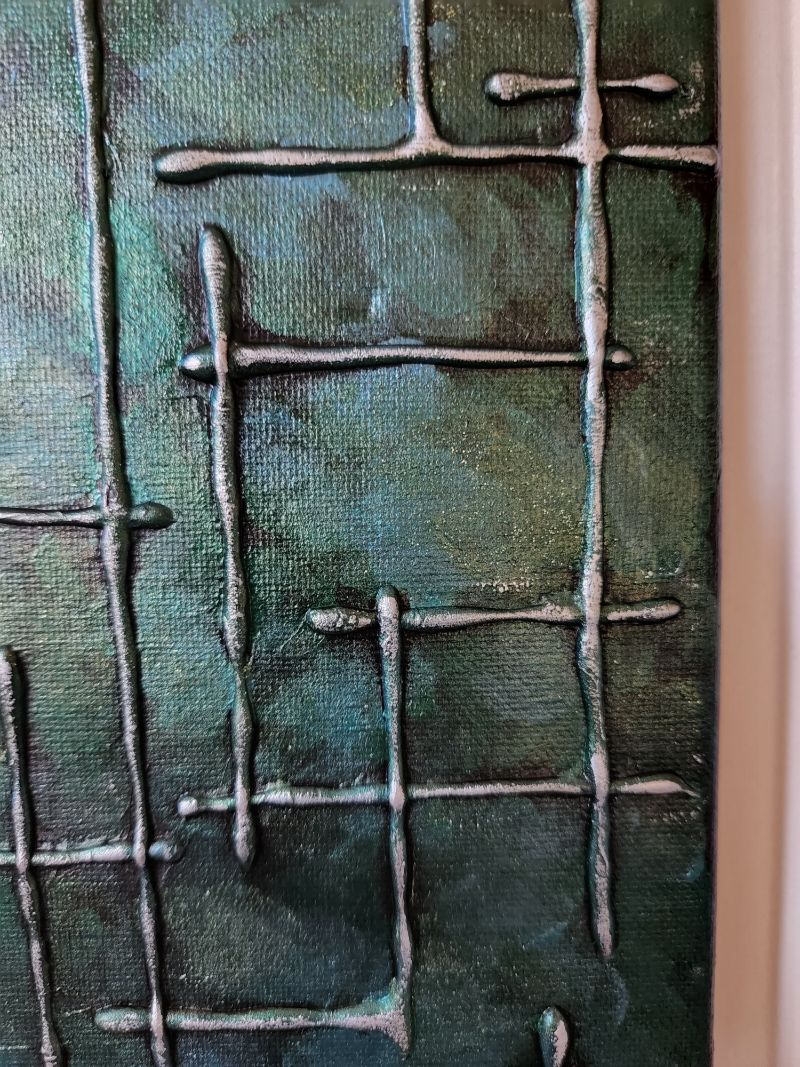
By gently rubbing silver wax with your finger along the raised hot glue, the design pops out beautifully.
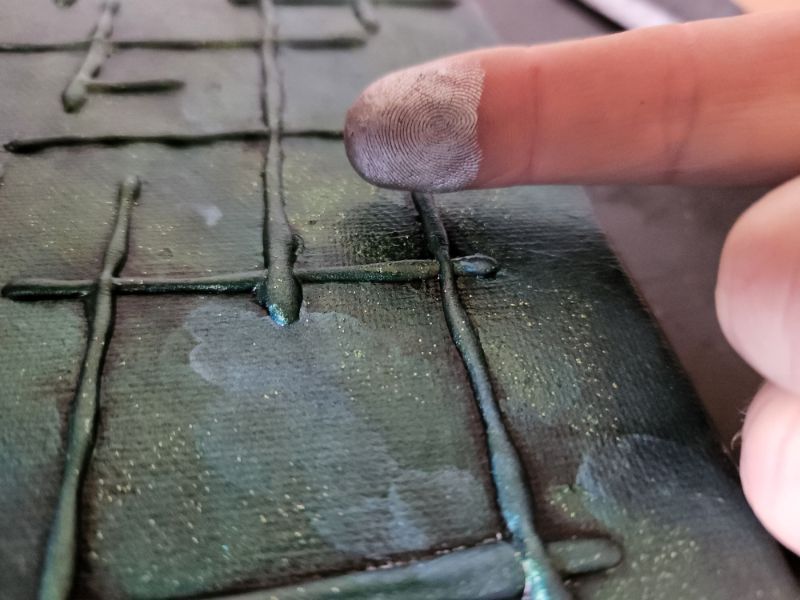
The metallic finish shifts in the light, giving your wall art a dynamic, ever-changing look. If you don’t have silver wax paste at home, you might already have the ingredients to make your own, and this post will show you how.
Adding Texture to the Canvas
For my second experiment, I used a recycled canvas with old oil paint already on it. The textured surface added extra depth once I painted it black and highlighted it with silver wax. The wax naturally clings to raised areas, bringing out the imperfections in a striking way.

If you don’t have a textured canvas, you can create your own using stencils and texture paste.

Simply hold a stencil in place and scrape the paste over it with a scraper or card.
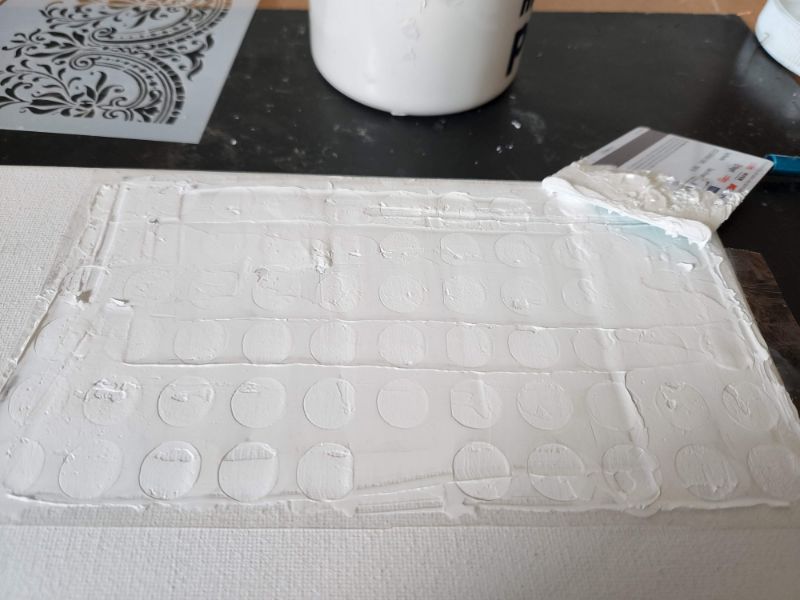
Don’t worry about perfection—the wax will
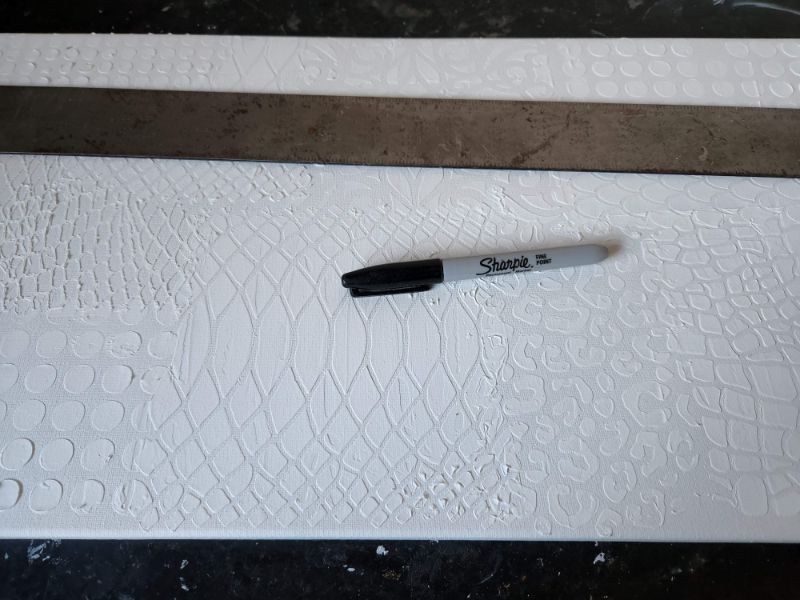
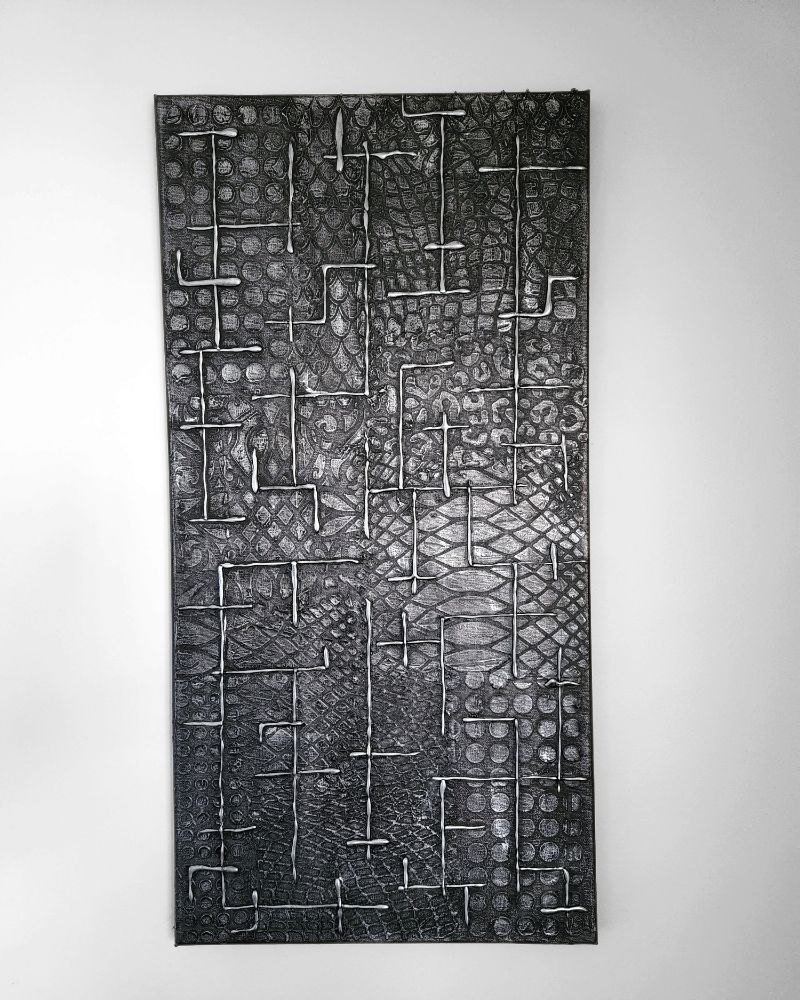
For this canvas, I again used the marker pen and ruler to add the lines before adding the hot glue in the same way as above.
I repeated the steps above of painting the surface black and adding the silver wax to highlight any textures. If you’re planning to explore textured art, this post shares several creative ways to add texture to your project.
This canvas was very hard to photograph because it was mainly silver the light seemed to reflect off the surface.
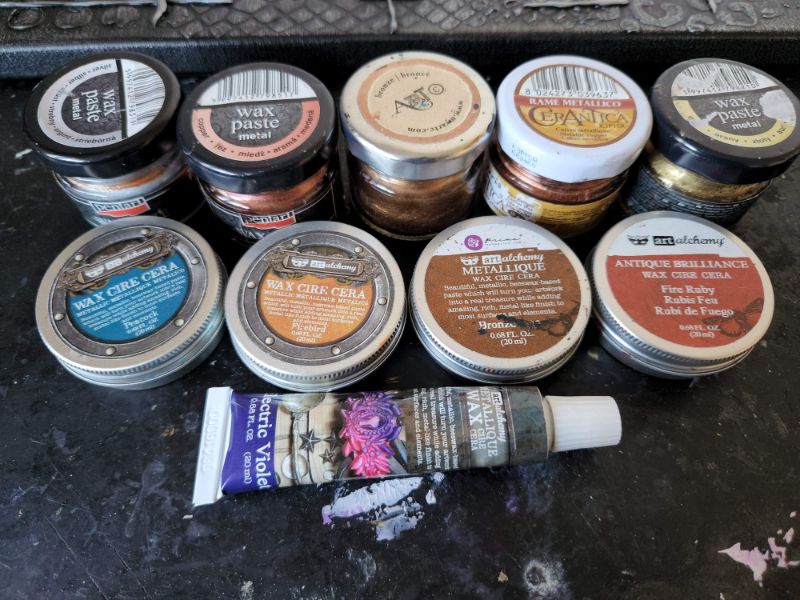
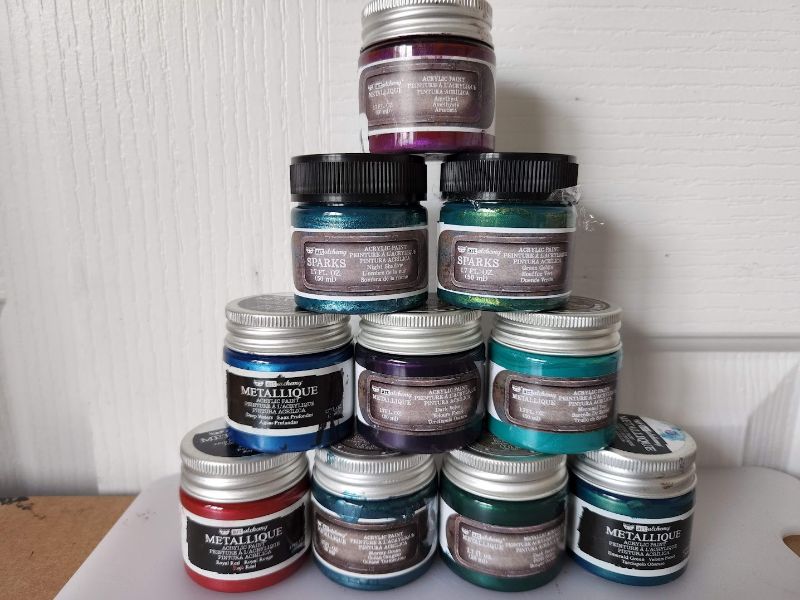
Paints and Waxes
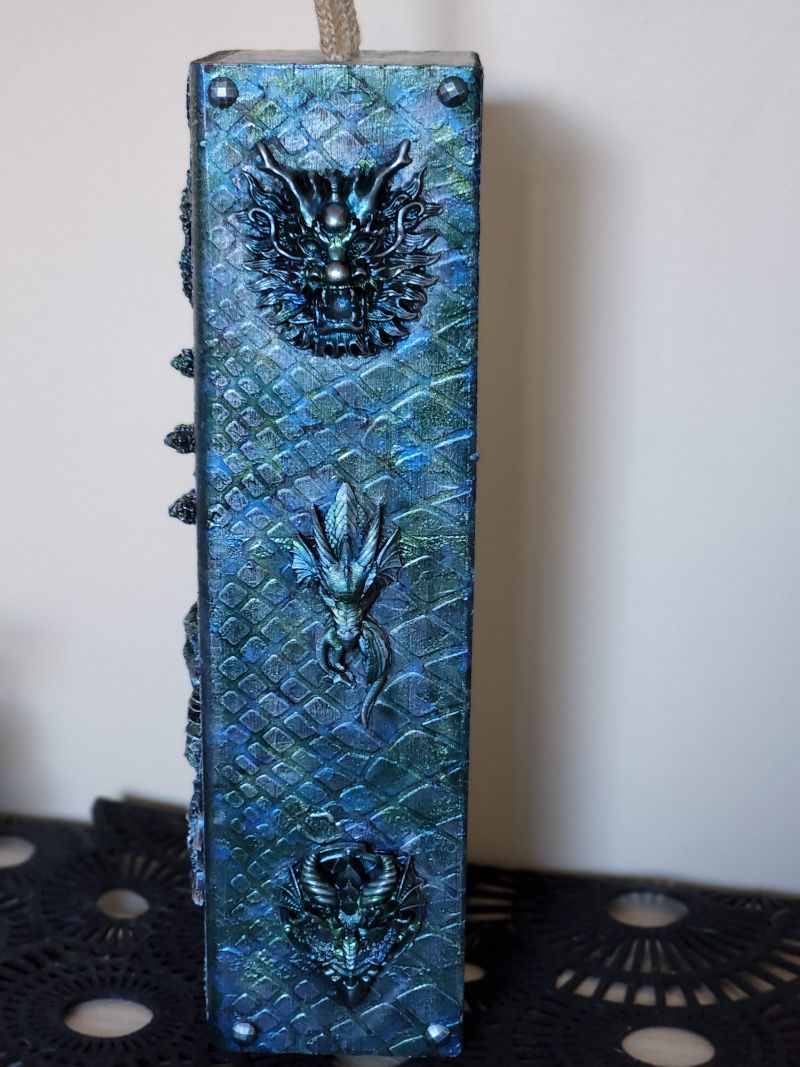
I used silver wax for simplicity in these examples, but waxes are available in many colours. Over the years, I’ve found metallic silver, gold, and copper give the boldest results, while Prima’s metallic and Sparks paints create vibrant, iridescent effects. These supplies last for years and can be used in many mixed media projects.
This is the effect you can expect from these paints. I painted this box using 3 of the paints shown above.
More mixed media art projects
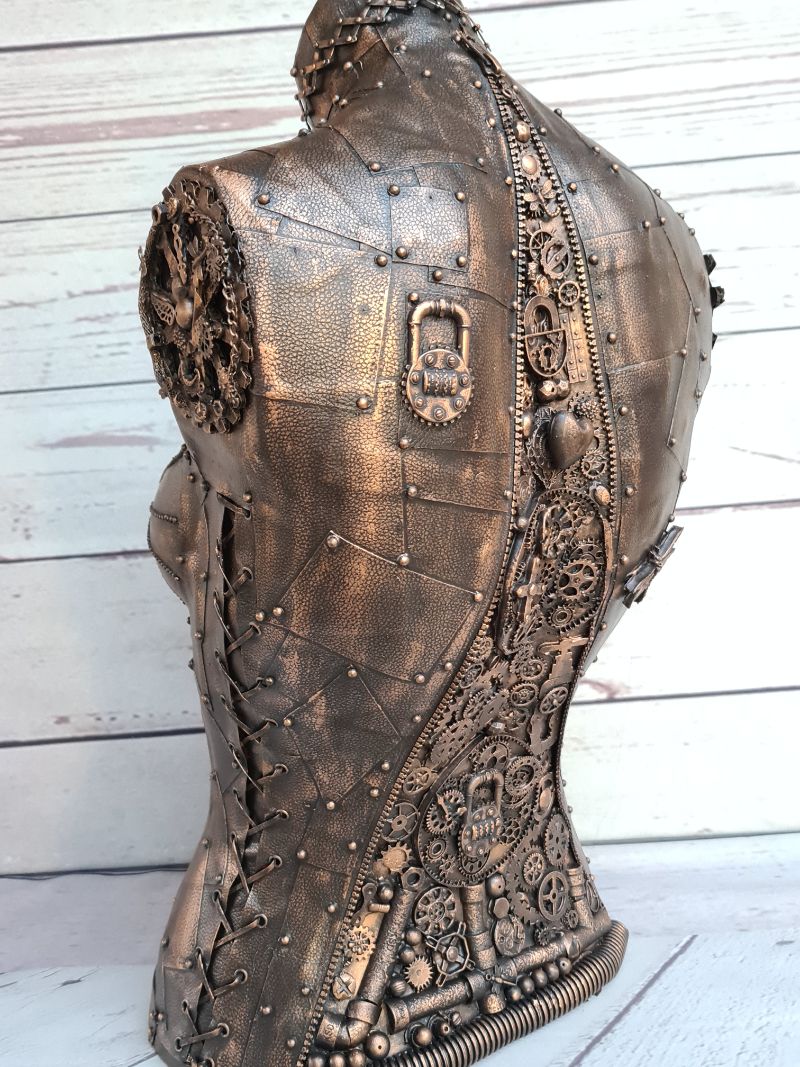
Mixed media art Steampunk Mannequin was created using a similar method, using paint and wax paste.
Here is another example of a wedding keepsake canvas that can be created using this technique. For inspiration, you can find all my art projects here.


If you’re interested in any of the items used in this project, we’d appreciate it if you used our affiliate links. Clicking these links earns us a small commission at no extra cost to you, helping us create more inspiring and exciting projects to share. We’d also love to hear your thoughts—feel free to leave a comment or share this post!


6 Comments
Michelle Leslie
July 13, 2022 at 4:29 pmYou really are the queen of mixed media. Love you easy and effective this is. Oh, and thanks for the great tip on blotting the sponge on a plastic surface. I tend to underblot (is that even a word) because I hate wasting, which is probably one of the reasons my stencils always look so messy 😀
Anita Holland
July 14, 2022 at 12:39 pmThanks Michelle, I did this post for a hot glue competition on Instructables. lol The plastic surface was I great idea, I cringe when I see all that paint being wasted.
Marie-Interior Frugalista
July 20, 2022 at 7:47 amThere ya go again with your amazing mixed media talents. The hot glue idea would be perfect for a long abandoned project I’ve got going on in the workshop. It solves the missing element where I drew a blank. Great idea for inexpensive wall art and a great handmade gift idea too!
Anita Holland
July 24, 2022 at 11:03 amThanks Marie, really glad I could offer some inspiration.
Kim
July 22, 2022 at 5:35 amAnita, you always have the most interesting and unique mixed media projects. And they’re always beautiful!!
Anita Holland
July 24, 2022 at 11:04 amThank you Kim, that is a lovely compliment.