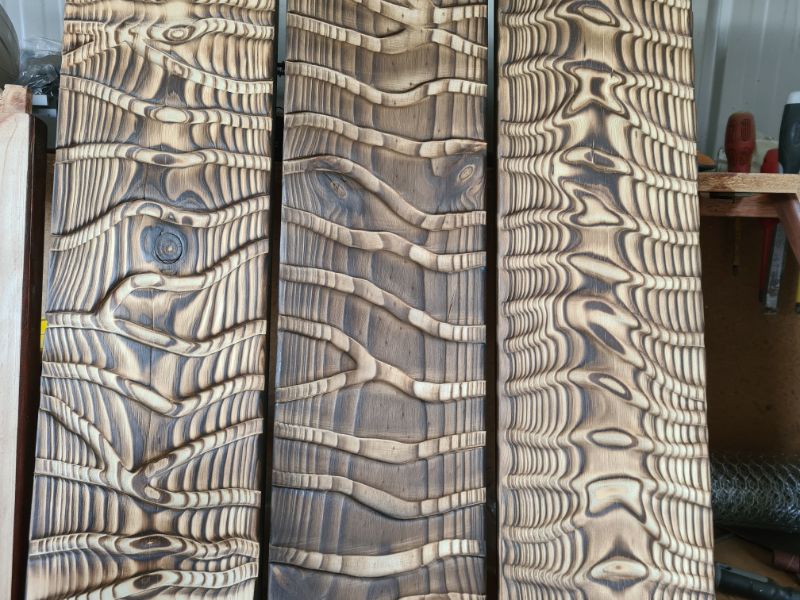
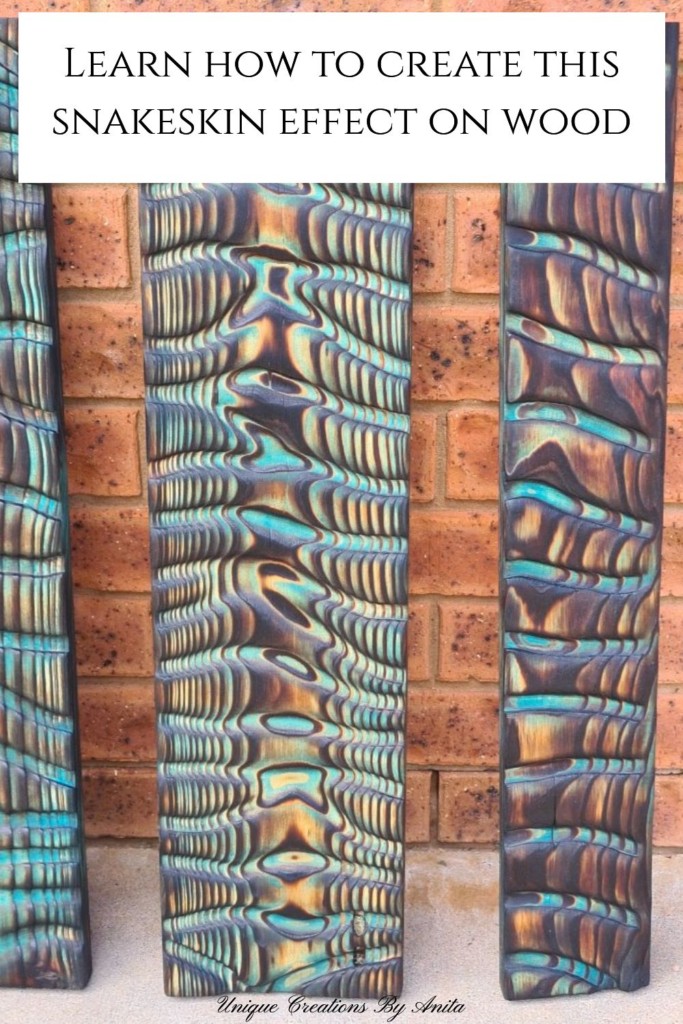
I didn’t plan a Shou Sugi Ban project, but this Snakeskin-Effect Shou Sugi Ban Wall Art began as a shortcut and turned into a stunner. I wanted to learn basic wood carving and thought wavy grooves would be a simple start. A quick experiment with burning and sanding revealed a dramatic snakeskin texture that appears intricate but utilises straightforward steps that can be repeated.
As a self-taught woodworker and DIY fan, I’m not claiming expert status—just sharing the steps that produced this snakeskin-effect wall hanging. Over the past couple of years, I’ve explored Shou Sugi Ban on different timbers and tested several ways to add colour. Here’s what worked best for me.
Before we dive into this tutorial, be sure to subscribe to my bimonthly newsletter to be the first to see my latest projects. You can also follow me on Pinterest and Facebook, where I also include my unique mixed-media art projects

Snakeskin-Effect Shou Sugi Ban Wall Art (Easy Router Carving)
**This post may contain affiliate links. This means I earn a small commission on links used at no extra cost to you. Please see my disclosure policy for more information.**
Materials and tools
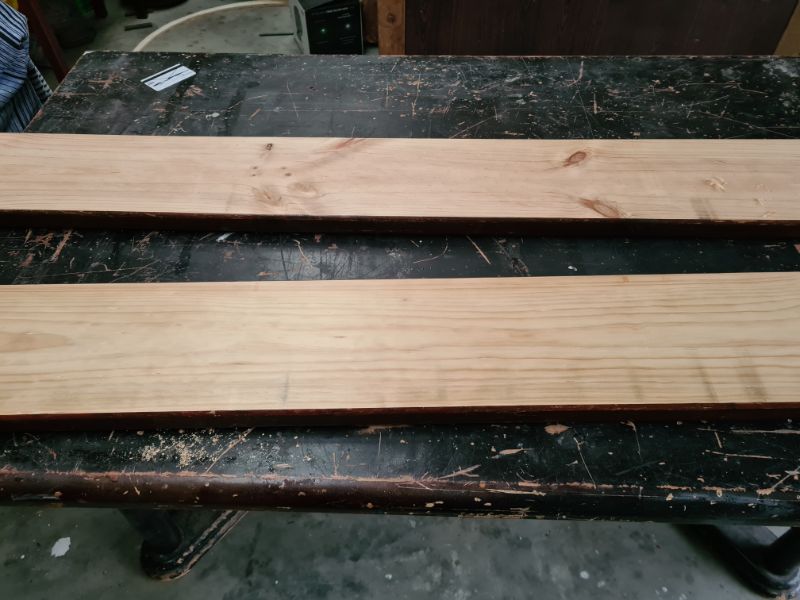
- Pine boards or panels (recycled bed rails are perfect)
- Straight router bit (or small cove/groove bit), compact trim router
- Blowtorch
- Large Wire brush
- small wire brush
- Coarse nylon brush for drill or die grinder
- 120–240 grit sandpaper and sanding block
- Budget acrylic paint (I used a single blue tone)
- Foam brush, clean lint-free rags
- Danish oil (or tung oil) for sealing
- Eye protection, respirator, hearing protection, heat-resistant gloves
- Picture-hanging hardware and screws for mounting
- Drum sander with nylon brush – craftsman restorer
Why pine works best
Pine burns quickly and shows strong contrast. The earlywood and latewood react differently to heat, which highlights grain and knots. Choose boards with visible grain and knots for maximum texture. I recycled the side supports from a four-poster bed. A couple of quick passes through the thicknesser removed the old varnish and revealed fresh timber.
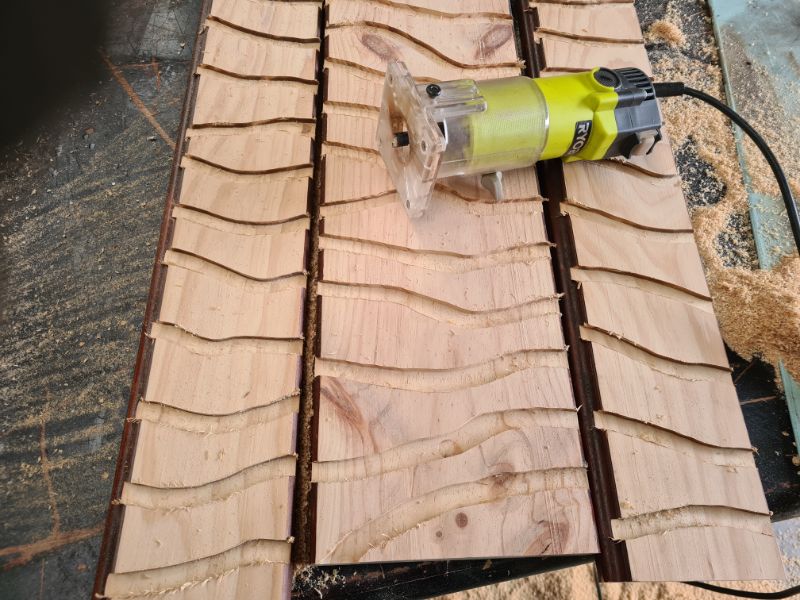
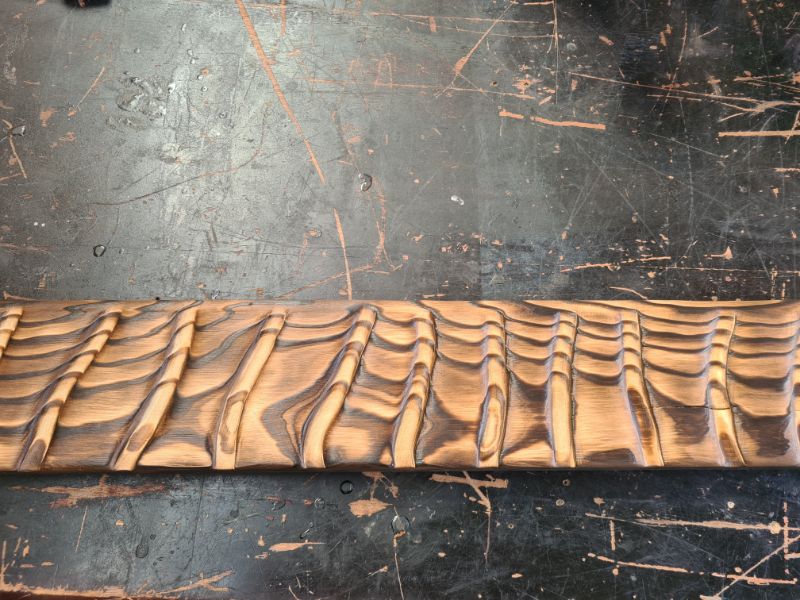
Carve simple wavy grooves
I used a small trim router because the compact base gives better sightlines. Fit a straight bit and freehand gentle S-curves across the board. Vary spacing for an organic look. Square shoulders are normal with a straight bit. If you own a small cove bit, you can soften edges at this stage, but it isn’t essential.
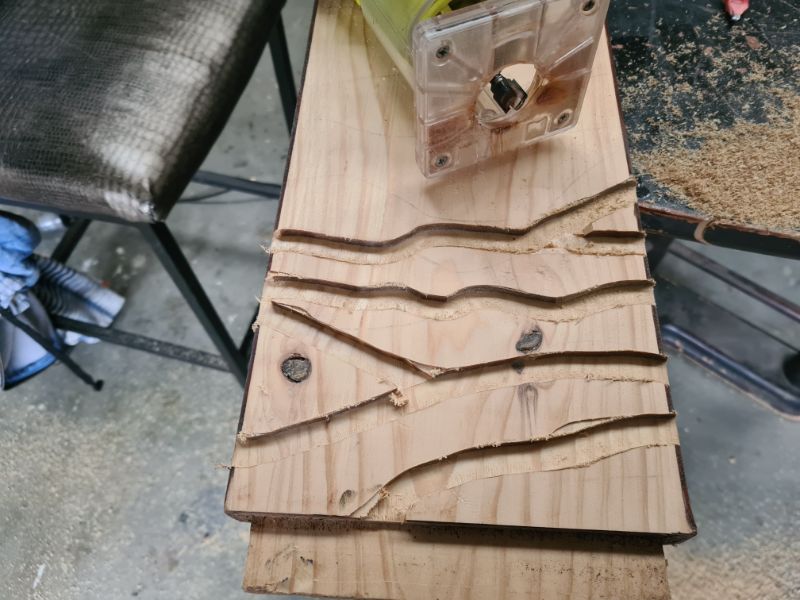
Smoothing those square edges by hand took ages, and the die grinder felt heavy. If you’ve struggled with that, don’t worry—the burn-and-brush steps below soften the edges fast.
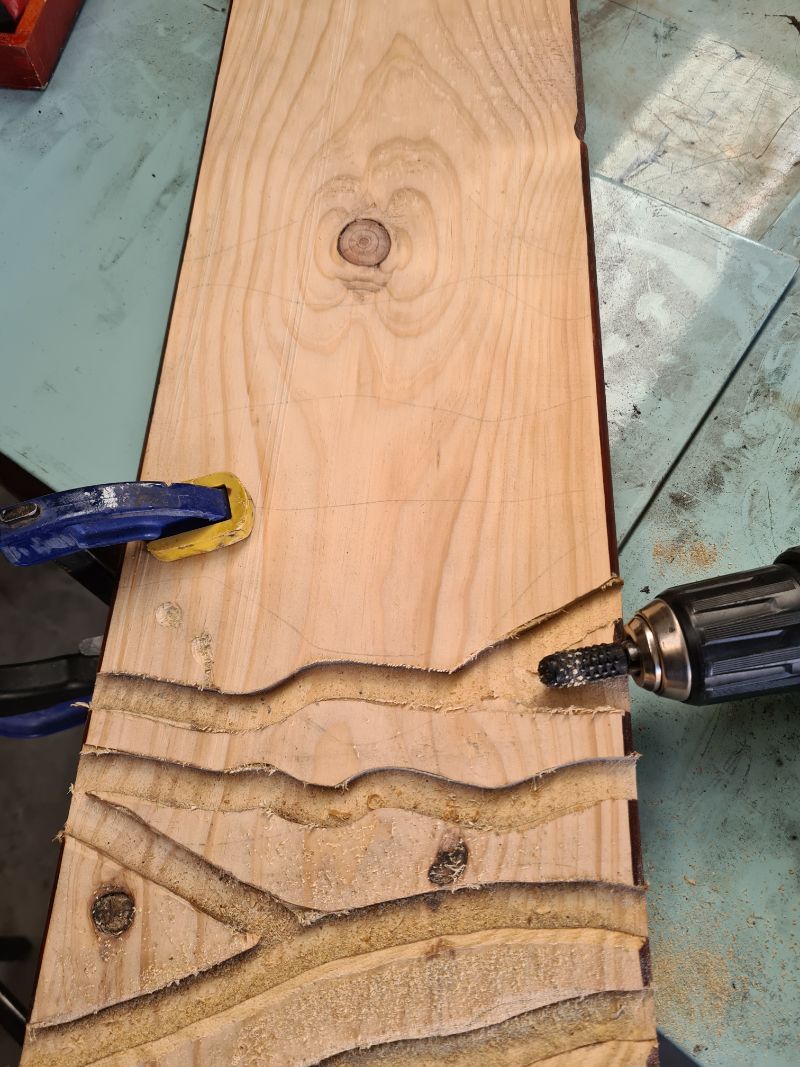
In hindsight, I’d continue each groove straight across all the panels so the routed lines flow as one continuous pattern. I’ve since developed a quicker, easier way to add the grooves—see the step-by-step tutorial here.
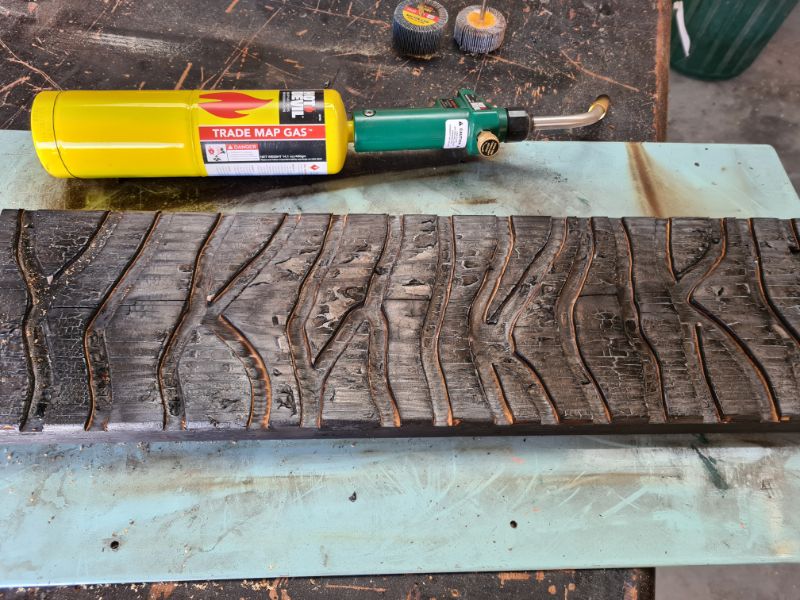
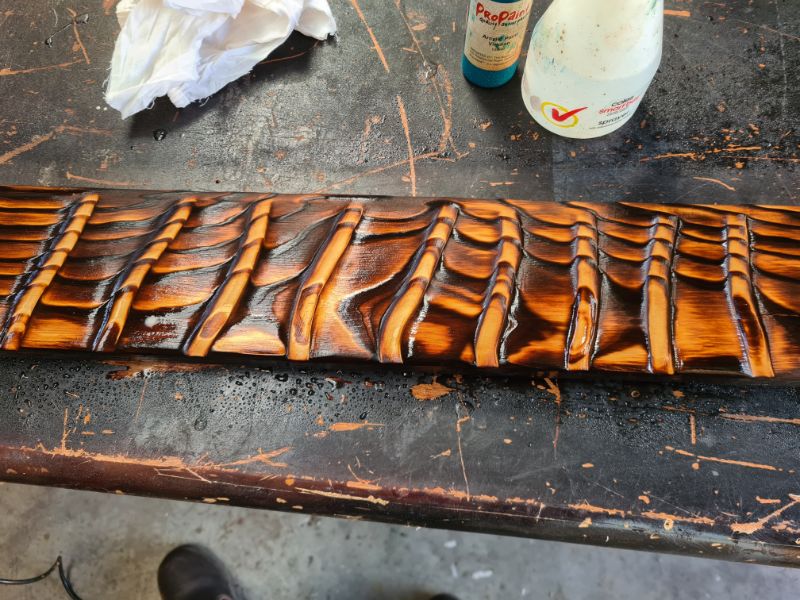
Burn the surface
I use MAP-Pro (often sold as “MAP gas,” now a propylene blend) because it delivers a hotter, more focused flame than standard propane, so the surface chars faster and more evenly. Propane still works—expect a few extra passes.

Keep the flame moving with the grain, and make several light passes rather than lingering in one spot to avoid scorching or warping. Work outdoors, wear eye protection and a respirator, and keep water or an extinguisher handy. Avoid burning treated timber, MDF, or plywood (glues can off-gas). Let boards cool between passes, and start on a scrap to dial in distance and speed before moving to your panels.
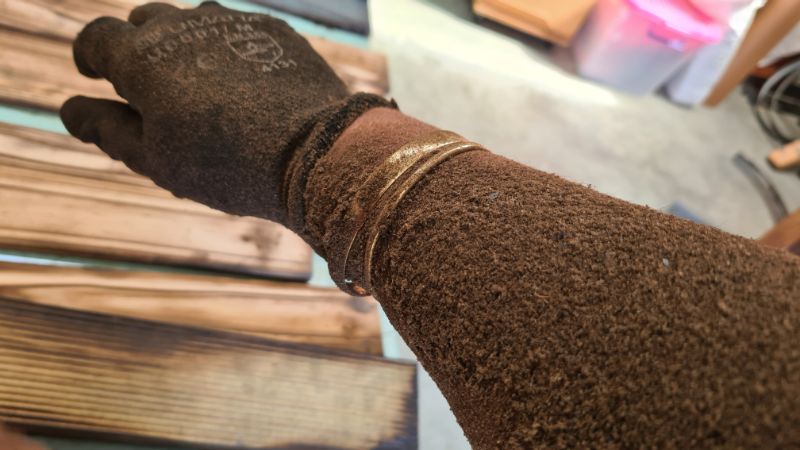
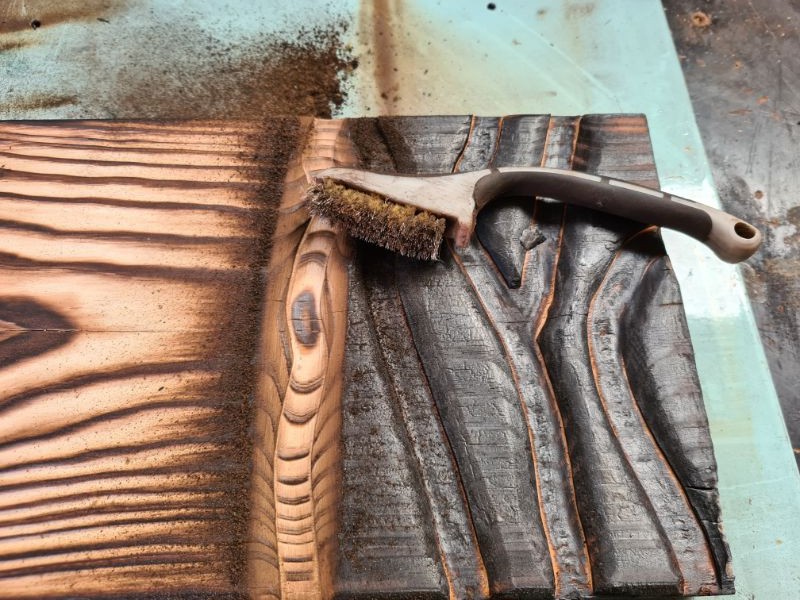
Brush back the char to reveal the texture
I start with a hand wire brush to keep the mess down. If you jump straight to a coarse wire cup brush on a drill, the soot goes everywhere—over you, the shed, and the floor—and it’s a pain to clean. It also kicks up fine dust that’s hazardous to breathe. Knock off the loose char first, then switch to the power brush, and wear a respirator and eye protection.
You’ll see the routed grooves and grain pop. If you want a stronger texture, burn again and brush again. I repeated this process a few times on each panel to push the snakeskin effect.
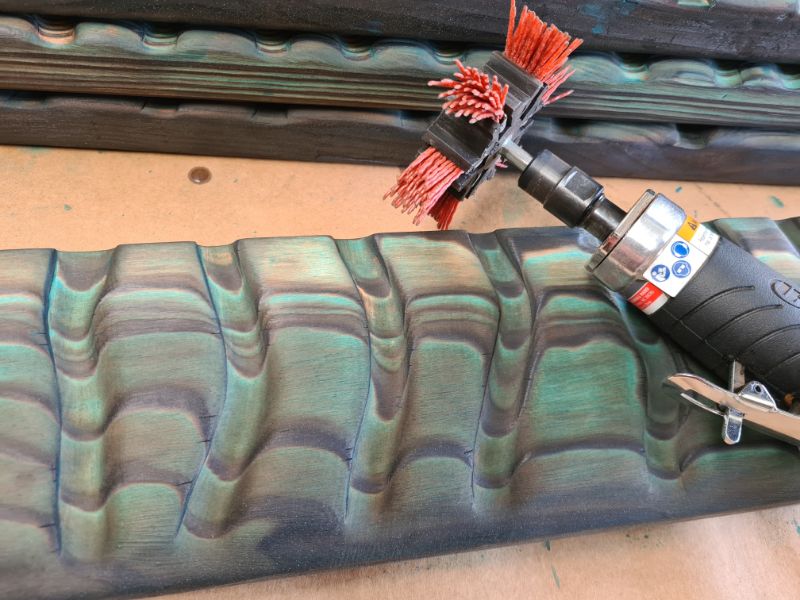
Rapid texture shaping with a nylon brush
Switch to a coarse nylon bristle brush on a drill or die grinder. It cuts the high points fast and evens the routed edges. It’s messy, so wear a respirator and eye protection.
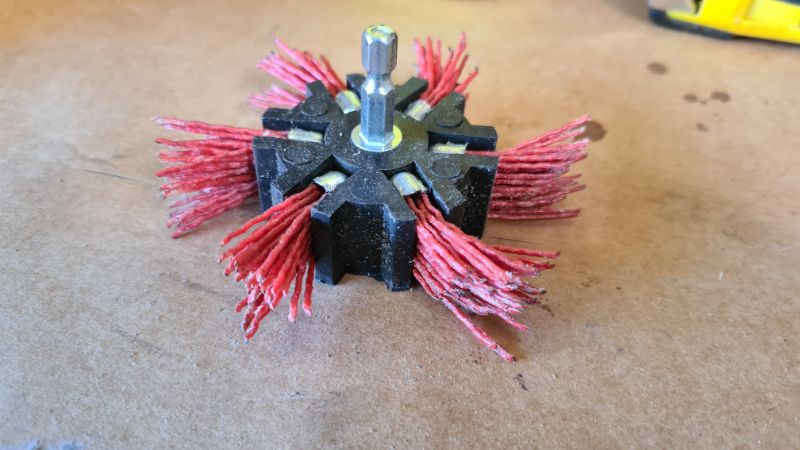
Always work with the grain—cross-grain marks show up once colour goes on. If you spot any cross-grain scuffs, a quick re-burn and re-brush will hide them.
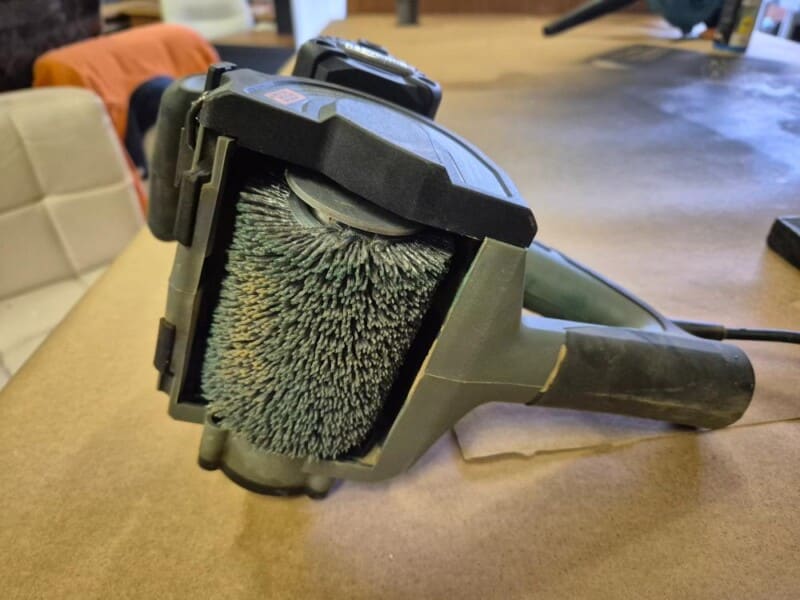
If you get hooked on Shou Sugi Ban and want to cut sanding time, invest in a burnishing tool or drum sander fitted with a coarse wire-brush drum. It strips the char and shapes the texture fast, saving heaps of elbow grease.

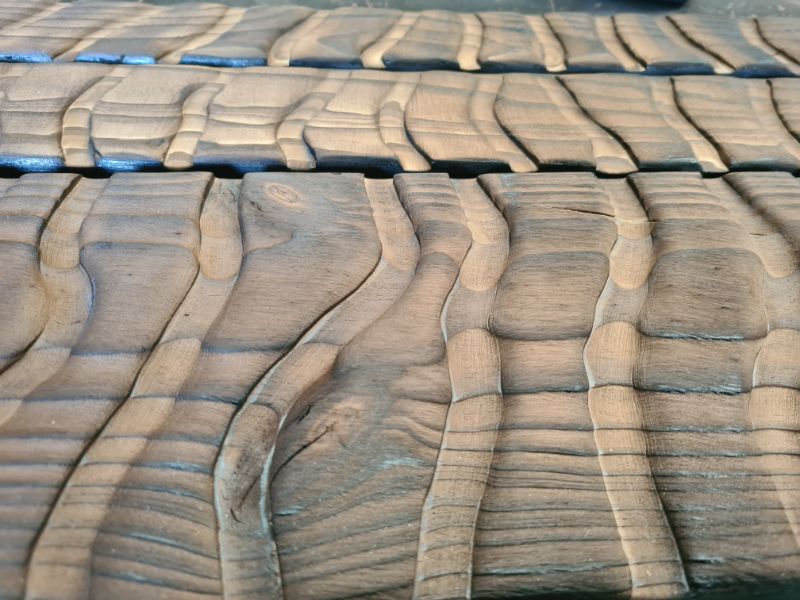
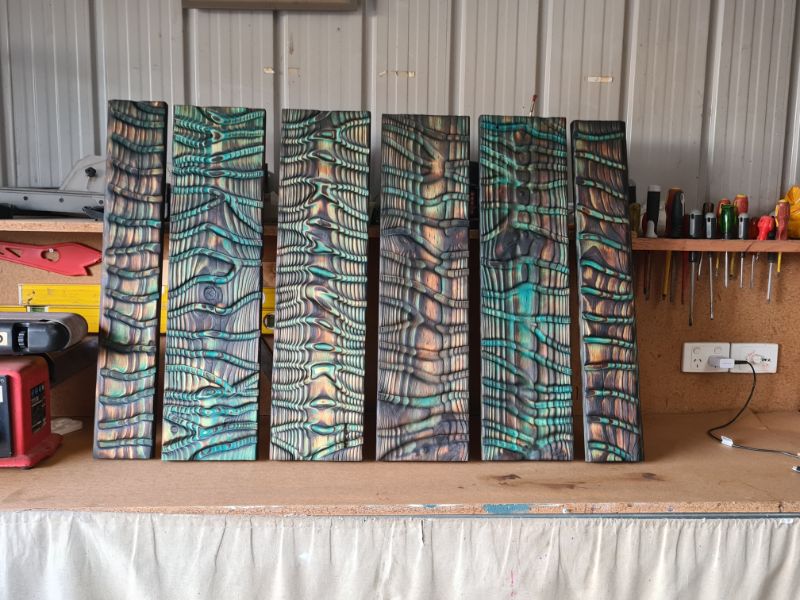
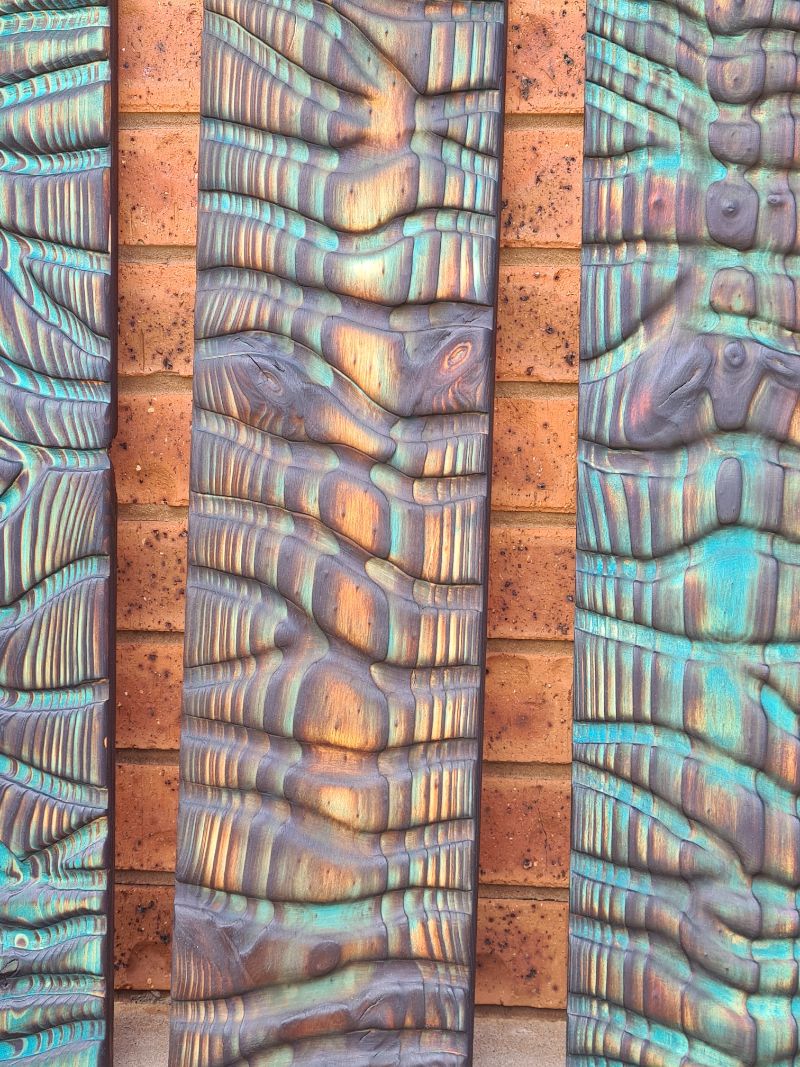
Burning some areas deeper created a beautiful, wavy surface. Sanding also changes the look—the deeper you sand, the lighter the timber becomes. I wanted a mix of tones across the set, so the middle panel was sanded less than the other two.
This photo below shows the side profile of the wood so you can see the different textures.
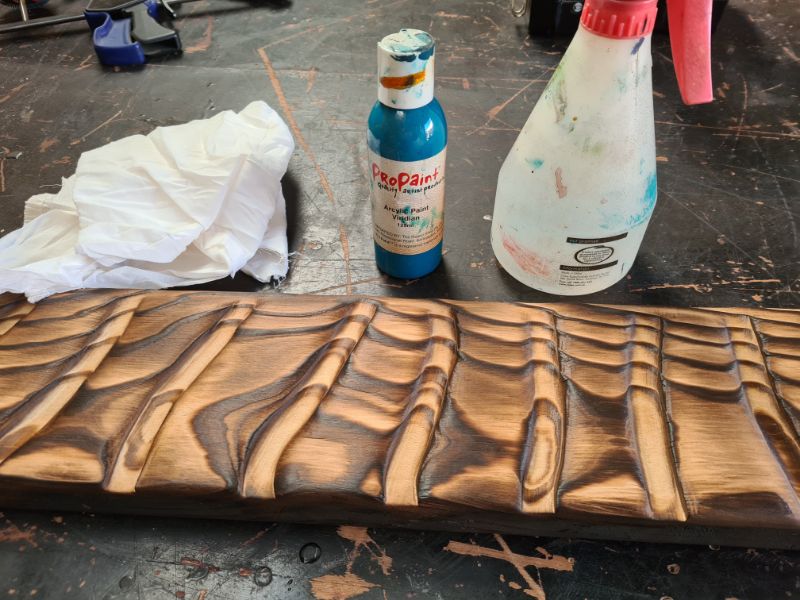
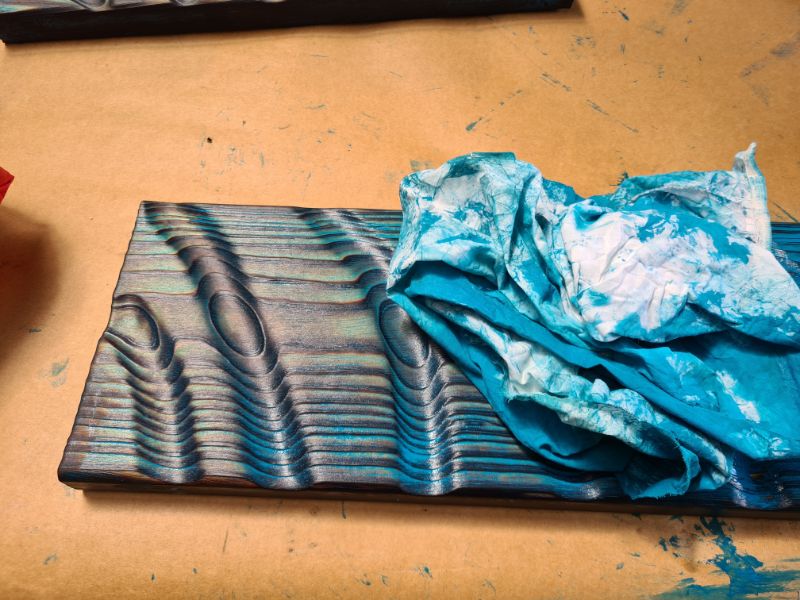
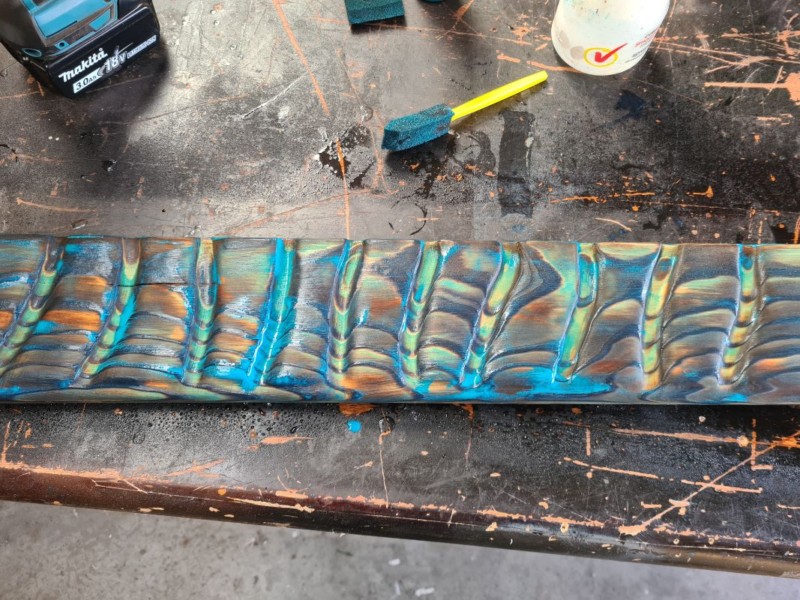
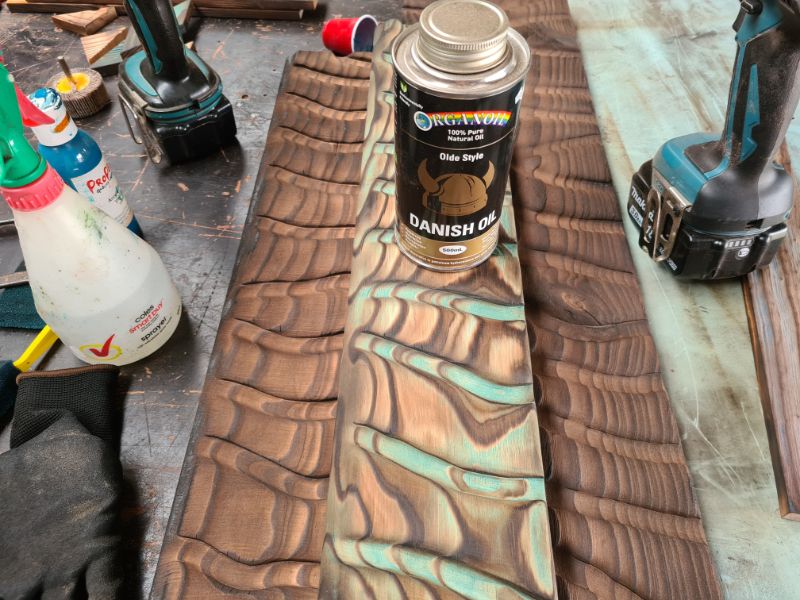
Add colour with a single budget paint
Here’s the fun bit. I used a $2 acrylic in one blue shade. The variation you see isn’t from multiple colours—it’s from how deep I burned and how much I sanded.
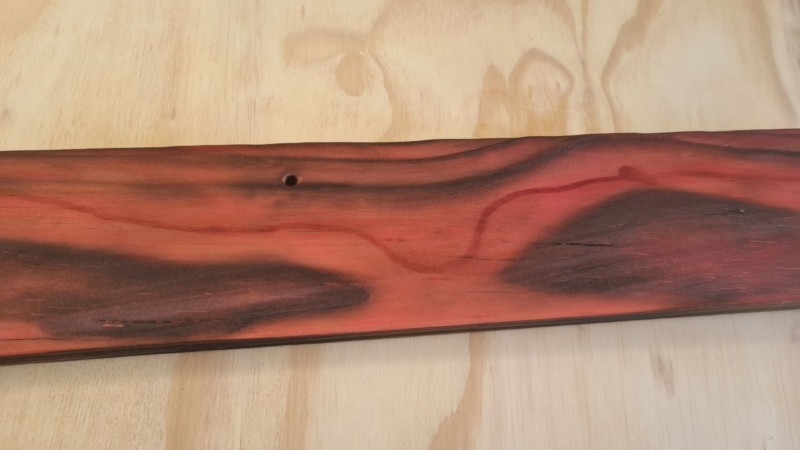
Don’t apply undiluted paint directly to raw timber—the wood will suck it in and it won’t spread evenly. This is what your results will look like if you do. The dark red line across the board is where I poured the paint.
Lightly mist the panel with water. Dilute a little paint with water in a small container.
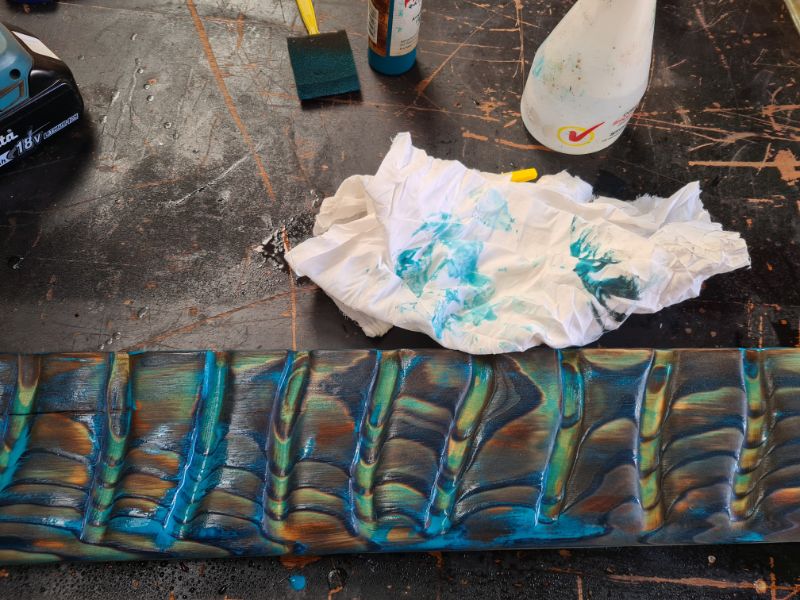
Apply the wash with a foam brush and let it sit for about five minutes to soak. Wipe back with clean rags. Wipe some areas harder than others to create lighter highlights. Panels burned deeper and sanded less remain darker; lighter sanding makes the blue read brighter.


If you want more colour just reapeat the step above again.
Seal to make the colours pop
Wipe on Danish oil with a soft rag. The grain leaps and the blue deepens. If you decide a panel is too dark or too blue, sand it back with the nylon brush and adjust. Re-oil to revive the depth and sheen.
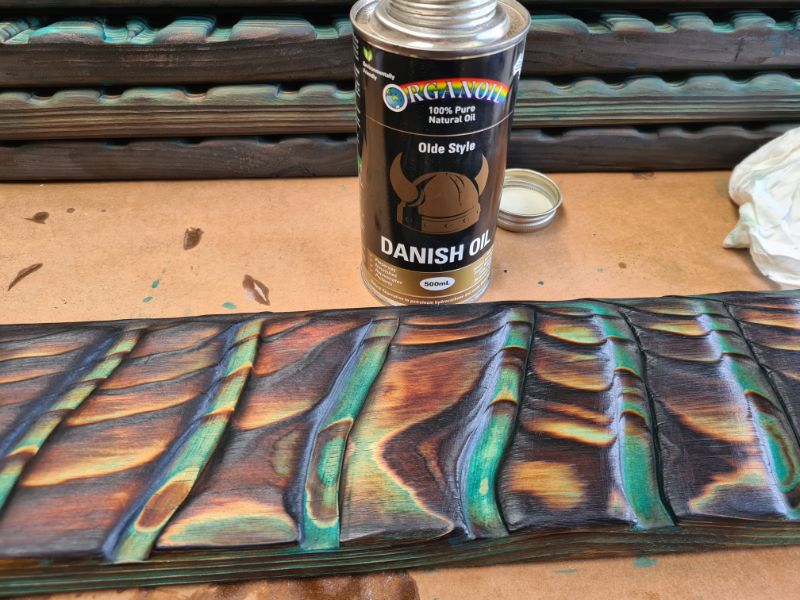
If you are not happy with the colours in the final step, do not despair. You can always go back and either burn the wood to go darker or sand to make it lighter. I felt this panel had too much blue, so I used the coarse nylon brush and removed some of the colours.
What you’ll notice up close
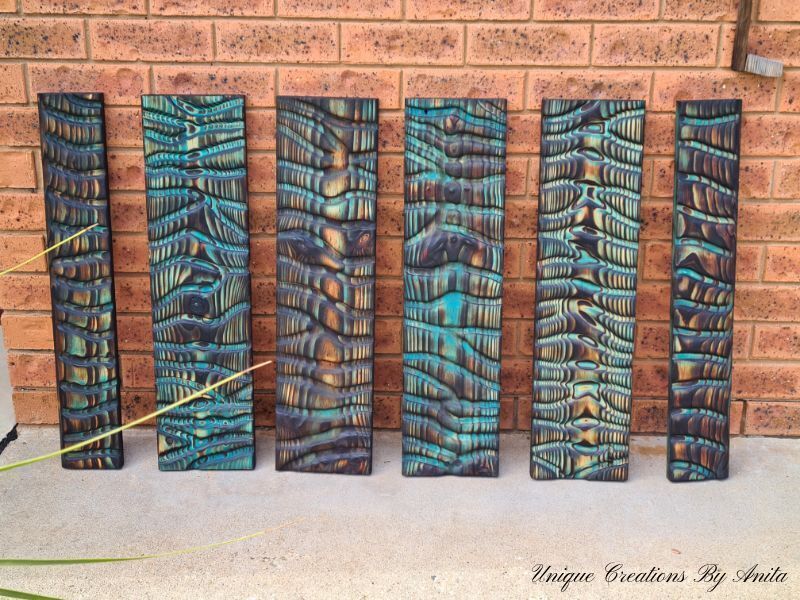
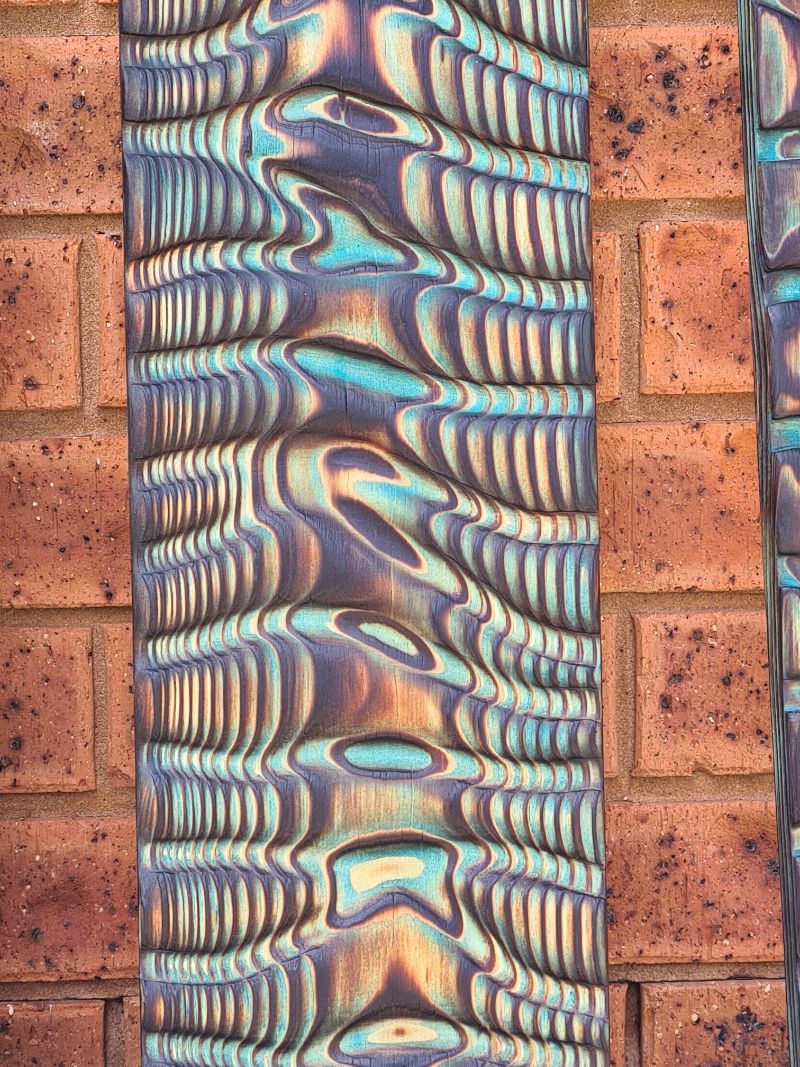
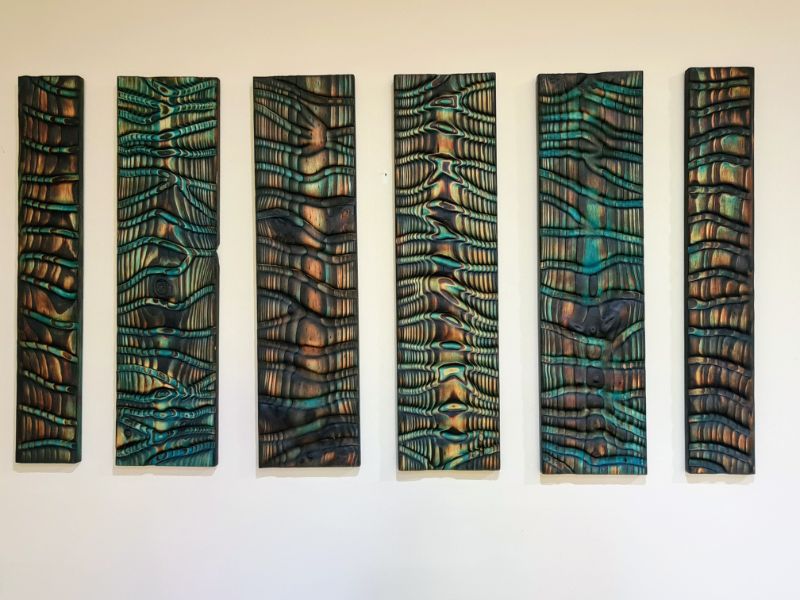
Knots and dense latewood don’t erode as easily, so they stand proud and read darker. A side-on view shows wave peaks and valleys from burning and brushing. Panels sanded to different depths display a pleasing gradient when hung together.
These photos show all the different textures created on the surface. The knots and wood grain do not seem to burn away so they are always more raised and darker than the rest.
The far-right panel shows what happens when you don’t sand back to fresh, light timber.
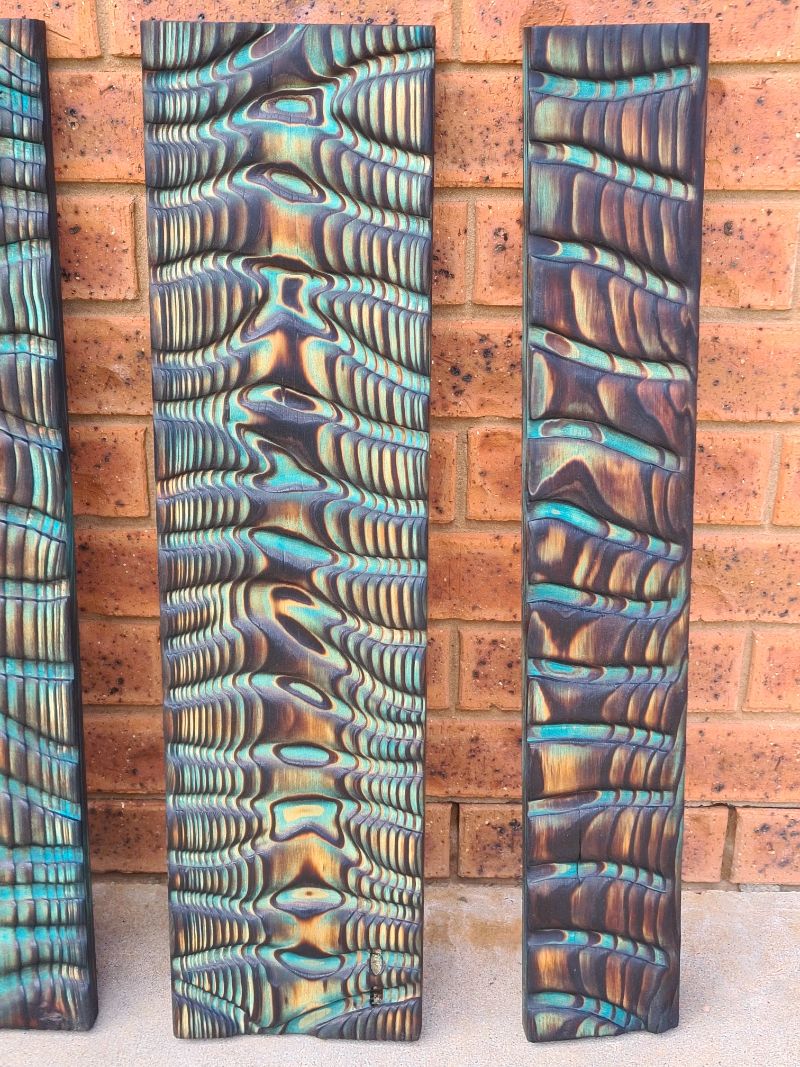

This panel is my favourite—I love the rich grain texture and how many different colours it reveals, even though I used only one.
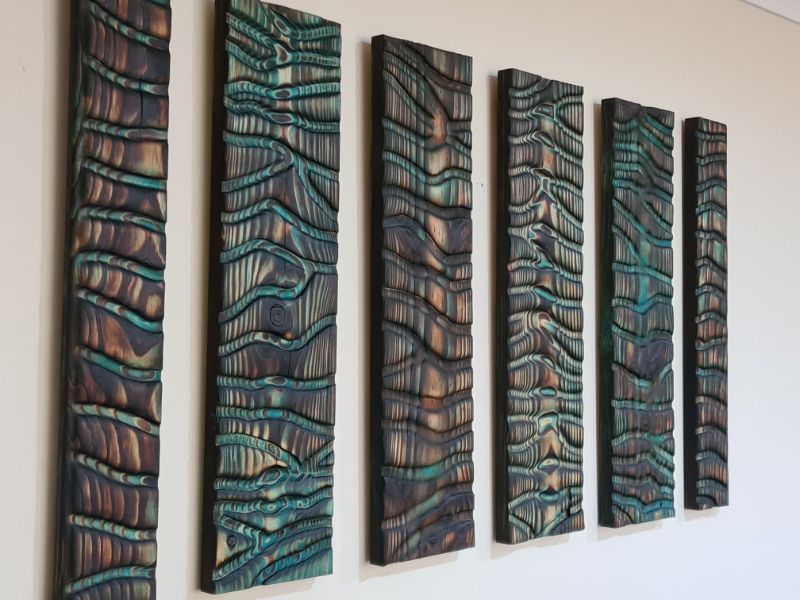
Mounting and display
Let the oil cure per the tin. Add D-rings and hanging wire, or mount French cleats for a clean, floating look. Hang the panels in a row with even spacing. Expect the colours to shift under different room lights—warm bulbs and daylight show different moods, which adds to the piece. I have very poor lighting in my home.
If I switch the light on in my lounge the colours change yet again.
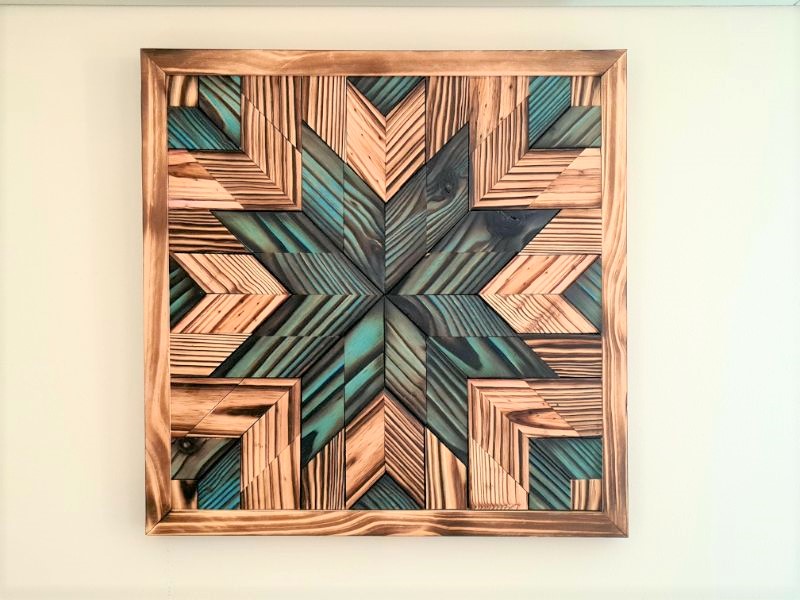
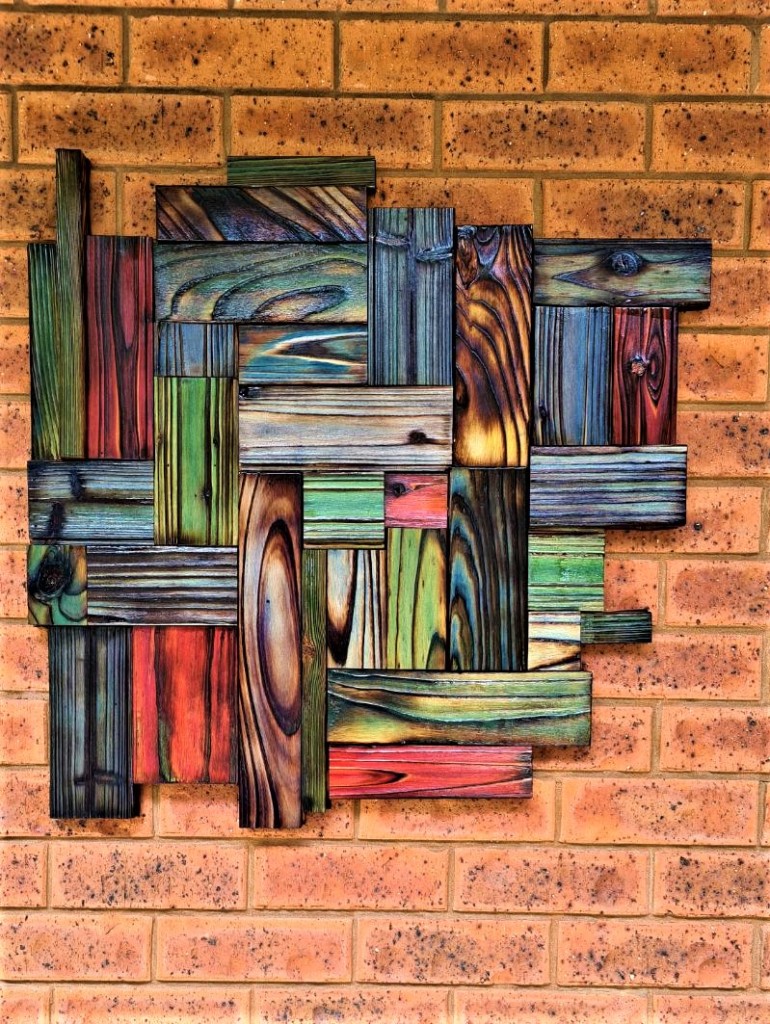
More projects using the Shou Sugi Ban technique
I created this wall hanging by combining wood burning with making a wooden barn quilt.
This was my first Shou Sugi Ban project, made from pallet-wood scraps and offcuts I had lying around the workshop. You can find more shou sugi ban inspirational projects here.

If you’re interested in any of the items used in this project, we’d appreciate it if you used our affiliate links. Clicking these links earns us a small commission at no extra cost to you, helping us create more inspiring and exciting projects to share. We’d also love to hear your thoughts—feel free to leave a comment or share this post!

31 Comments
Michelle Weikart
April 10, 2022 at 3:00 pmI am loving! Between the colors and design it is amazing
Anita Holland
April 11, 2022 at 11:02 amThank you so much Michelle, I had no idea it would create this effect.
Pat
April 10, 2022 at 7:15 pmWOW!!! very beautiful! But a lot of work. Maybe I will try a small one.
Anita Holland
April 11, 2022 at 11:03 amThank so much Pat, it is a lot of work but I have plenty of time on my hands.
Sara
April 11, 2022 at 12:22 amAwesome project Anita! Can you please clarify a few things? I assume you can’t sand with the grain in the grooves? Did you sand the grooves using the wire brush and then switch to the nylon brush on the drill?
Anita Holland
April 11, 2022 at 11:06 amThanks Sara, you are correct I used the wire brush first to remove the bulk of the wood then used the nylon brush. There were still times around the grooves that I got a bit rough and went over the edges going against the grain. That was how I picked it up that it will show up negatively once painted. The paint stuck in the grooves and made it look so obvious.
Bhushan Deshpande
April 9, 2024 at 10:34 amWhat is the depth of router?
Anita Holland
April 9, 2024 at 11:36 amThe final depth was about 1cm.
Kim
April 11, 2022 at 6:39 pmIt looks fantastic! Good job!
Brooke Fedigan
April 12, 2022 at 5:40 amWhat a beautiful Project! I love everything about this. Thank you for sharing it on your Blog Anita.
Anita Holland
April 12, 2022 at 8:29 amThank you so much Brooke, it was a surprise for me too.
Michelle Leslie
April 13, 2022 at 9:18 pmWOW!!!!!! I’m in love with the final effect. It’s so fascinating how each piece comes out so different and how the grain tells a different story. Wood always amazes me that way. Hard to imagine that you only used one color. Really, really beautiful, Anita
Anita Holland
April 18, 2022 at 1:28 pmThank you, Michelle, I found the results just as surprising. I got so excited doing this project because the more mistakes I made the better it looked.
Kippi at Home
April 16, 2022 at 2:15 amAmazing wall hanging! These are gorgeous. I would love to have them in my home!!!
Happy Spring,
Kippi
Anita Holland
April 18, 2022 at 1:29 pmThanks so much, Kippi, I did keep this one for myself and people always comment on them.
Wendy
April 16, 2022 at 4:08 amAbsolutely gorgeous. I’ve wanted to try this for awhile, and this is the perfect inspiration. Thank you!
Anita Holland
April 18, 2022 at 1:30 pmThanks, Wendy, it is one of my favourite projects because you never know what you are going to get at the end of it.
Kristin salazar
April 28, 2022 at 1:11 pmYour art is simply amazing! So beautiful!
Anita Holland
April 30, 2022 at 8:17 amThank you so much, so kind of you to say.
Janet
April 29, 2022 at 6:29 amSuch a beautiful wall hanging. I’m amazed at the affect you were able to get by combining a couple of relatively (if time consuming) techniques.
Anita Holland
April 30, 2022 at 8:18 amThanks Janet, it was well worth the work.
Cindy
April 29, 2022 at 11:05 amThat is amazing!! Each one is a work of art! 😊
Anita Holland
May 5, 2022 at 11:55 amThank you so much Cindy, so kind of you to say.
Marie
April 29, 2022 at 1:39 pmWow I have never heard of this technique! It looks very cool. Thanks for sharing.
Anita Holland
April 30, 2022 at 8:19 amThanks Marie, the woodburning Shou sugi ban has been around for a very long time. I just found a new effect by adding grooves into the design.
Robin S
July 26, 2022 at 11:54 amYou piece is fantastic, first of all. Great job! I was looking at you work trying to get a feel of it’s size and I’m coming up with 4 feet tall and about and about 5 long? It’s not that tall is it? I tried to take into account the approximate size of the couch and a guess-timate of the space between your valleys. If that’s the size it is it must have taken months. That would be a very impressive piece of art. Well, it is already impressive, but I mean in size. Thank you for sharing your talents. You time is so much appreciated. And thank you in advance for answering my question, as silly as it is. 👏👏👏
Anita Holland
July 26, 2022 at 5:39 pmThank you so much. I am not sure if the feet measurements but each piece is 730cm in height and the total width for them all is 1.3m across the wall. It took me about 24 hours in total to make that was using the course wire brush and drill to sand. I would imagine it would take weeks sanding with a wire brush.
Casey Herman
September 5, 2024 at 9:22 pmYou’re very creative, Anita! Keep on experimenting, who knows what you’ll come up with next?!
Anita Holland
September 5, 2024 at 11:55 pmThanks so much for the lovely comment. 😍
Kathy
March 20, 2025 at 3:55 amI am in awe of these. I know you said you used a gouge ball on the 6 snake boards, however the ball looks bigger? Was it used to round the outside, I’m just not sure where to use it if I try this project. Thank you
Anita Holland
March 21, 2025 at 3:20 pmThank you Kathy, I used the gouge ball first and then used the orbital sander to smooth out the edges which made them wider.